Overview
Lifecycle is useful if you want to manage how the objects live in the bucket. An example is after 30 days you want your object(s) to be archived in the “Nearline” storage class, then after another 30 days moved to “Coldline”, which have less storage cost when compared to “Regional” and “Multi-Regional”.
From our partners:
Prerequisites
- GCP Account that can access the GCP Cloud Console
- IAM Account should be to manage Cloud Storage (e.g. Storage Admin)
Cloud Storage Creation
01. Login to the Google Cloud Console at https://console.cloud.google.com/
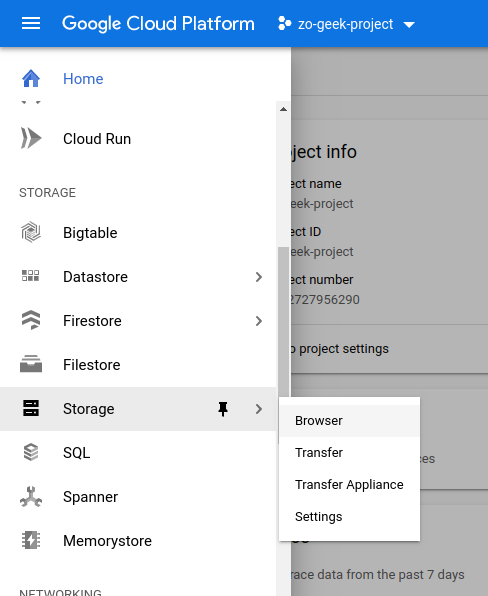
02. On the Navigation Menu, under “Storage” section, select “Storage” > “Browser”.
03. A list of existing Buckets will be shown if there are any. If empty, select the “Create bucket” button.
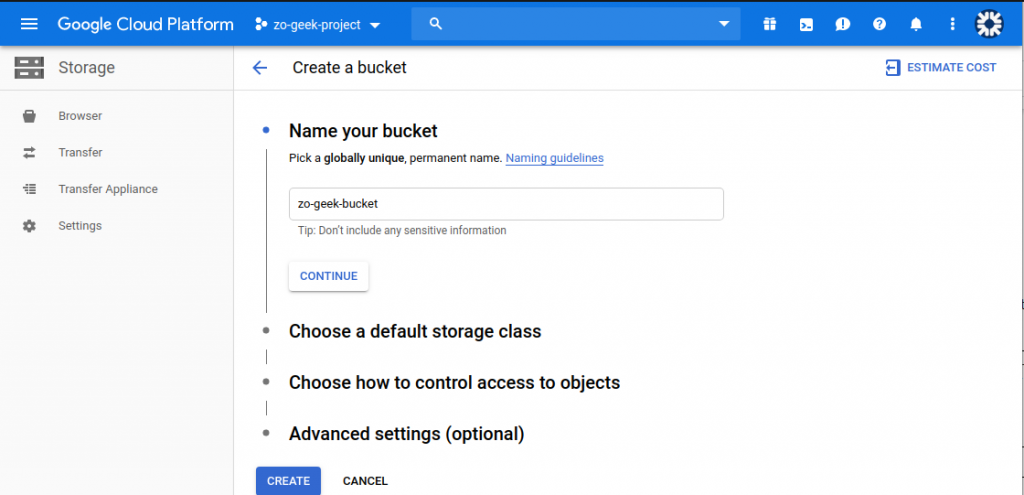
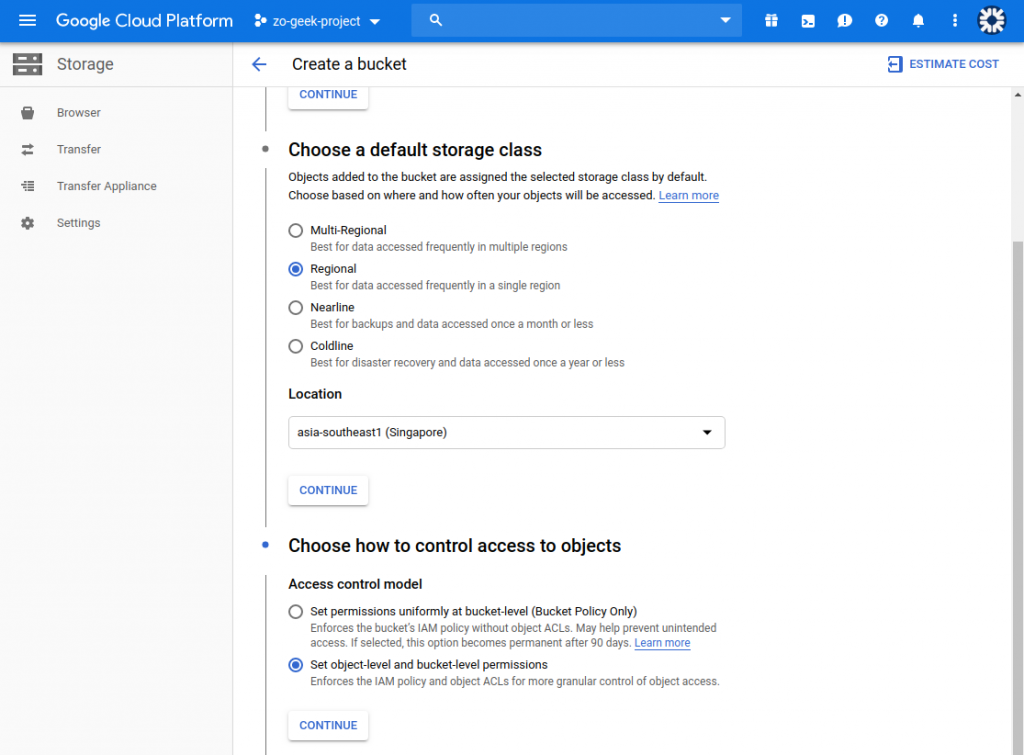
04. A step-by-step form will be shown where you have to enter the following details. The 1st section will ask to enter the Bucket Name.
| Bucket Name | Name of the bucket. Note this is a globally unique name. If another bucket with the name already exist, even if from a different account, it will be unavailable for use.
Example: zo-geek-bucket |
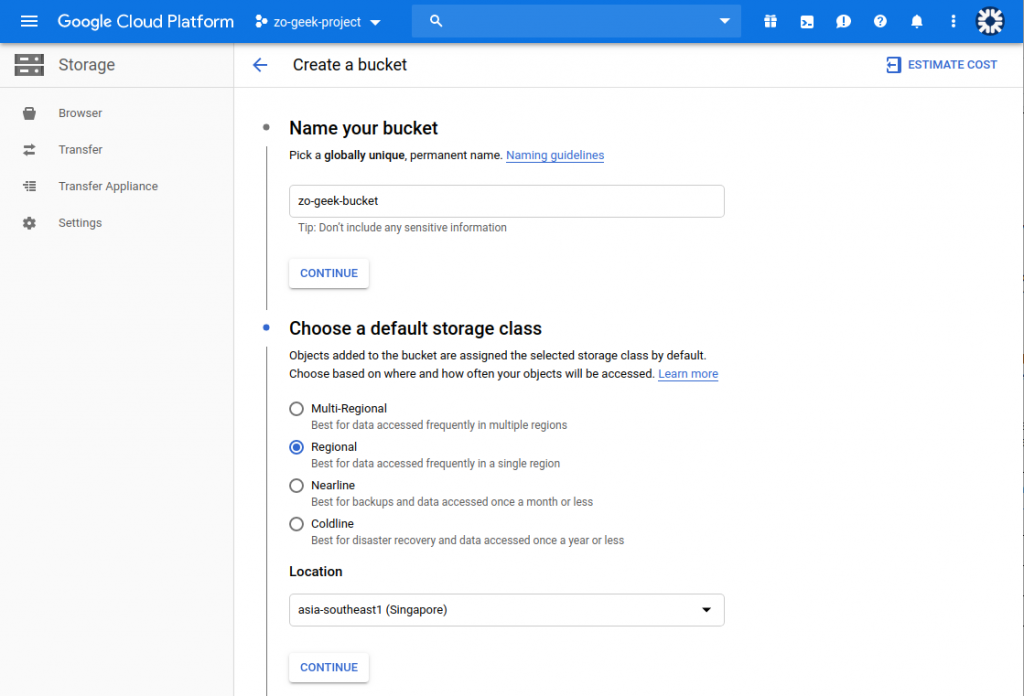
05. Next is to select the Storage Class and Location.
| Storage Class | Options:
— Multi-Regional — Regional — Nearline — Coldline Regional if you want your data to reside within only the selected region in the “Location” selected. Multi-Regional is used when your content needs to be accessed from multiple regions. Is more costly than “Regional” Nearline are best used if the objects needed to be accessed like once a month. The storage cost for Nearline is less than Regional and Multi-Regional, but the retrieval price is more. Use this for data lakes and backups. Coldline has the lowest storage cost but the highest access cost. Best used for storing archive like document retention and compliance. Example: Regional |
| Location | Depending on the “Storage Class” selected. The choices here are different. Select the location where the data will be accessed.
Example: asia-southeast1 (Singapore) |
06. Next is to configure Access control model
07. The last section is Advanced Settings.
| Encryption | Options
— Google-managed key — Customer-managed key Data-at-rest at the Bucket are encrypted. If you want to select your own key, you can select “Customer-managed key” and choose from your own keys that have been added at the Cloud Key Management service. Choosing “Google-managed key” will let GCP create and manage the key. |
| Retention Policy | Selecting the retention policy will set a duration on how long before the objects can be deleted. This provides protection from accidental deletion or modification after uploaded. |
| Labels | Key-value pairs used for grouping related info. Can be used for filtering resources. |
08. Review the details then select the “Create” button.
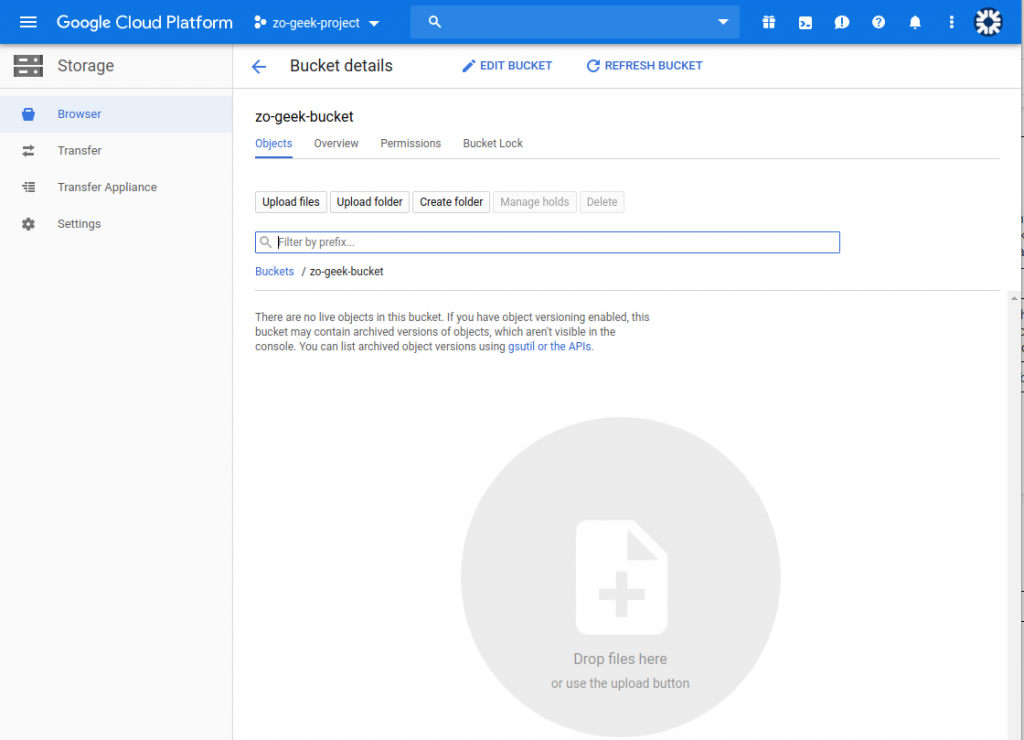
09. Once created, the view will look something like the following. You can then upload files and folders directly from the web console or use the SDK to perform programmatic interaction with the bucket. To get started with GCP SDK on Ubuntu view this guide.
Managing Lifecycle
Object lifecycle can be managed. This is useful if you want to keep archive or backups and want to do it automatically.
01. On the Buckets list. Select the Bucket that will be updated it’s Lifecycle.
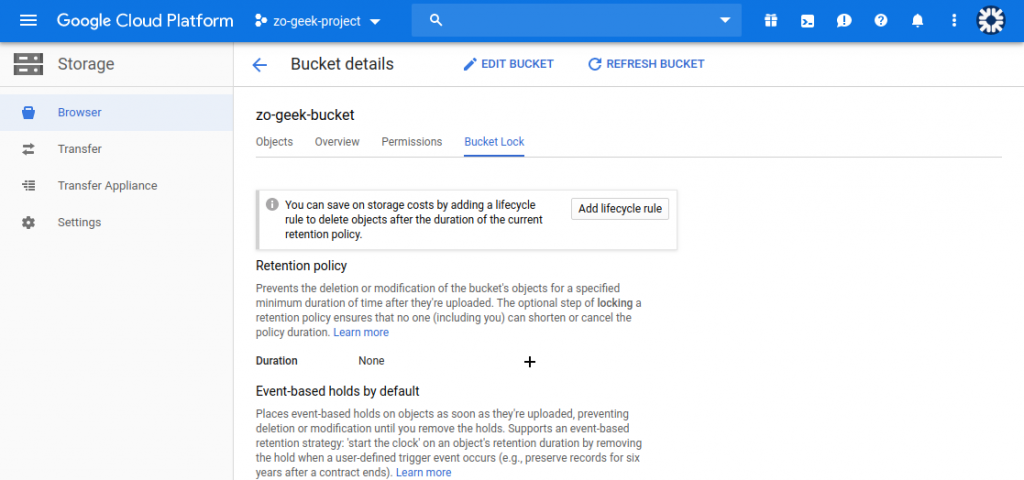
02. On the bucket details, select the “Bucket Lock” tab. Then select “Add lifecycle rule” button.
03. You will need to specify the condition for the object and what actions will be done if the conditions are met.
| CONDITIONS | |
| Age | Specifies the number of days the object has lived in the bucket. |
| Creation date | All objects created on or before the specified date. |
| Storage class | Depends on the storage class of the object. |
| Newer versions | The number of versions the object has. Example, if “2” is specified, this means that if the object has been updated 2 times then it meets the condition. |
| Live state | Options:
— Live — Archived Note that the term “Live” means that this is the active or latest version of the object. |
| ACTION | Options:
— Set to Nearline — Set to Coldline — Delete Changes the object storage class to “Nearline” or “Coldline” or even deletes the object. Sample use case is after “30” days change the storage class of the Object to Nearline. Then another is that when “Nearline” objects reached “60” days set the storage class to “Coldline”. |
04. Confirm each section (Conditions and Actions), by selecting the “Continue” button. Then select the “Save” button on the bottom.
05. The Lifecycle rule for the bucket will now be updated.
Below is an example of rules assigned to the Bucket that sets the storage class from Regional to Nearline after 30 days, then after another 30 days to Coldline.
For enquiries, product placements, sponsorships, and collaborations, connect with us at [email protected]. We'd love to hear from you!
Our humans need coffee too! Your support is highly appreciated, thank you!
