This guide will walk you through one of the storage solutions available in Google Cloud Platform, the Cloud Storage. It is a good option when you need to store large volumes of data and you don’t need to have fine-grained access to the files while it is stored. You will be able to create a bucket, a sort of like namespace or directory where objects will be saved. And also to upload files to the bucket.
1. Login in to the Google Cloud Platform console. If you don’t have any account yet, follow the steps here on How To Create a Google Cloud Platform account.
From our partners:
Creating the Bucket
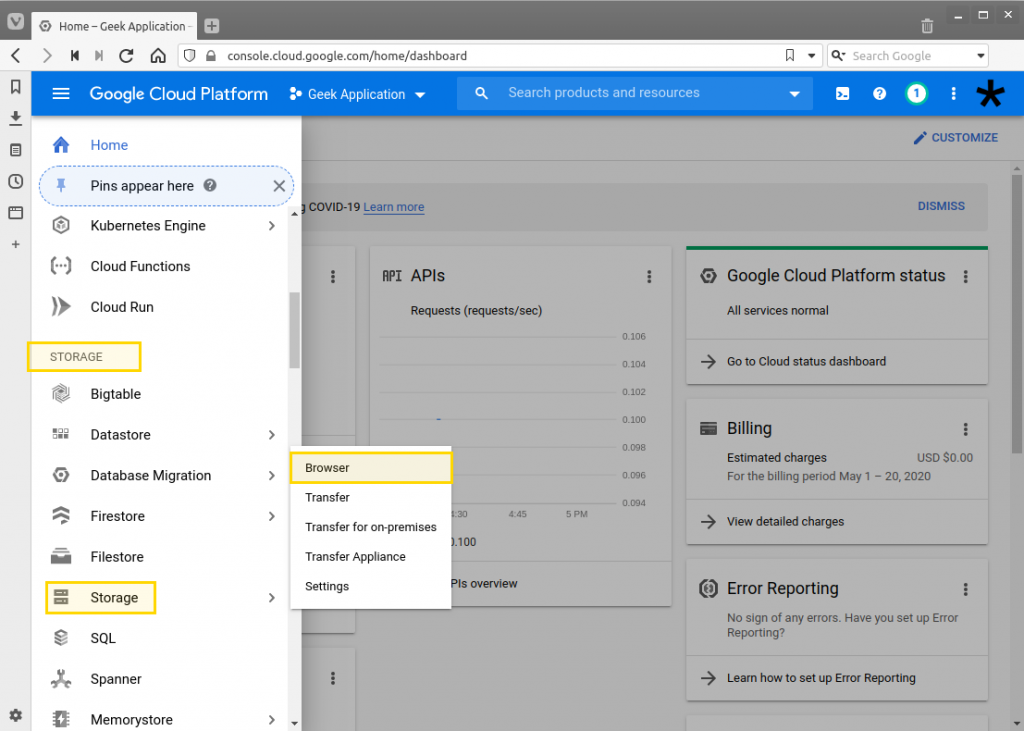
2. Once authenticated, you will be shown the Dashboard. Click on the hamburger icon on the top-left to open the navigation menu. Select Storage under the Storage section.
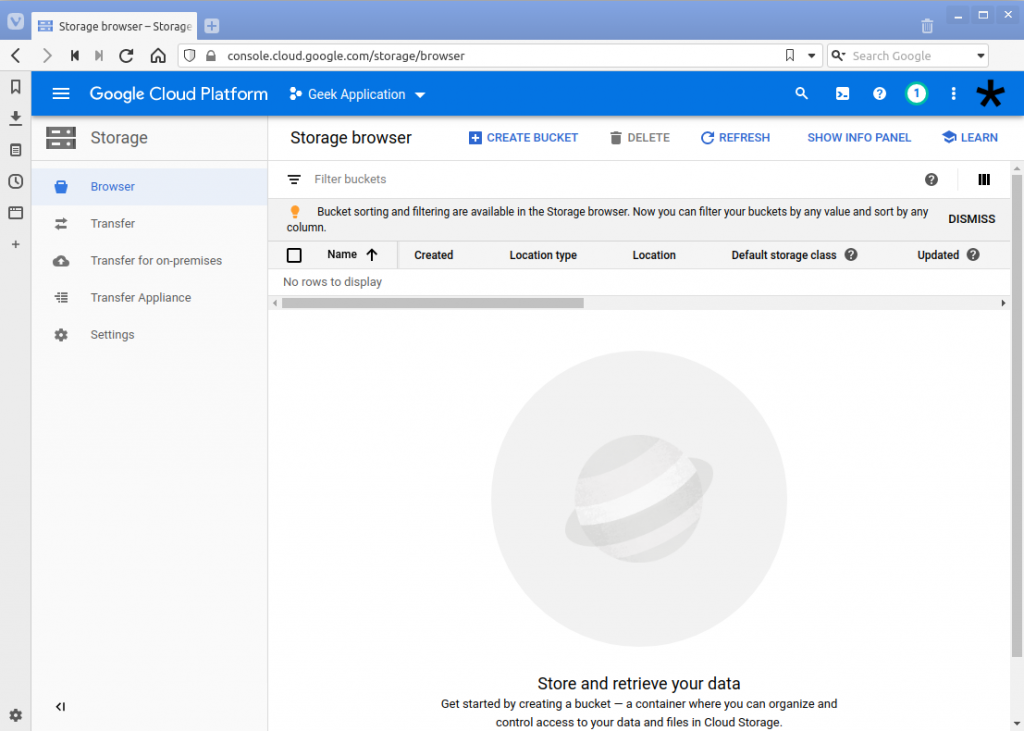
3. You will be taken to the Storage browser where it will list all the buckets you currently manage.
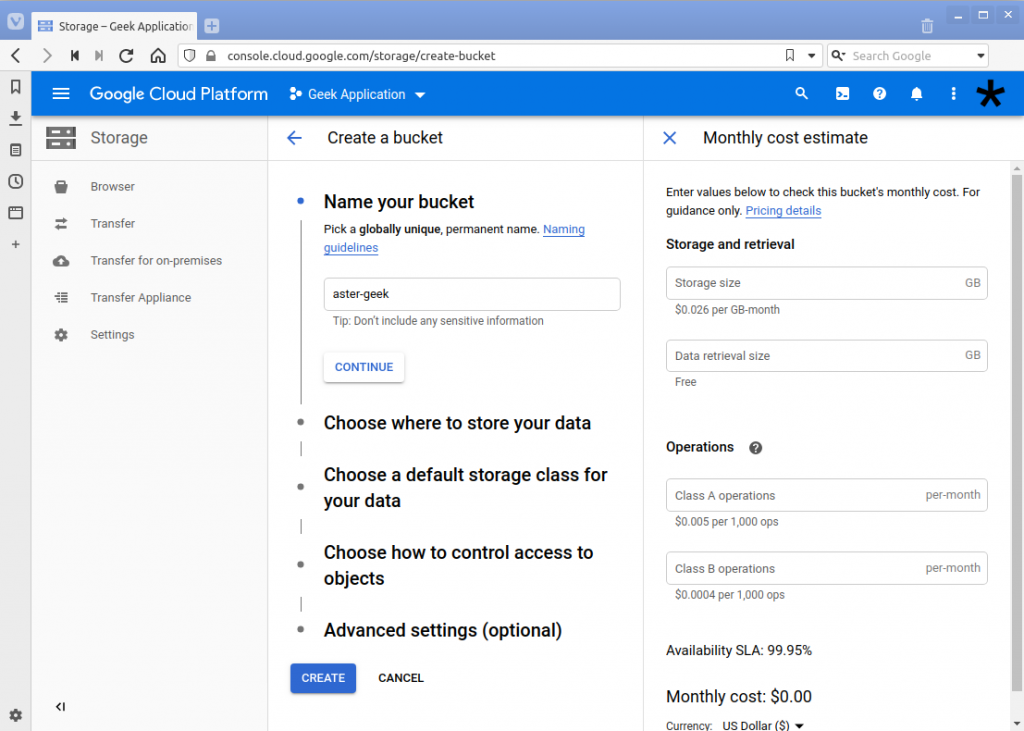
4. Click on the “Create Bucket”. The “Create a bucket” form will be shown. The first one is the name of your bucket. The bucket will contain the files you will upload later.
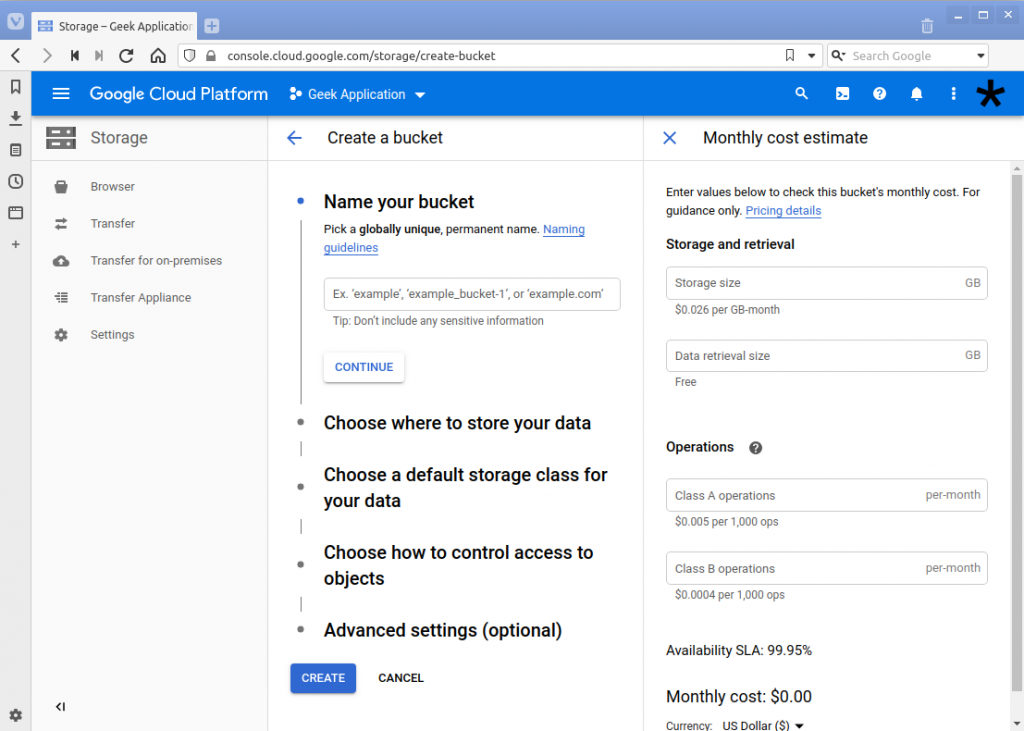
A bucket is synonymous to the following words: can and canister. Its objective is to contain things. In this case it will be objects or files.
The name of the bucket must be unique globally. This means that bucket name is not existing yet in your list of buckets and any other buckets created by other users of Google Cloud Platform. In the image below we try the “example” bucket name, but is already existing, and therefore not allowed.
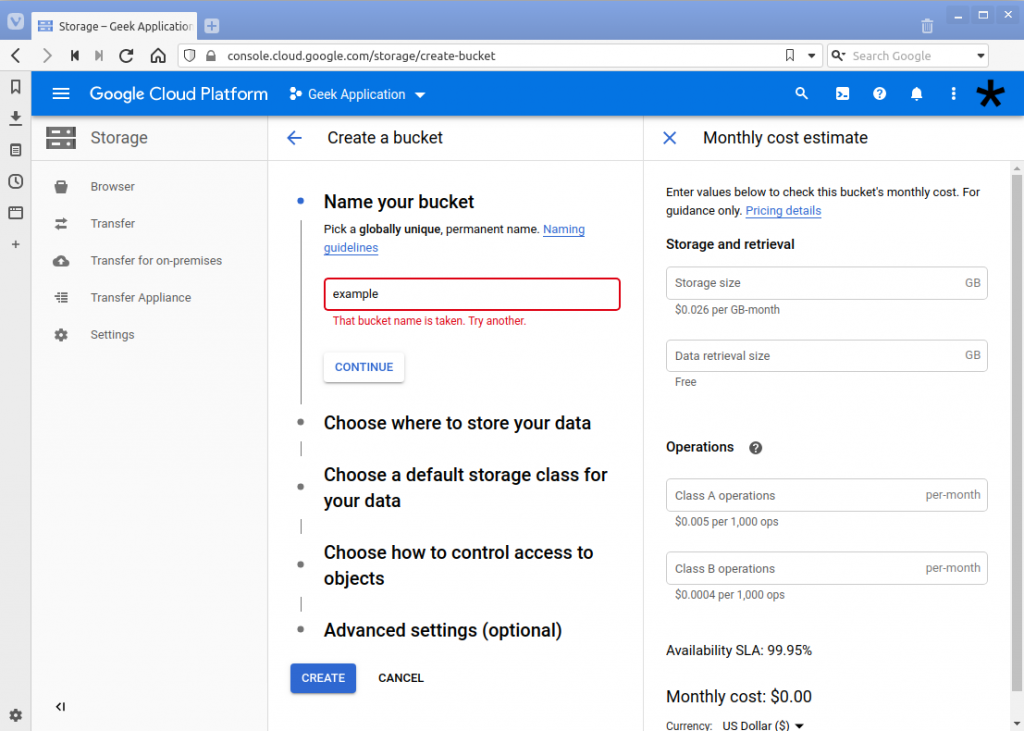
If the bucket name does not exist yet, click on the “Continue” button. In this guide we are using “aster-geek” as the name, which you should not anymore use since this guide will have created it.
5. In the next section, you need to select the Location where the bucket will be created. The location has an effect with cost, performance and availability. Depending on the location it will have the following effects
- The cost will be different. Different regions have different storage cost
- Performance will be greater if the bucket location and the user or service that will access it is near the selected location.
- Availability depends on the state of the country. If due to some disasters (man-made and/or environmental) the data centers and the services might be unavailable.
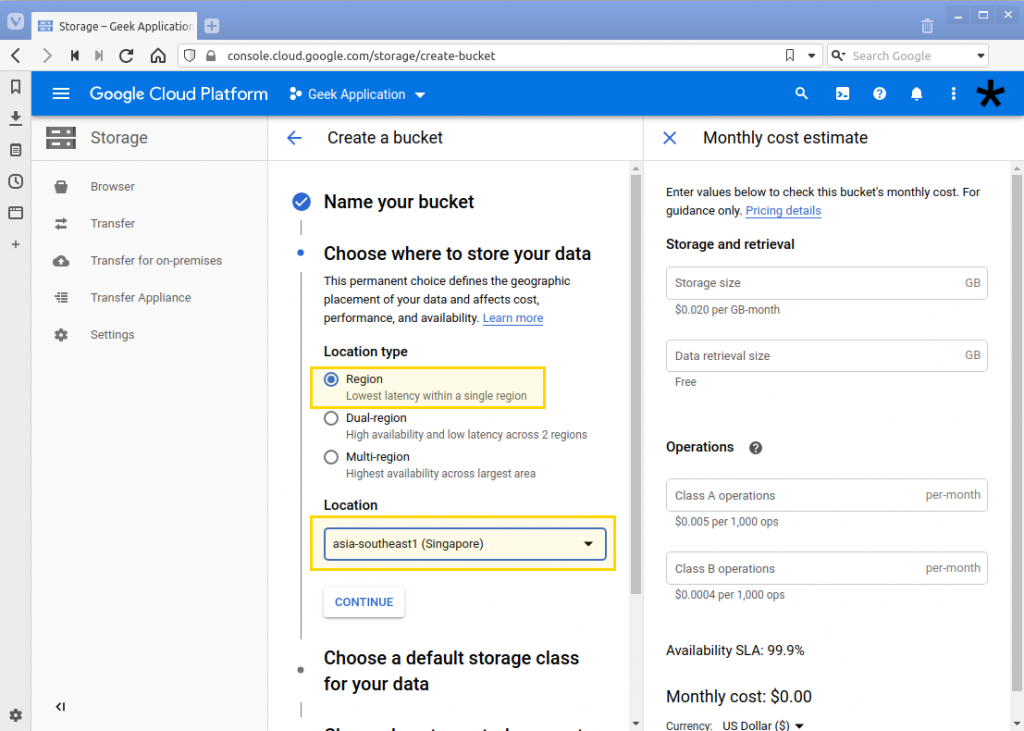
The location type can be selected from one of the following
- Region. The bucket and objects will be stored in one region. Regional buckets are redundant across zones.
- Dual-Region. The bucket will be stored in 2 regions. An example is North America Iowa and South Carolina.
- Multi-Region. The GCP will create the bucket into multiple regions. This provides more than 99.99 percent availability service level agreement (SLA).
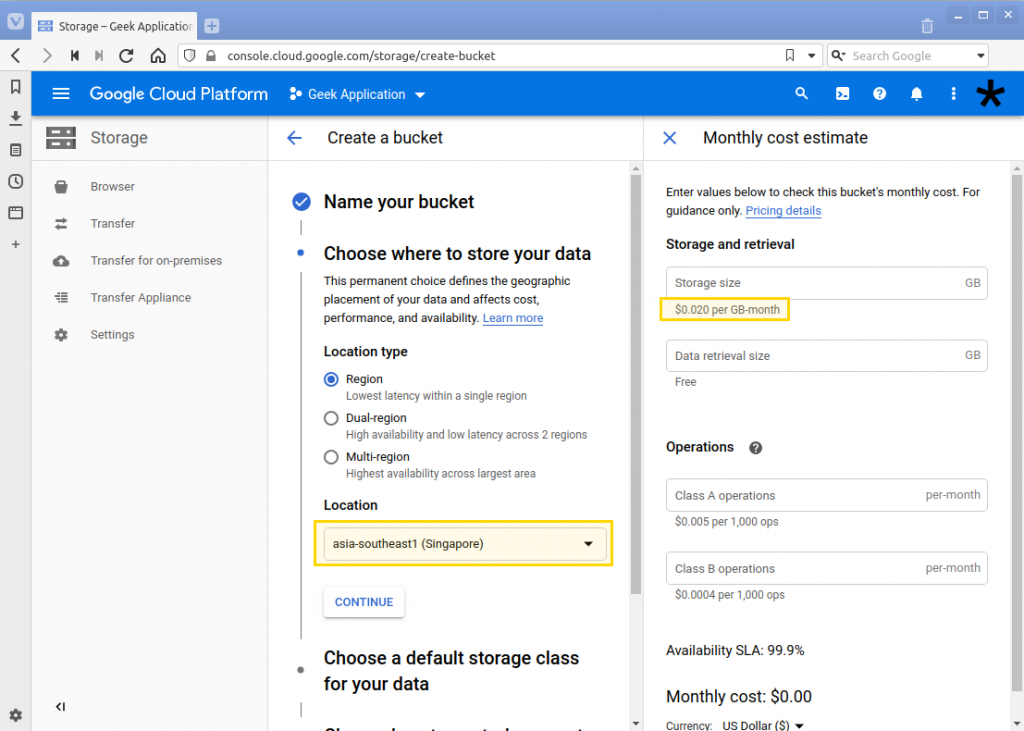
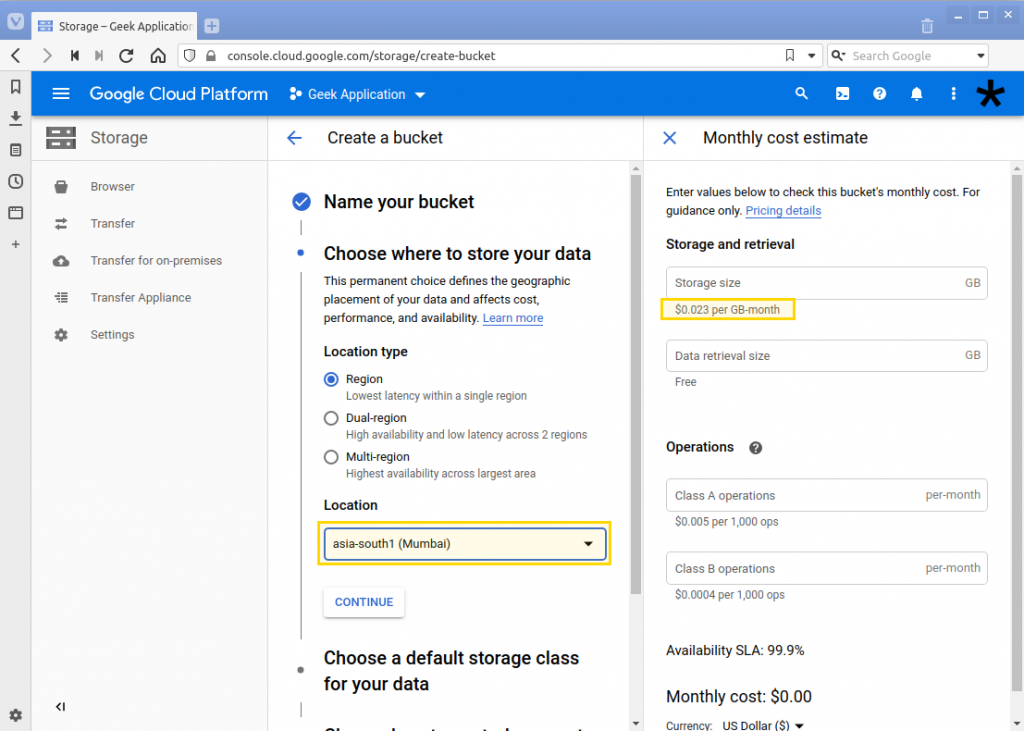
See the example below when we change the region from Singapore (asia-southeast1) and Mumbai(asia-south1). The storage cost is different when compared. To view the complete list of locations see here.
Singapore region selected.
Mumbai region selected.
In this example we are using “Region” for the Location type and “asia-southeast1” or Singapore. Then select the “Continue” button.
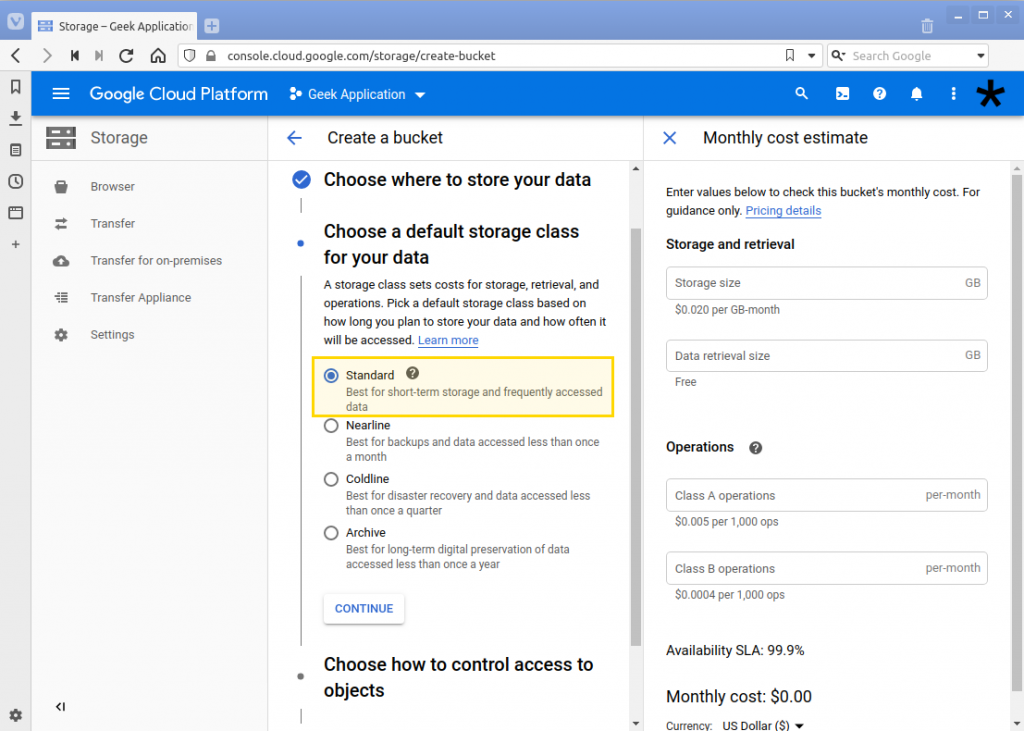
6. Next is the selection of the “Storage Class”. Depending on your use case you may choose from the following values.
- Standard. Choose this if your data is actively used. Sample use case is for objects that are shared across applications. Like a web or mobile application that retrieves images from the cloud.
- Nearline. For infrequently accessed data, like once a month. For older data like data lakes and backups.
- Coldline. Also for infrequently accessed data less than once a quarter.
- Archive. For long-term data that is accessed less than once a year. Used for document retention and compliance.
Some general notes when choosing the Storage Class.
Standard -> Nearline -> Coldline -> Archive
As you go from Standard to Archive, the storage cost decreases and the access cost increases.
In this example we are using “Standard”. Then select the “Continue” button.
7. Next is the access control, which will determine the permission for the objects. It has the following options:
- Fine-grained. Selecting this option will have specific control on individual objects, as object-level permissions. If you select this and you set permissions for the bucket, you can override the object level permissions.
- Uniform. The select access control will be applied to every object in the bucket.
In this example we are using “Fine-grained” as we will be applying different levels of permissions on other objects within the bucket.
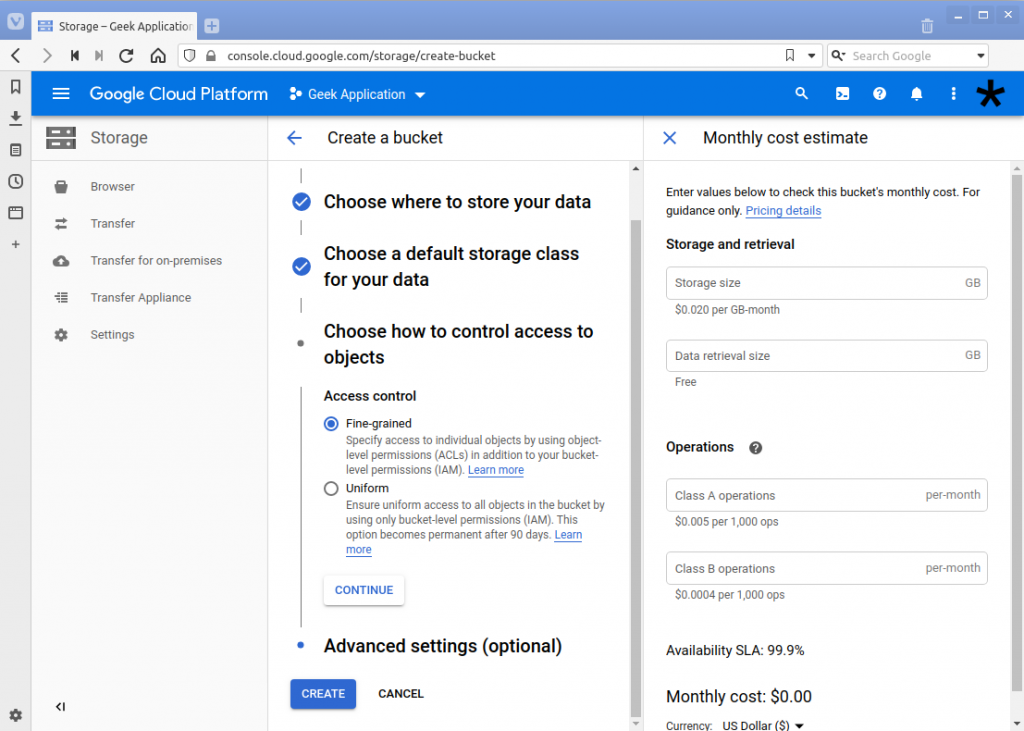
Click on the “Continue” button to proceed.
8. The last section is the Encryption. For simplicity we will be choosing “Google-managed key”. The “Customer-managed key” requires configuration of a separate key. The “Google-managed key” leaves the creation and storing of the keys to GCP.
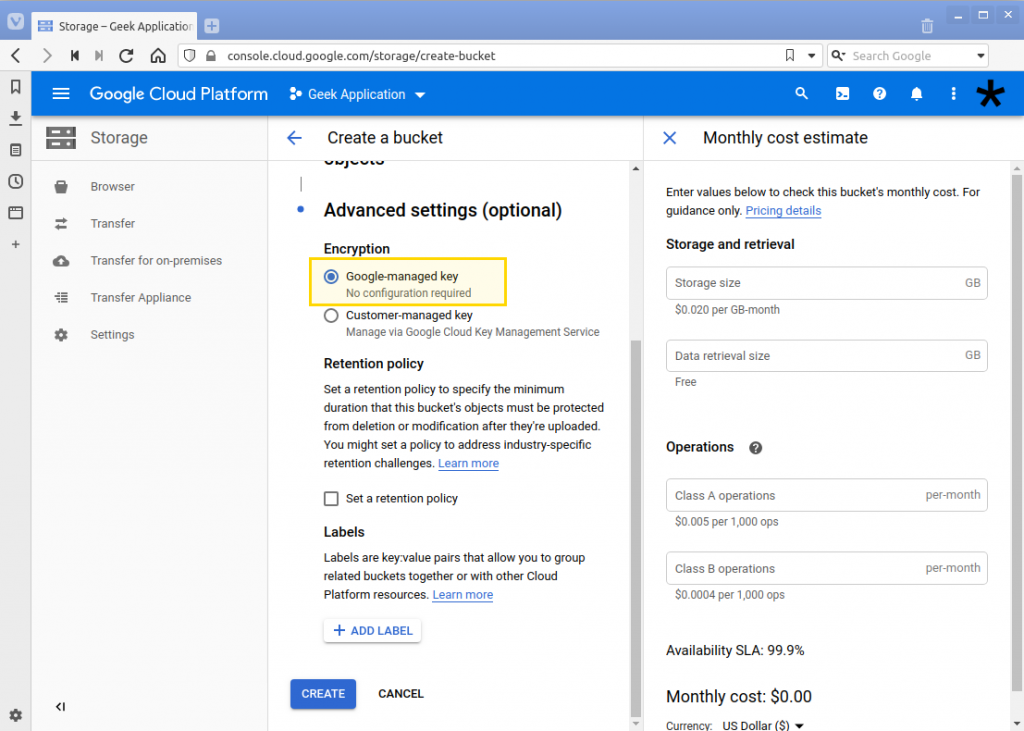
The retention policy can be used if you want to protect and prevent deletion of objects before a certain period of time has elapsed. In this example we are not enabling it.
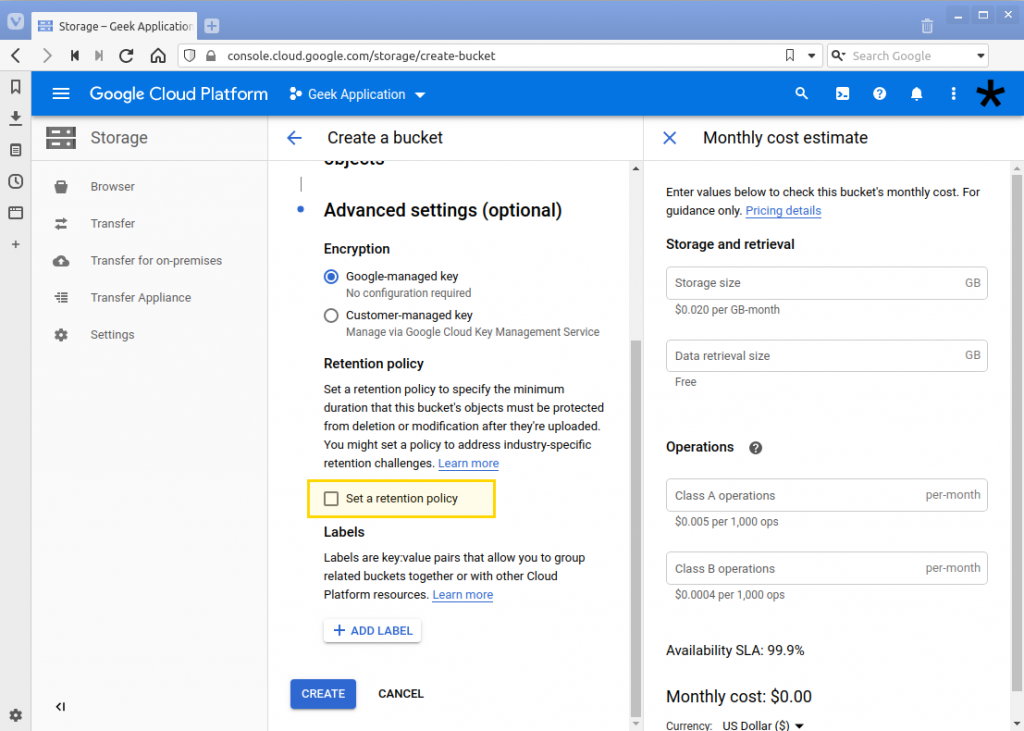
You can configure labels as additional tags or identifiers. In this example we are adding a single label with a key of “environment” and value of “development”. This denotes that we are using it for our development environment.
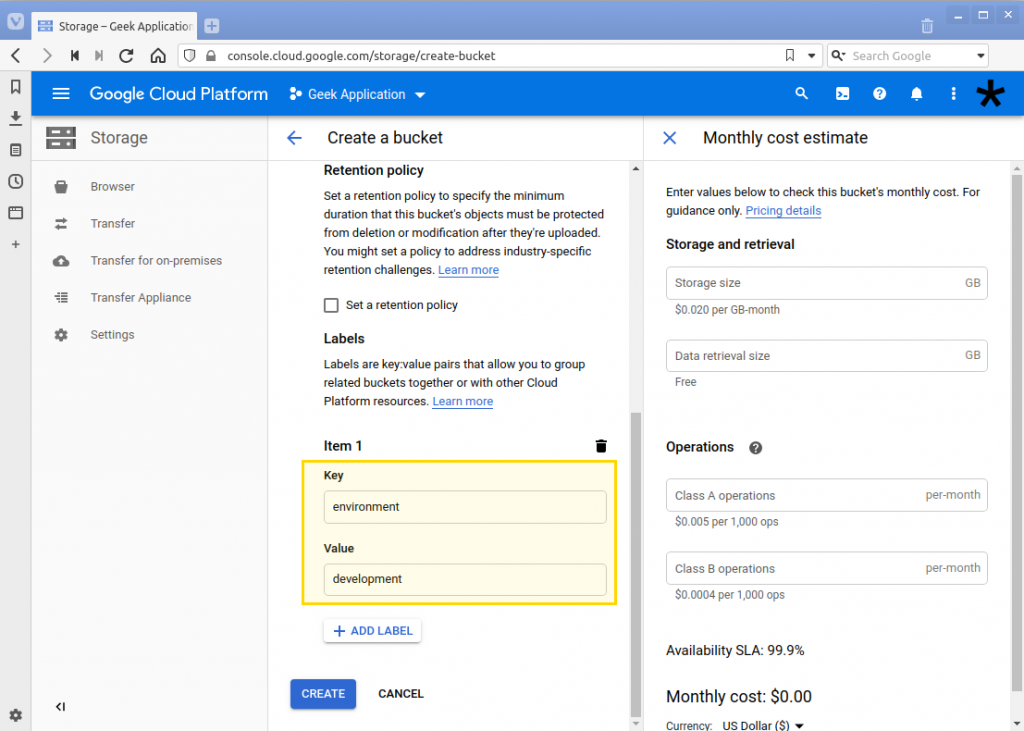
9. Review the previously entered details and click on the “Create” button.
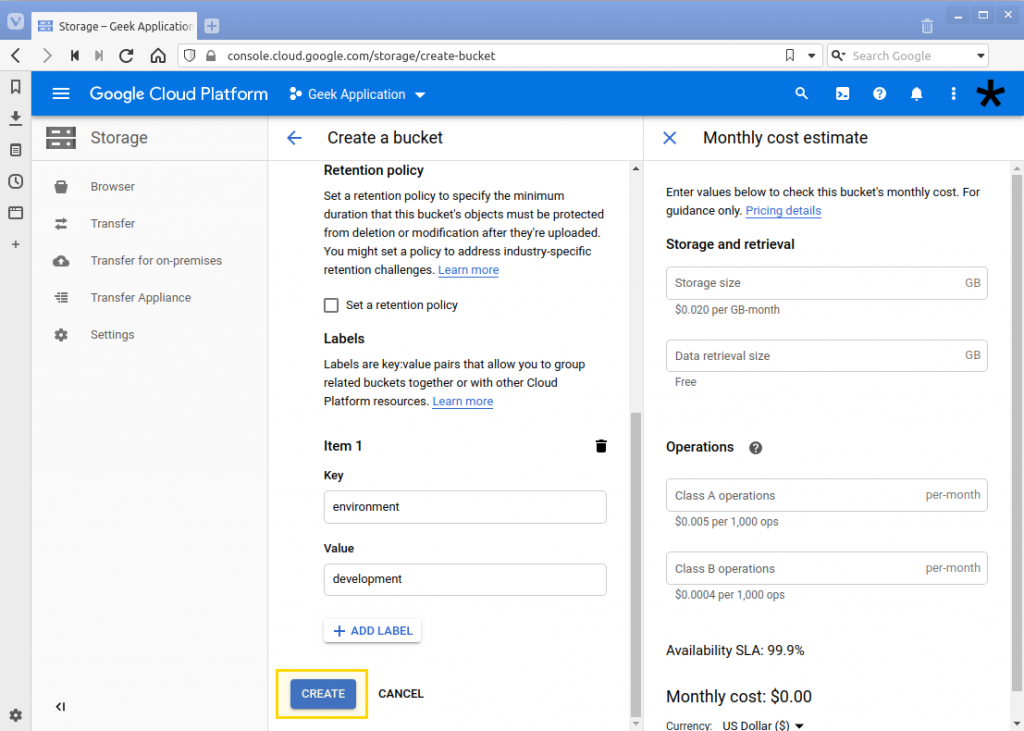
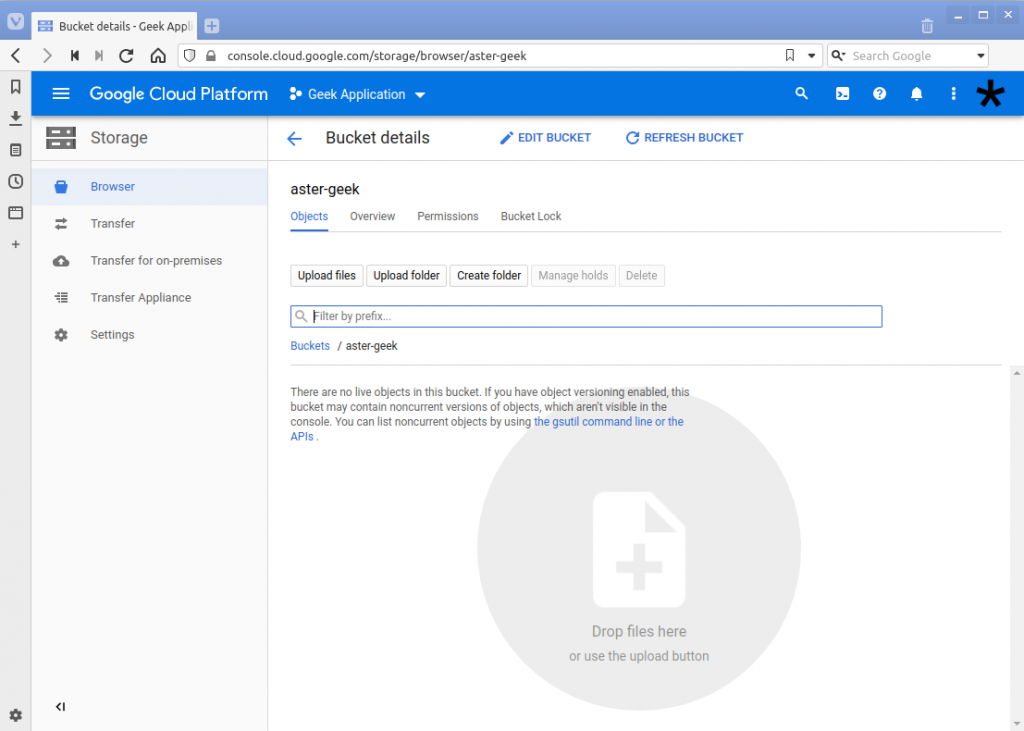
10. Wait for a short while and you will be shown the bucket view for the newly created bucket.
Uploading an object or file
11. Once the bucket has been created, you can upload files in the bucket details page. This can be accessed from the Storage browser page and selecting the bucket.
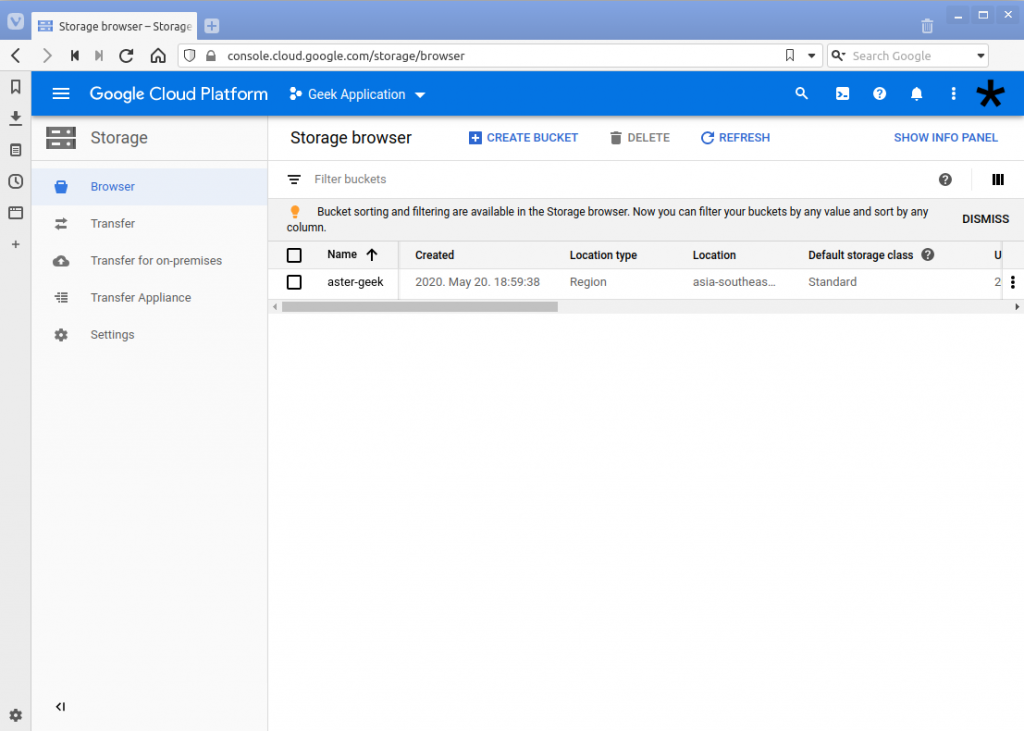
12. Select the bucket and you will see the folder and files (objects) in the bucket.
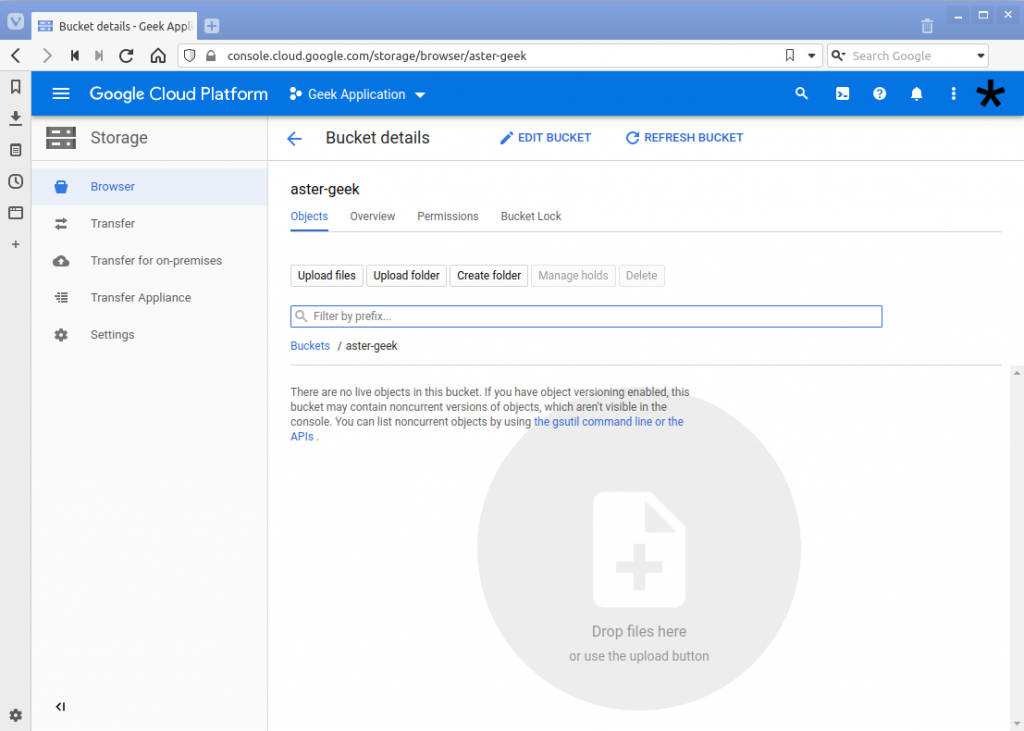
13. There are different ways to add files to the bucket.
- Upload single files from your local machine using the “Upload files” button
- Upload a folder and all the contents using the “Upload folder’
- Drag and drop files
In this example we will be uploading a single file. Select the “Upload files” button. From your local machine select the file you want to add to the bucket.
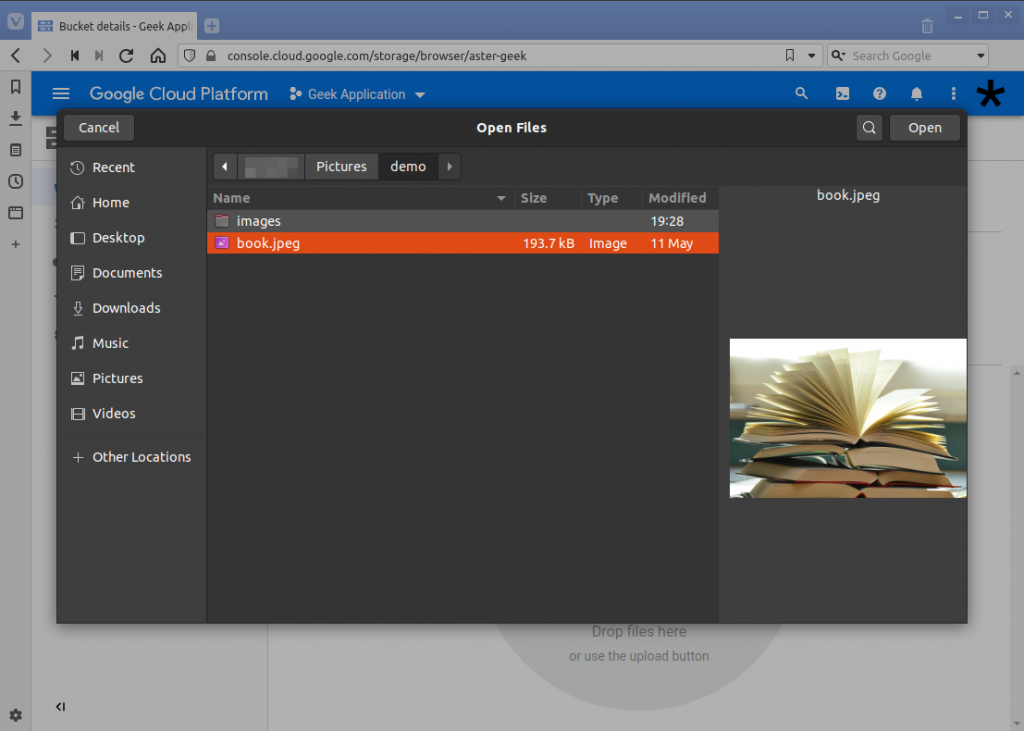
A message will appear on the lower-right corner of the page that shows the progress of the upload. Then the file will appear under the bucket.
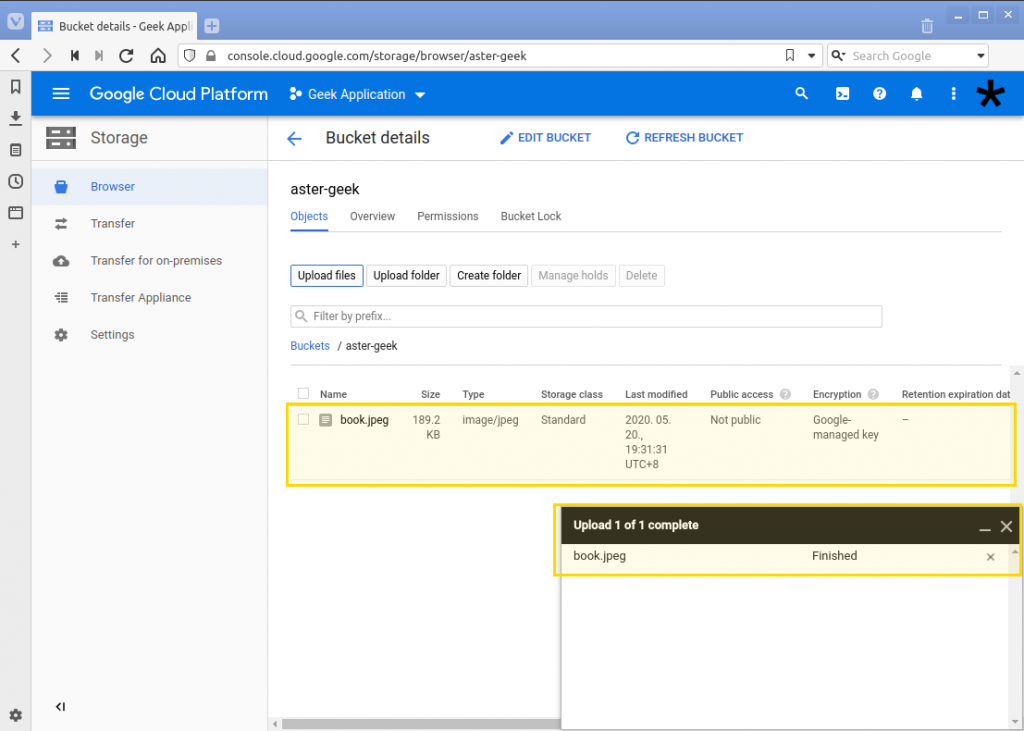
14. Congratulations. You now have created a bucket and added a file in it.
Click here to Cloud Storage – GCP – Storage – Reading the bucket and object to get to the next section, which will guide you through reading the file and retrieve other info.
For enquiries, product placements, sponsorships, and collaborations, connect with us at [email protected]. We'd love to hear from you!
Our humans need coffee too! Your support is highly appreciated, thank you!


