In this guide you will be able to create a Memcached Instance using Memorystore. It also supports Redis, and if you are interested in that, click the following link [link to How To: Provision and manage a Memcached Memory instance in GCP].
1. Login in to the Google Cloud Platform console. If you don’t have any account yet, follow the steps here to create.
From our partners:
Creating the Redis Instance
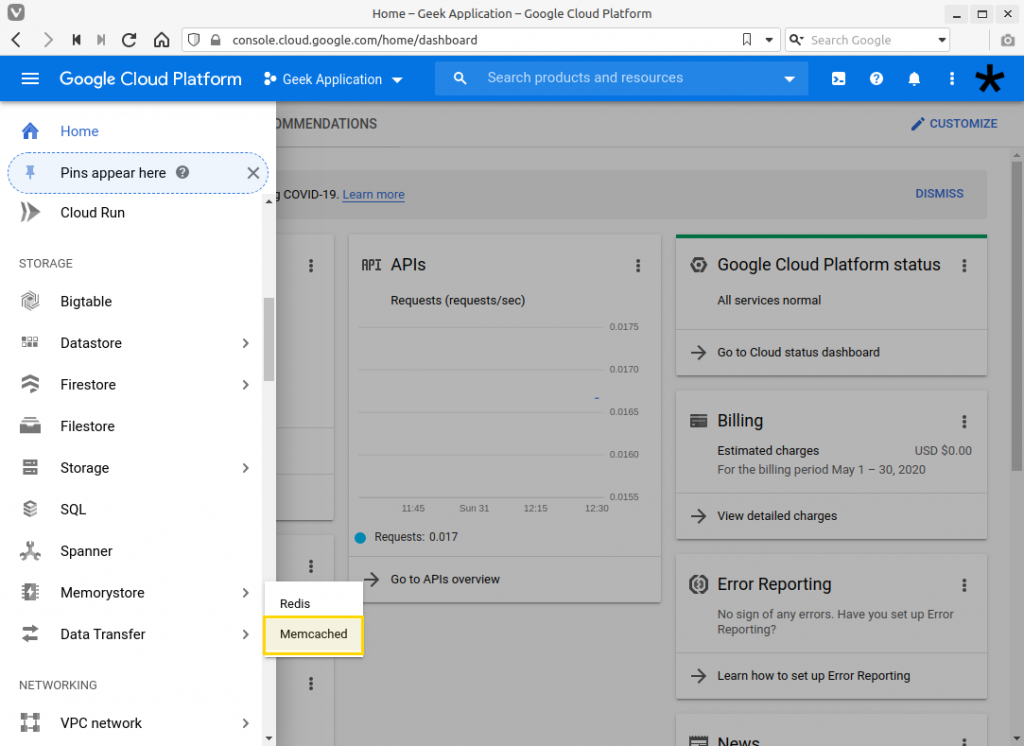
2. Once authenticated, you will be shown the Dashboard. Click on the hamburger icon on the top-left to open the navigation menu. Navigate to Storage > Memorystore > Memcached.
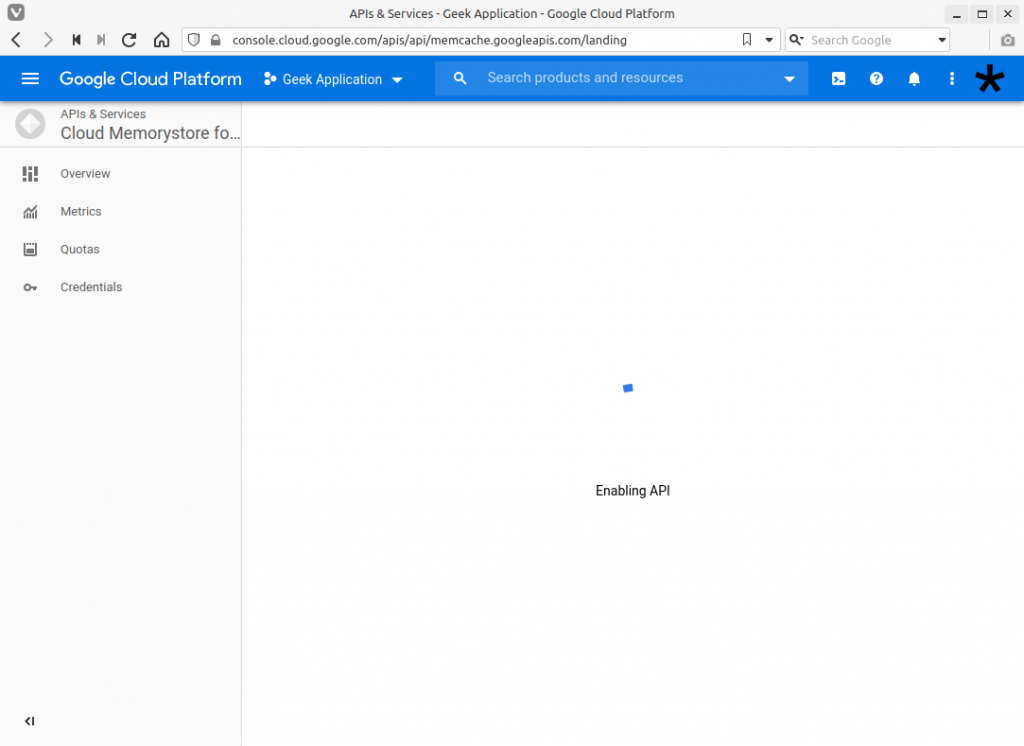
3. If you haven’t created any Memcached instance previously or enabled it’s API, you will be shown a page where you have to enable it.
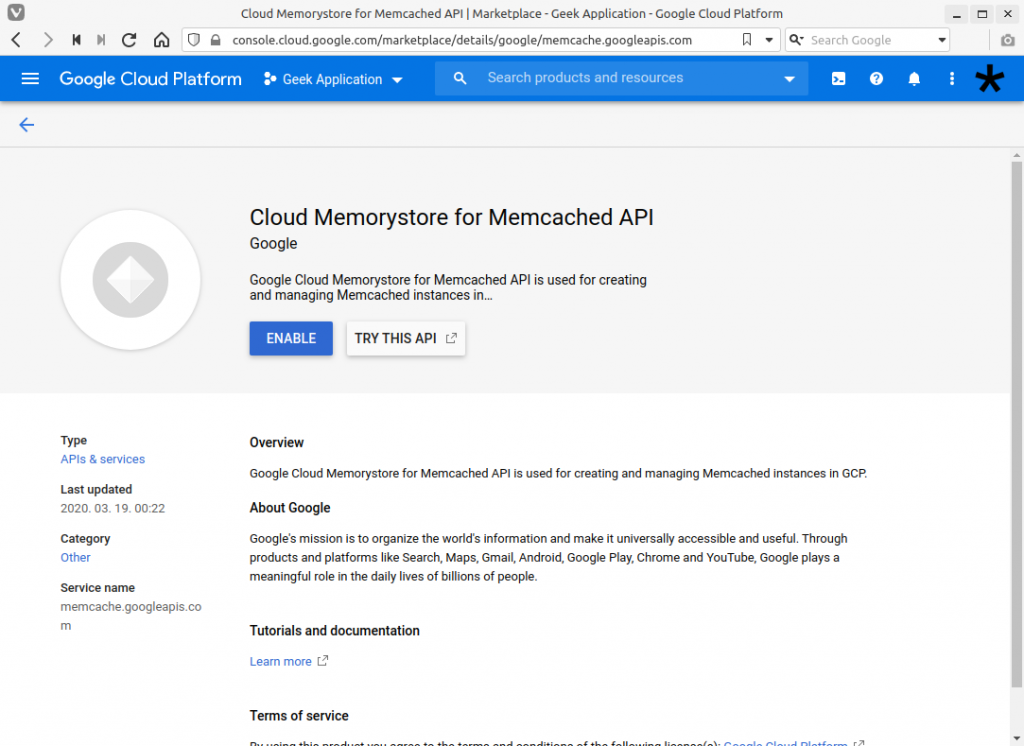
Click on the “Enable” button and wait until it’s complete. This might take some time.
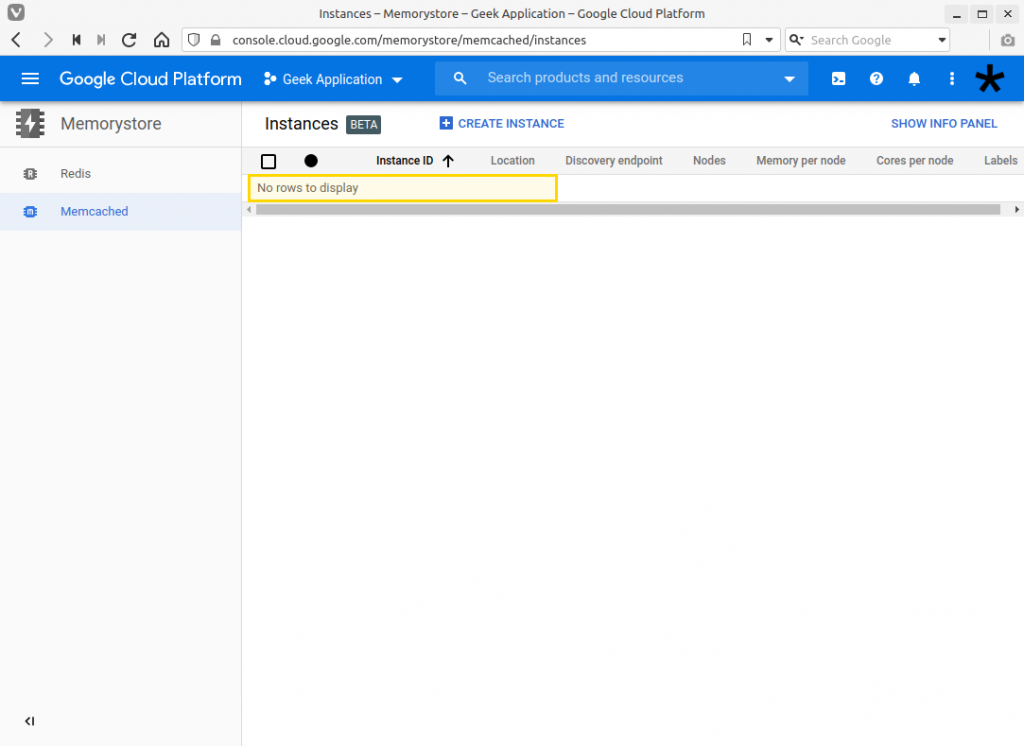
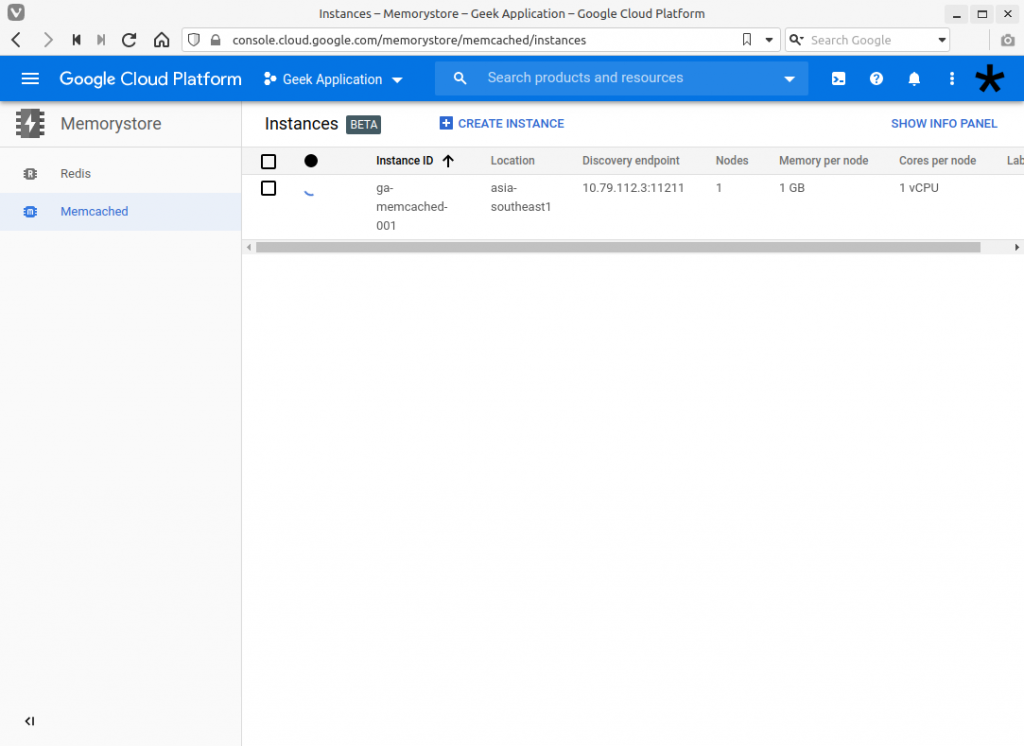
4. On the new page, the Memcached instances will be listed. In the image below, there are no instances created yet.
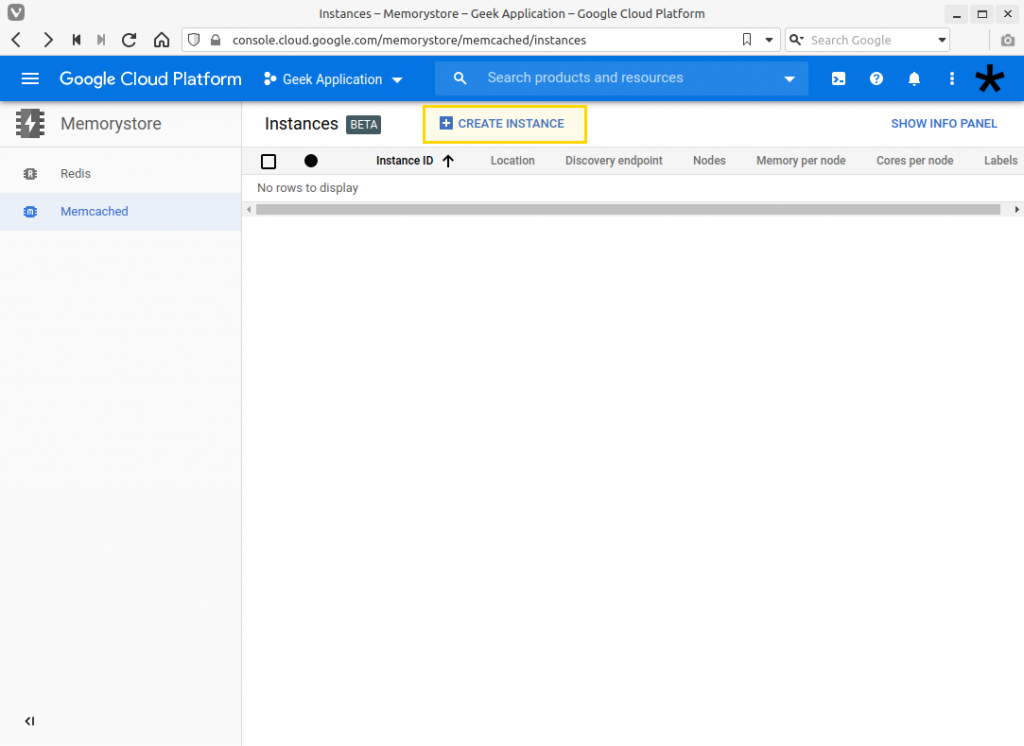
5. Select the “Create Instance” button.
6. A form where you have to input the details on the Redis instance will be shown.
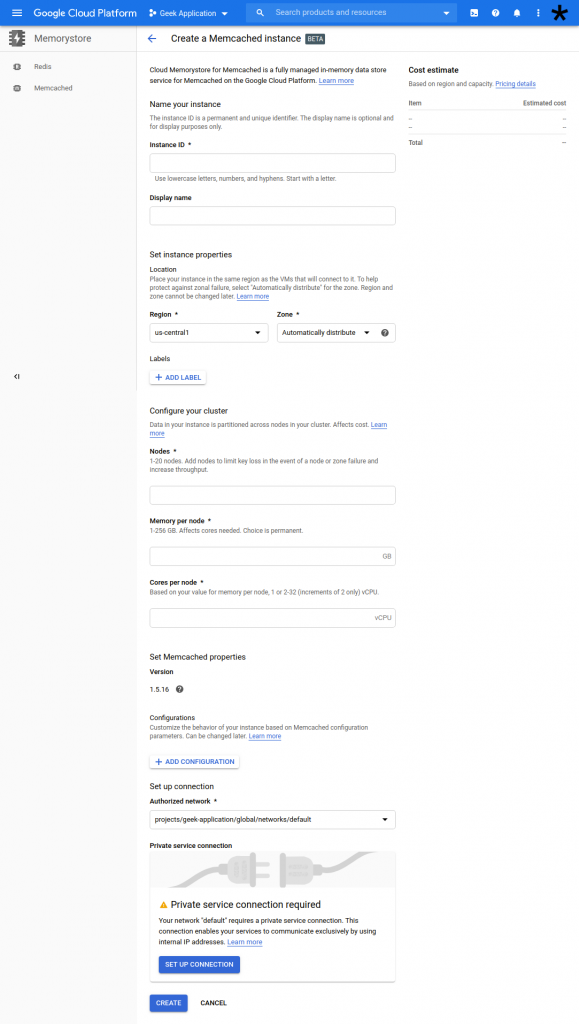
| Instance ID | A unique ID that will be assigned to the instance. It must be unique across your instance. Unique across your GCP project.
This can be used in the GCP cloud console for various operations like removing the instance using this ID. |
| Display name | Name of the instance. This field does not need to be unique. But it is still preferable to assign a unique name in order to avoid confusion if you are handling multiple instances. |
| Tier | The “Basic” option has less cost than the “Standard”. But the “Standard” has a failover replica in case of unforeseen disaster. |
| Region and Zone | These fields determine where the physical location where the instance will be created. For the full list of regions and zones, see here.
With memcached you are able to select the option of “Automatically distribute” the zone. |
| Nodes | Preferred number of nodes |
| Memory per node | Memory in GB assigned to each node |
| Cores per node | Number of virtual CPU assigned to each node. |
| Memcached properties | |
| Version | At the time of this writing, the version cannot be changed and is fixed to 1.5.16. This could change in the future as the Memorystore for Memcached is still in Beta stage. |
| Configurations | Additional settings for the Redis can be added using the “+ Add Configuration” button. The following options can be set:
For a description on each setting, see here. |
| Authorized network | In this drop-down you need to select the network where the Redis can be accessed. The “default” network lets you access the Memcached instance in any VM that resides or is configured in the “default” network. |
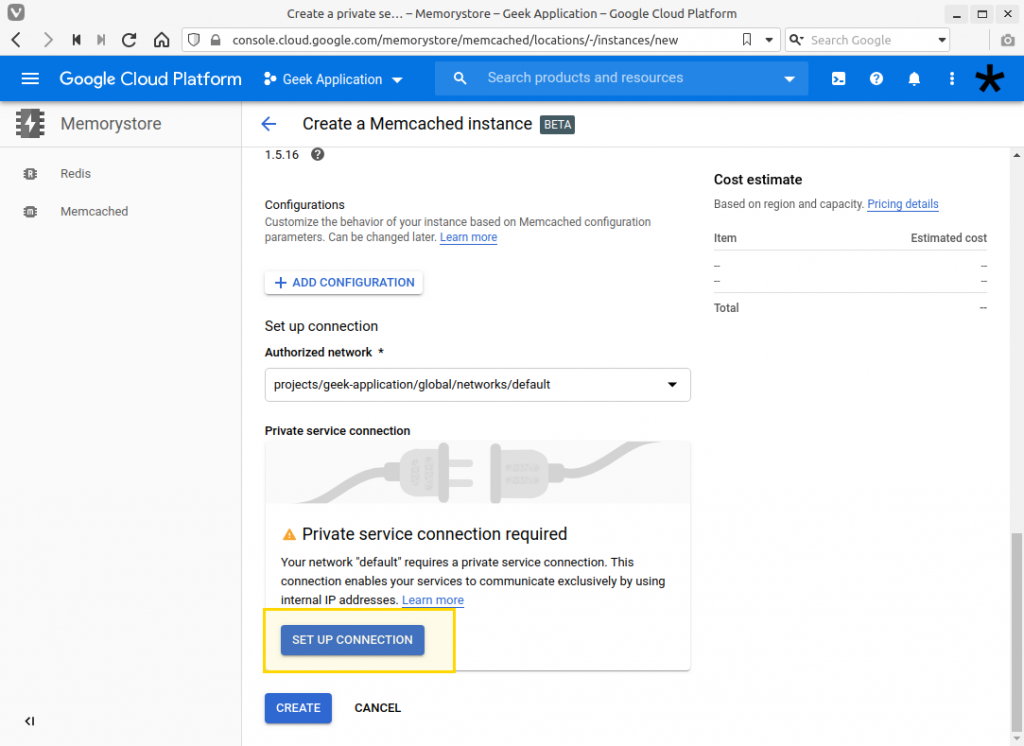
| Private service connection | This is required if you are using the default network. Or if you have created a network that already has a private connection you can use that. |
7. To setup a private service connection from the Memcached creation, select the “Setup Connection” button.
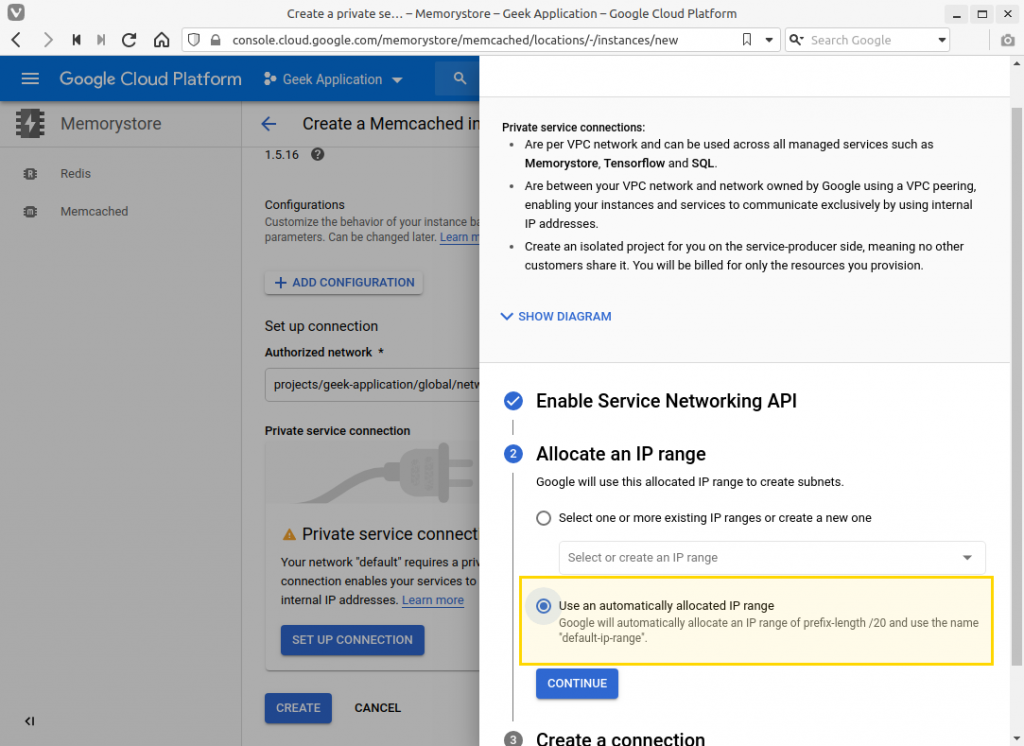
If this is your first time using the Service Networking API, a confirmation to enable the API will be shown. Then click on the “Continue” button.
8. On the next step, you will need to select an IP range or create a new one. For simplicity, we will let Google allocate the IP range. Select the “Use an automatically allocated IP range” then click on “Continue”
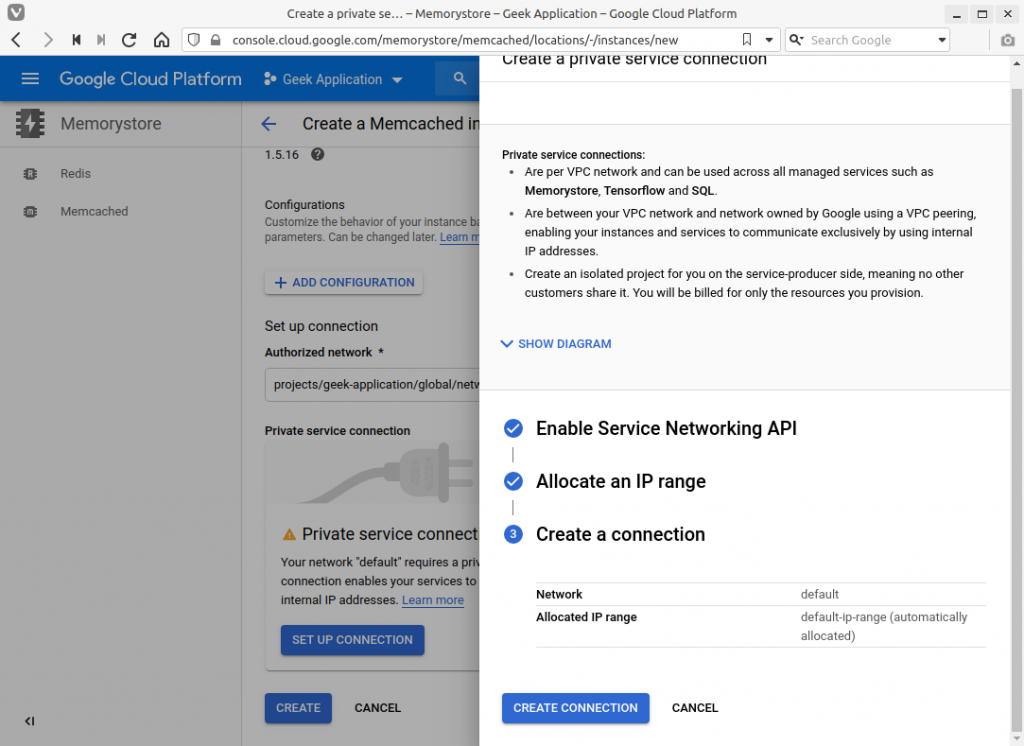
9. Review the changes that will be applied and click on the “Create Connection” button.
10. Wait until the connection has been created. This might take some time if the API will be enabled for the first time. Once done, a check will be shown on the Private service connection.
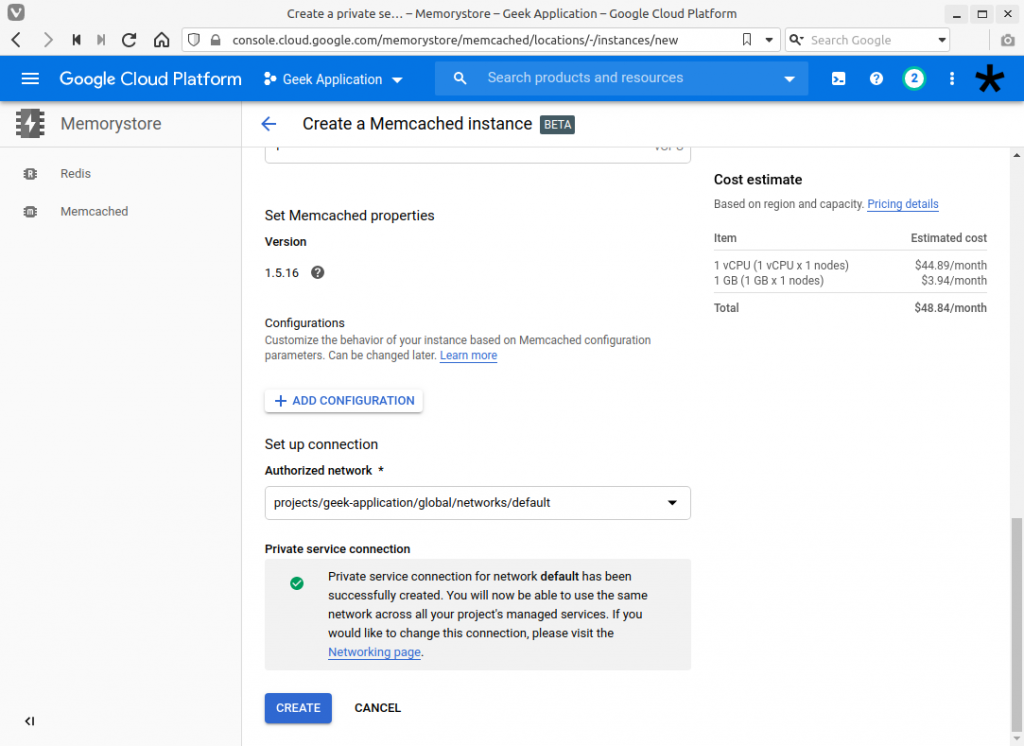
11. View the cost estimate on the right side. It will show the specs and estimated cost.
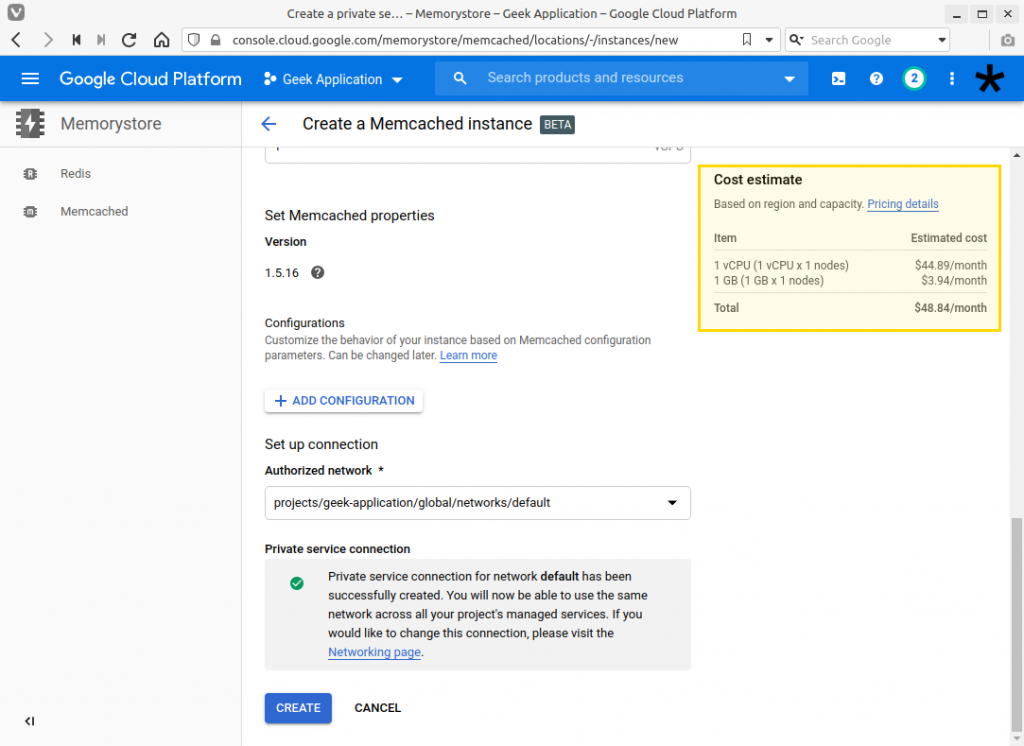
12. Click on the “Create” button if you are satisfied with the specs and cost. Wait until the instance has been created.
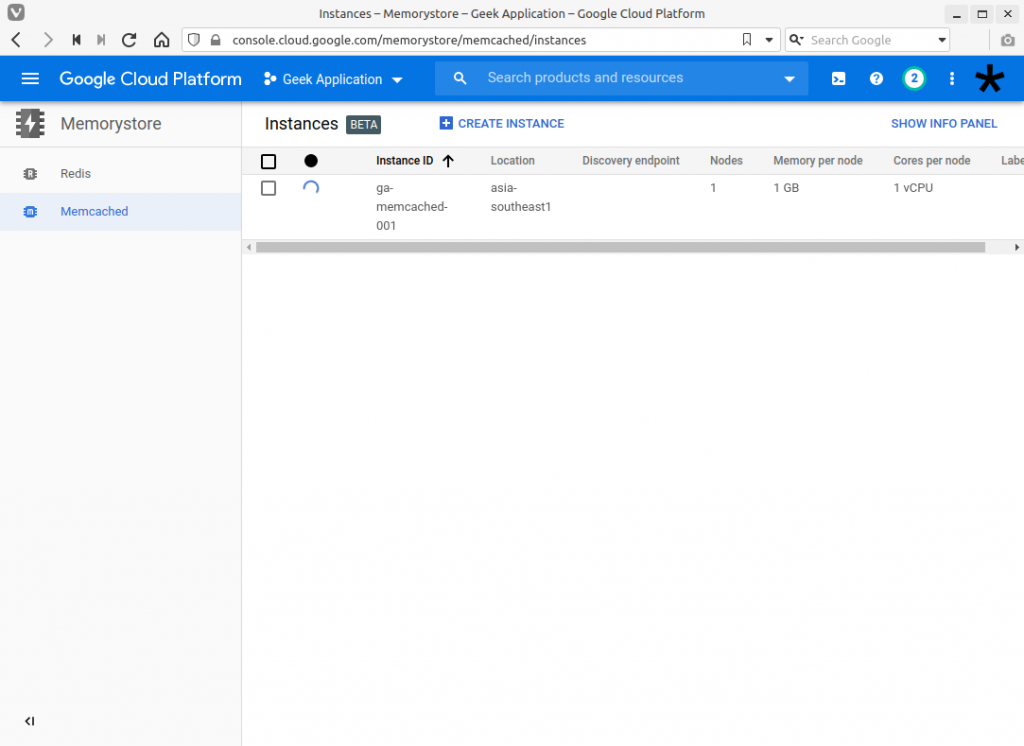
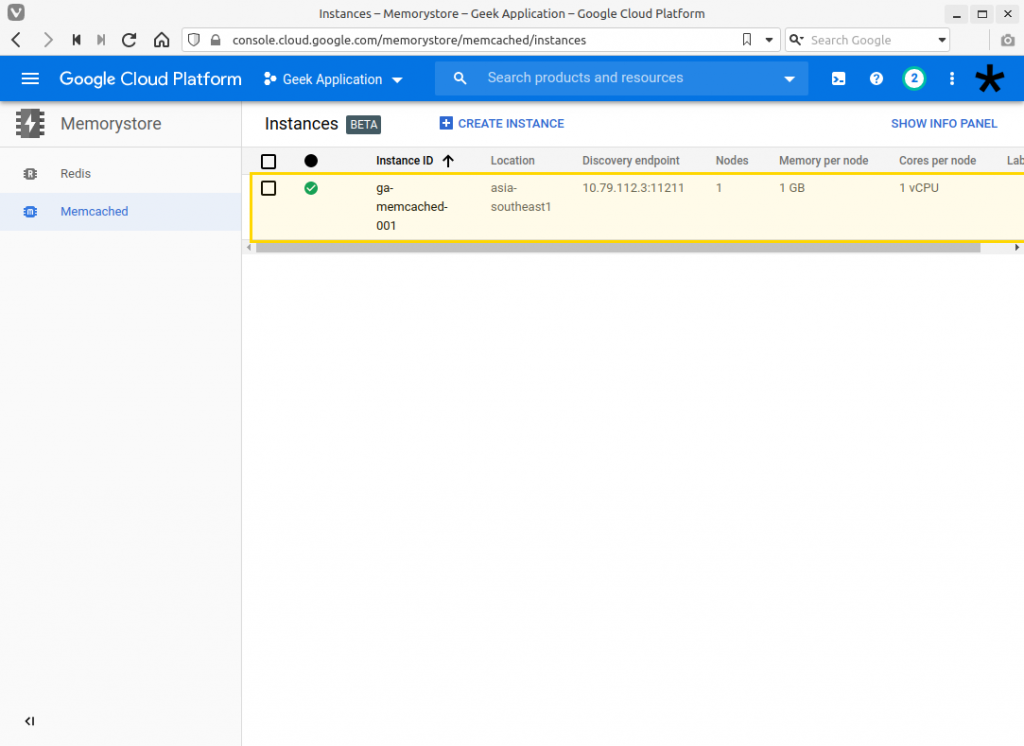
13. The Memcached instance will be ready when there is a check mark on the left of the Instance ID.
Viewing the details of a Redis instance
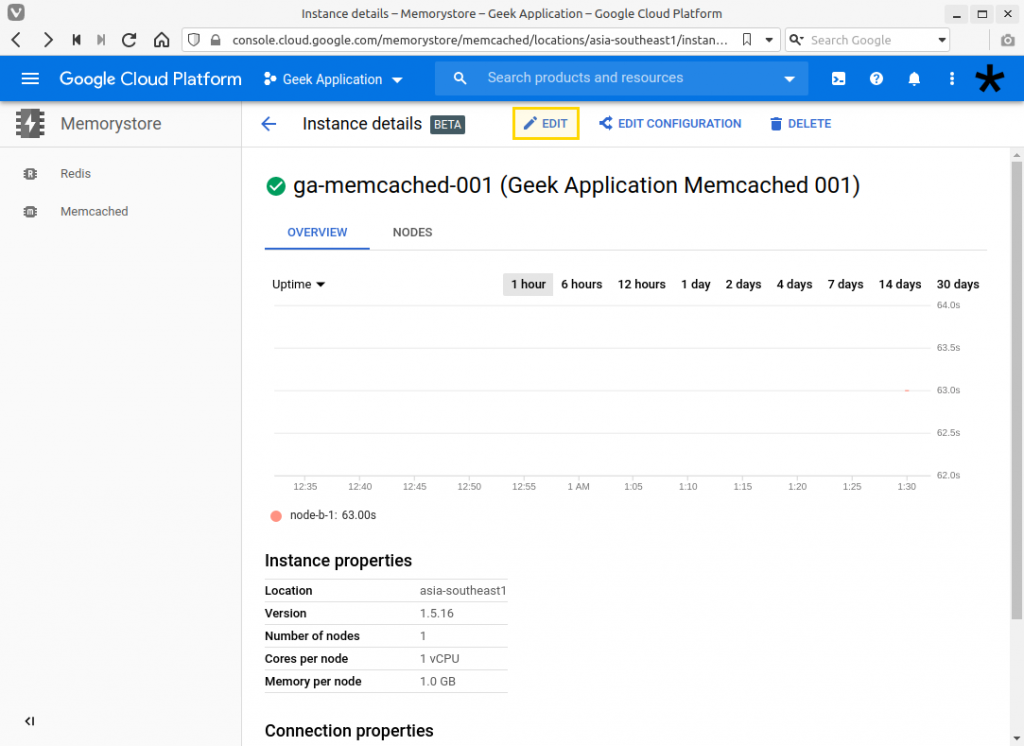
14. Click on the Instance ID, in this case “ga-memcached-001” and it will have a detailed view of the instance.
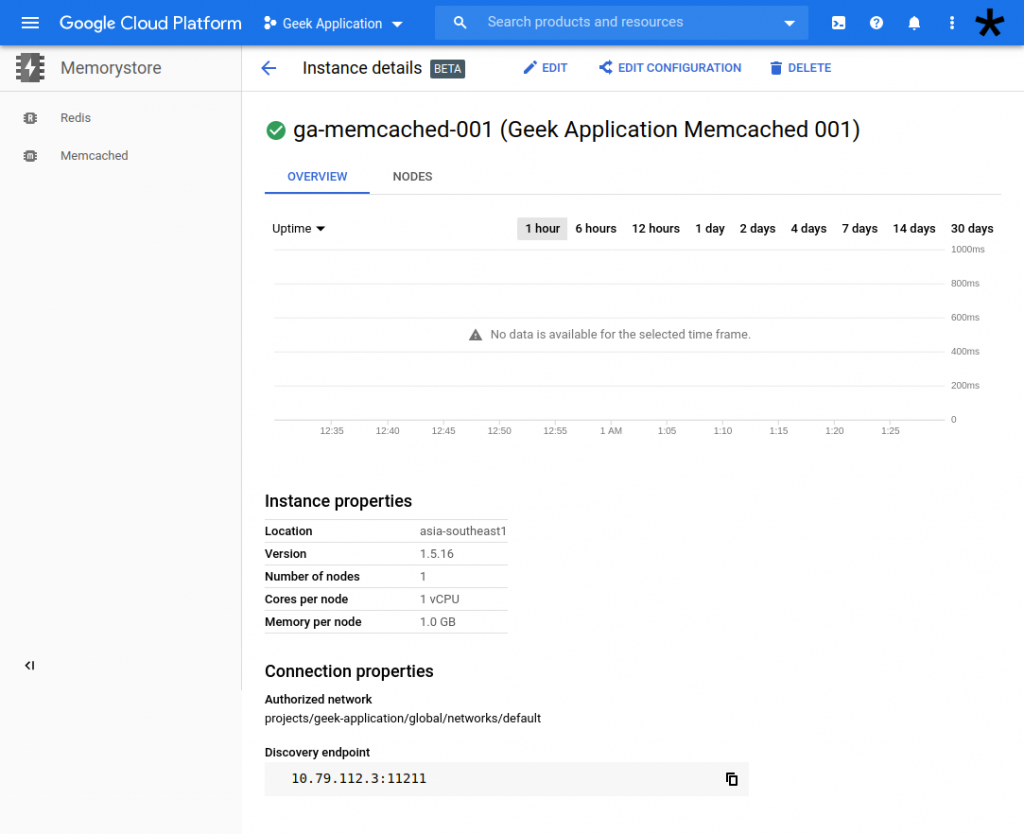
It shows memory usage of the Memcached instance, along with its property. These properties are the ones configured during the creation. In the Connection properties section we can see the Discovery endpoint. These are used to access the instance.
Updating the instance
15. Click on the “Edit” button at the top of the page.
16. The edit page is similar to the creation of the instance. But there are a few details which cannot be changed. The Instance ID, Location, memory per node, cores per node, connection property cannot be updated. Only the Display Name and the number of nodes can be changed.

17. Apply your changes using the “Save” button. Or select the “Cancel” button to go back to the instance details page.
18. To edit the Memcached configuration. Select the “Edit Configuration” at the top, on the details page.

19. In this page, the Memcached configuration can be updated.
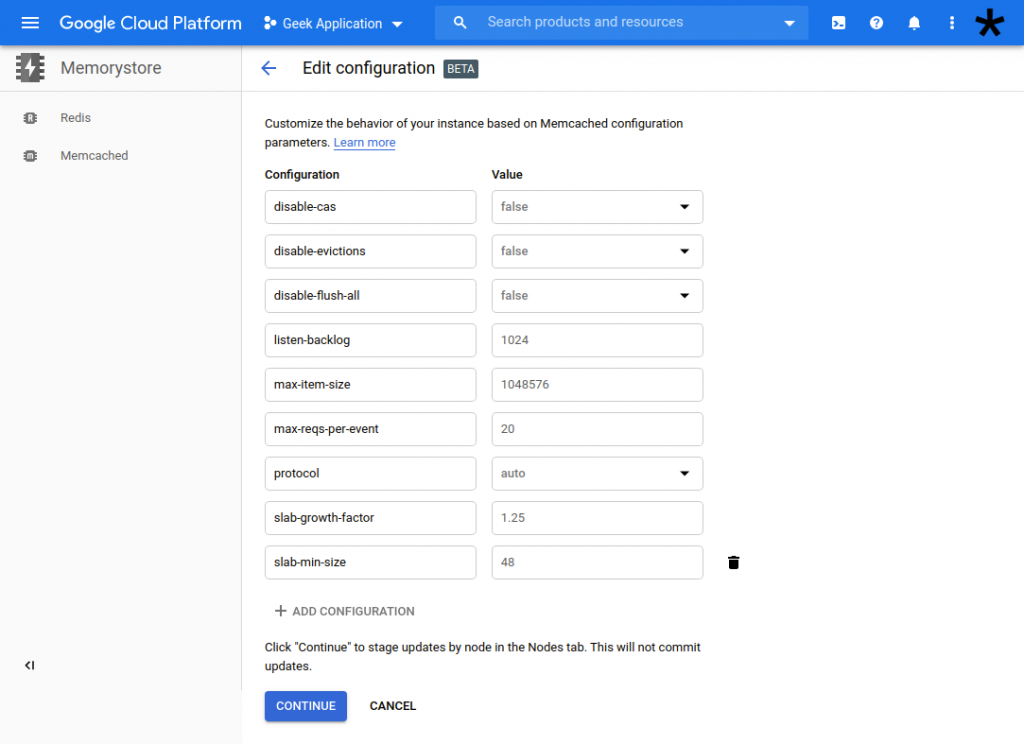
20. Apply your changes using the “Continue” button. Or select the “Cancel” button to go back to the instance details page.
Removing the instance
21. While at the Instance details page, there is the “Delete” option beside the “Edit”. Select this and you will be confirmed before actually removing the instance.
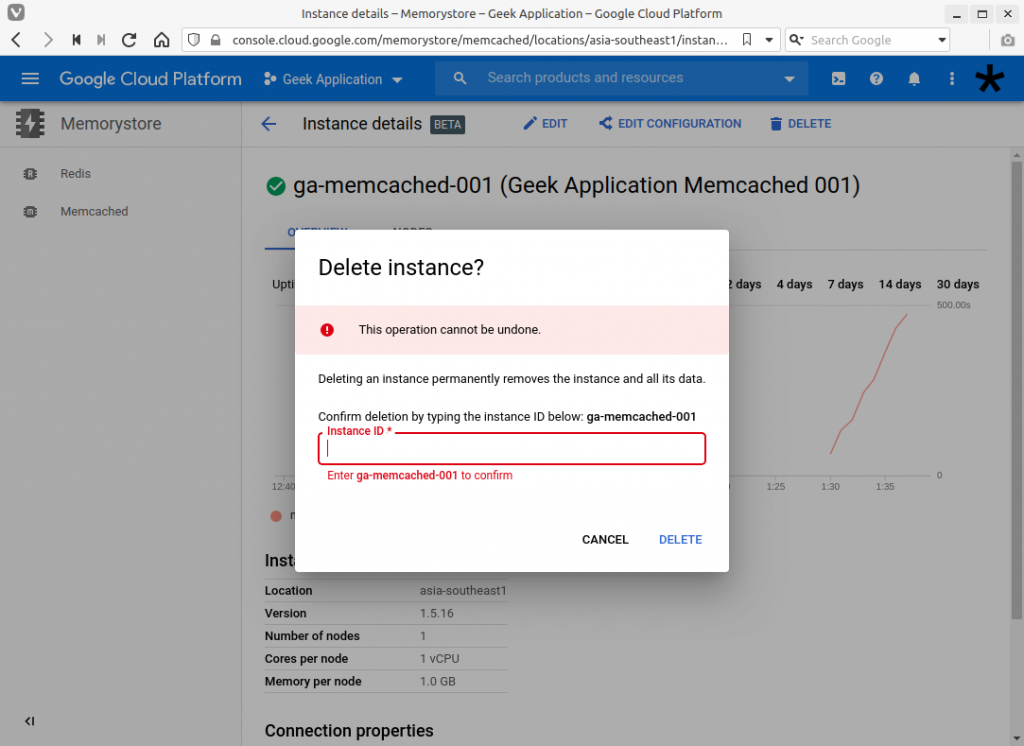
22. Enter the Instance ID, in this example “ga-memcached-001”. Then select the “Delete” option on the modal.
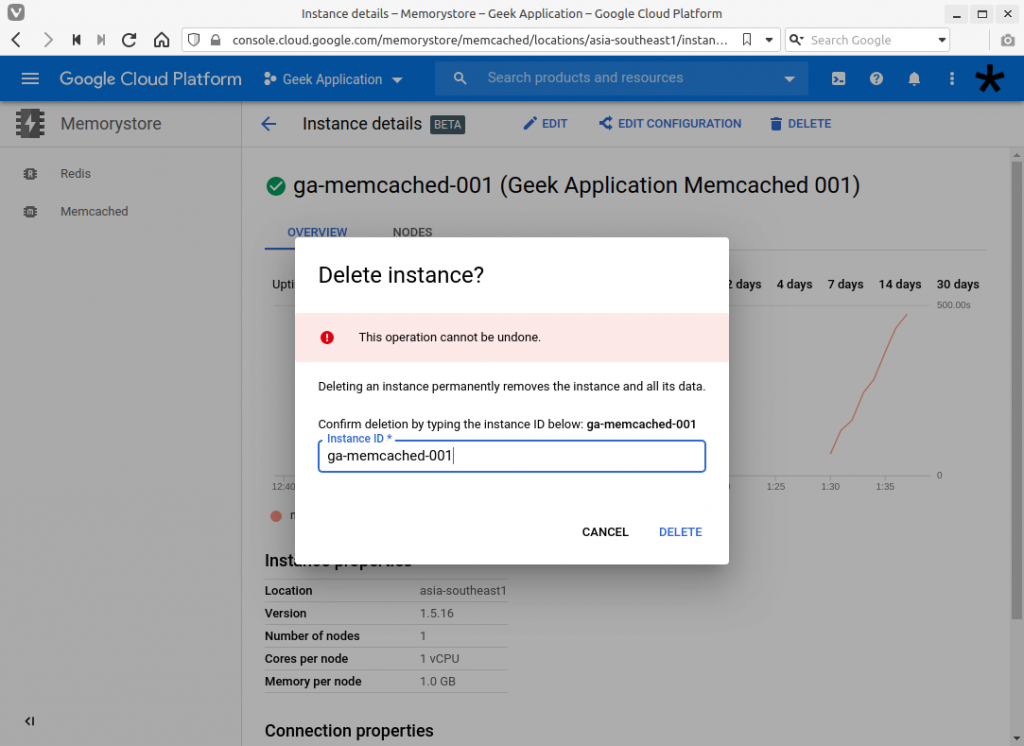
23. Wait until the instance has been removed.
24. Congratulations! You have created, viewed, updated and removed a Memcached GCP Memorystore. If you want to try out GCP Redis for Memcached click here [link to How To: Provision and manage a Redis Memory instance in GCP.
For enquiries, product placements, sponsorships, and collaborations, connect with us at [email protected]. We'd love to hear from you!
Our humans need coffee too! Your support is highly appreciated, thank you!