With Cloud SQL for SQL Server, you can bring your existing SQL Server on-premises workloads to Google Cloud. Cloud SQL takes care of infrastructure, maintenance, and patching so you can focus on your application and users. A great way to take better care of your application is by monitoring the SQL Server error log for issues that may be affecting your users such as deadlocks, job failures, and changes in database health.
Cloud SQL for SQL Server and Cloud Operations Suite
You can monitor and alert on messages in the Cloud SQL for SQL Server error log using the Google Cloud Operations Suite. Operations Suite is Google’s Cloud Observability solution allowing customers to have visibility into their infrastructure and applications. Using Cloud Operations Suite, you can monitor and alert for multiple instances at scale, and can set up alerting through your preferred method such as PagerDuty, Slack, email or a custom webhook.
From our partners:
The tools we will be using from the Operations Suite are Cloud Monitoring and Cloud Logging. Cloud Logging allows you to view logs from applications and services and allows you to create custom metrics from those logs. Cloud Monitoring allows you to create alerting policies to notify you when metrics, health check, and uptime check results meet specified criteria. To demonstrate how this works, we will enable deadlock detection on our Cloud SQL Instance, create a log based metric to monitor when deadlocks are detected, and create an alerting policy on the newly created log based metric. The architecture for monitoring SQL Server error log messages is shown below:


Configuration of Cloud SQL for SQL Server
What you will need:
- Cloud SQL for SQL Server
- Azure Data Studio
- Cloud SQL Proxy
- Email Address for alert message
Let’s break down how you can set this up. First you need a Cloud SQL for SQL Server instance here are the steps to set up one quickly:
1 .In the Google Cloud Console, go to the Cloud SQL Instances page.
2. Click Create Instance.
3. Click Choose SQL Server.
4. Enter a name for Instance ID.
5. Enter a password for the sqlserver user.
6. Expand Show Configuration Options
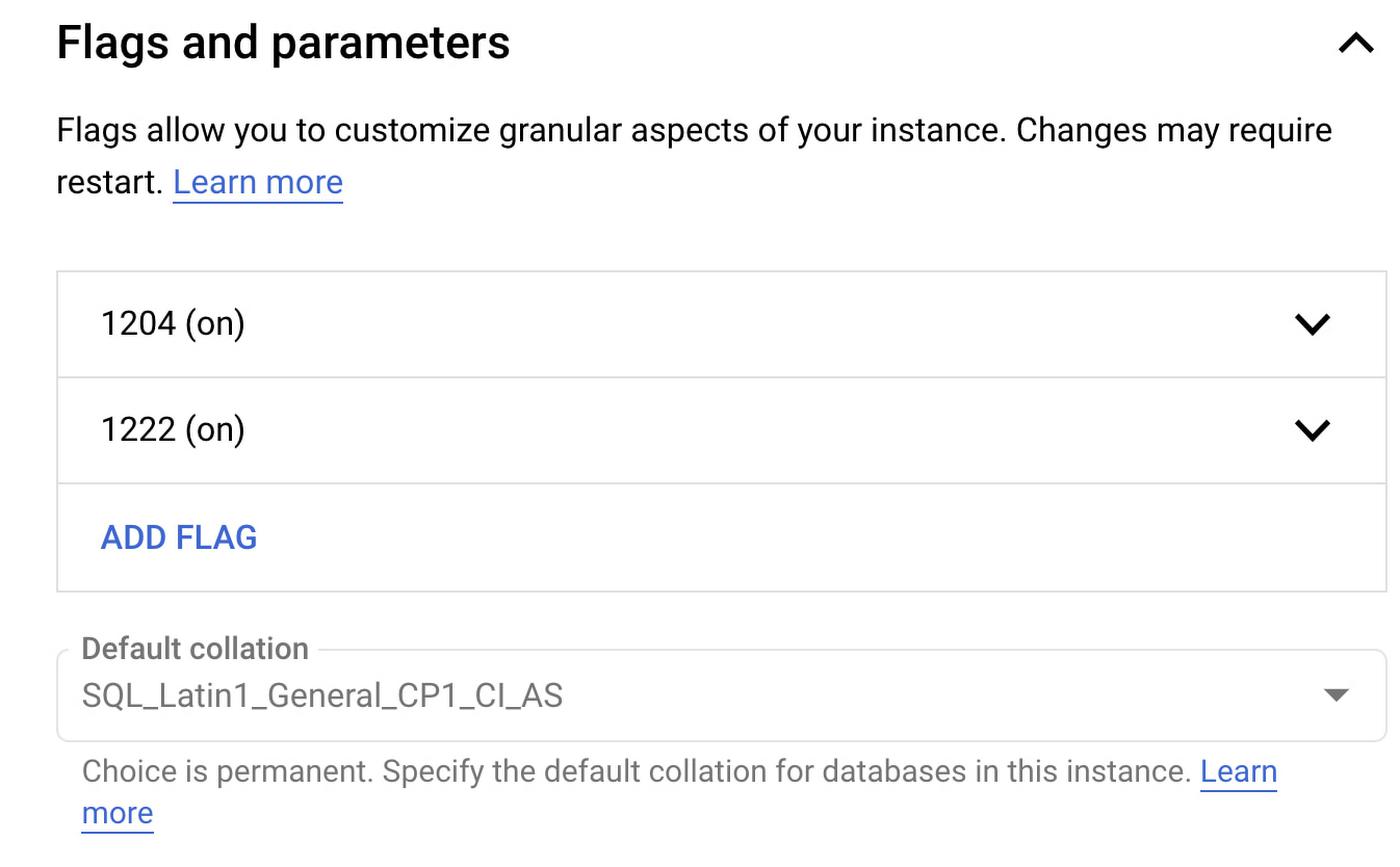
7. Under Flags and Parameters add the following trace flags:
a. 1222
b. 1204
8. Click Create Instance.
If you already have a Cloud SQL for SQL Server instance you would need to edit your Cloud SQL for SQL Server Instance.


In the edit screen you will need to go to “Flags and parameters” to add and enable SQL Server trace flags 1204 and 1222. These flags enable deadlock detection messages into the SQL Server error log. Your instance will need to be restarted after this change. More details on editing your Cloud SQL for SQL Server instance can be found here.

Connecting to your Cloud SQL for SQL Server instance
Perform the following steps to connect to your Cloud SQL for SQL Server Instance from your local machine.
1. Install the Google Cloud CLI. The Google Cloud CLI provides the gcloud CLI to interact with Cloud SQL and other Google Cloud services. The gcloud CLI uses the Admin API to access Cloud SQL, so you must Enable the Admin API before using the gcloud CLI to access Cloud SQL.
2. In a bash shell command prompt or in Windows PowerShell, run the following command to initialize the gcloud CLI: gcloud auth login
3. Run the following command to authenticate the gcloud CLI: gcloud auth login
4. Download and install the Cloud SQL Auth proxy (see Installing the Cloud SQL Auth proxy). Note the location of the Cloud SQL Auth proxy because you will run the Cloud SQL Auth proxy in the next step.
5. Run the Cloud SQL Auth proxy by using a bash shell command prompt (or by using Windows PowerShell). Specifically, run the following command, replacing Instance-connection-name with the corresponding value from the Google Cloud Console’s Overview tab (for your instance): ./cloud_sql_proxy -instances=INSTANCE_CONNECTION_NAME=tcp:1433
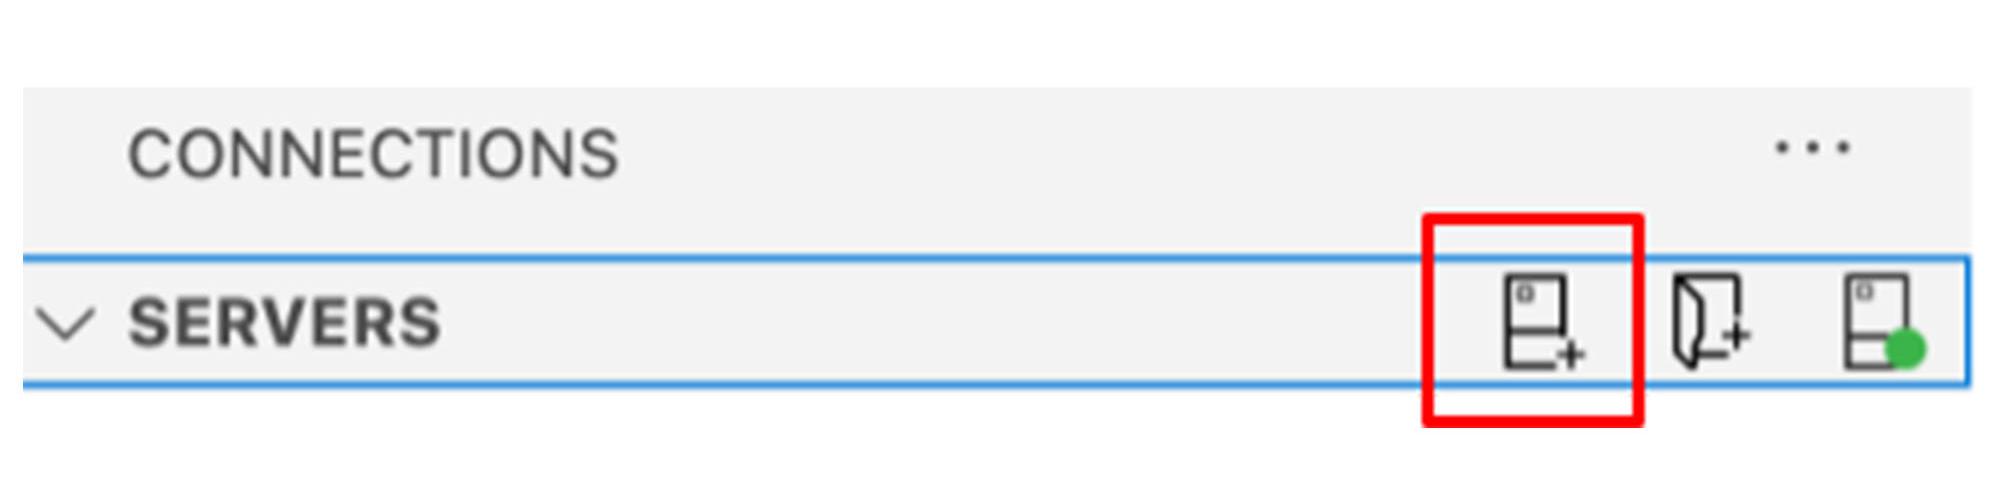
6. In Azure Data Studio Create a New Connection

7. Enter the following values in the Connection dialog:
a. For Server Type, enter Microsoft SQL Server
b. For Server, enter 127.0.0.1 as the IP address of your SQL Server instance.
- For TCP connections, the Cloud SQL Auth proxy listens on localhost(127.0.0.1) by default and since we are using Cloud SQL Auth Proxy to connect Azure Data Studio to our Cloud SQL instance that is the IP address we must use.
c. For Authentication, enter SQL Login.
d. For Login, enter sqlserver.
e. For Password, enter the password used when the instance was created.

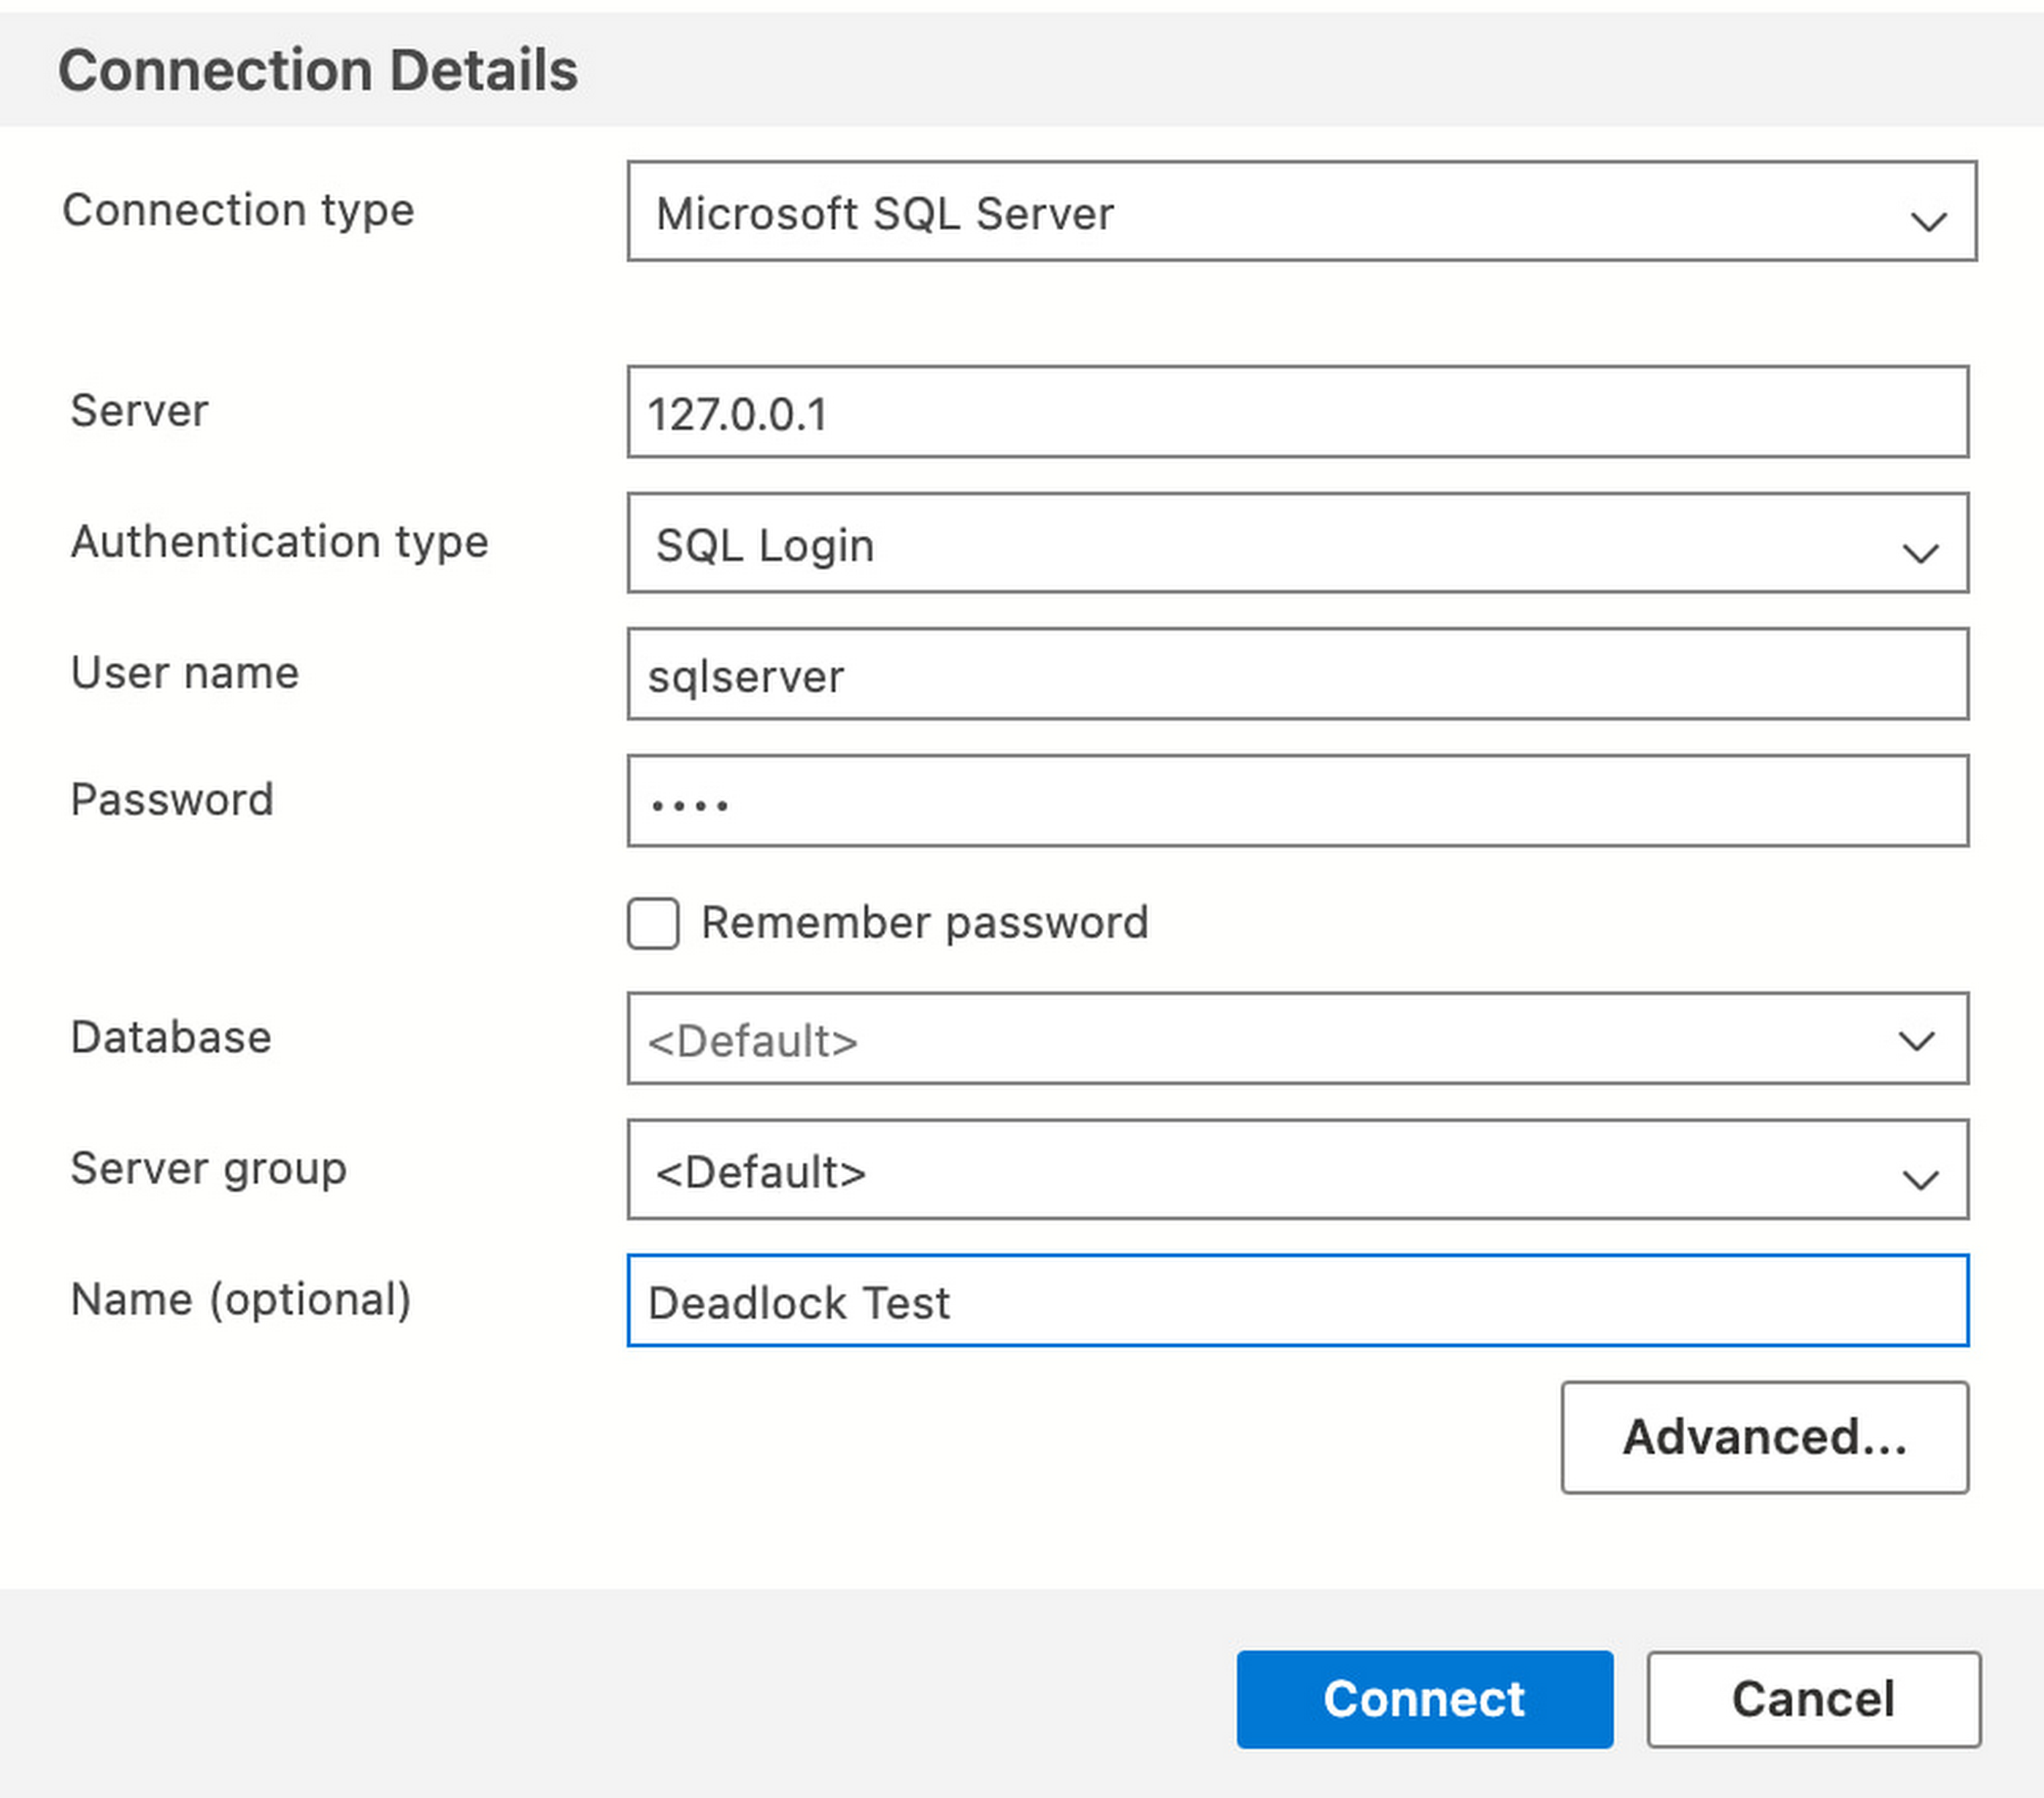
8. Click Connect
Creating a deadlock
Now that you are connected to Azure Data Studio you can run the follow T-SQL code to create temporary tables on the SQL Server instance.
CREATE TABLE ##Product (ProductId INT IDENTITY,ProductName VARCHAR(10),Description VARCHAR(12))GOINSERT INTO ##Product (ProductName, Description)VALUES ('Boat', 'Water'), ('Plane', 'Air'), ('Car', 'Ground')GOCREATE TABLE ##Vendor(VendorId INT IDENTITY,VendorName VARCHAR(10),State VARCHAR(2))GOINSERT INTO ##Vendor (VendorName, State)VALUES ('XYZ', 'NY'), ('ABC', 'OH')GO
Next to create a deadlock you will need to open two query sessions in Azure Data Studio and you must run each command one step at a time in the order specified here:
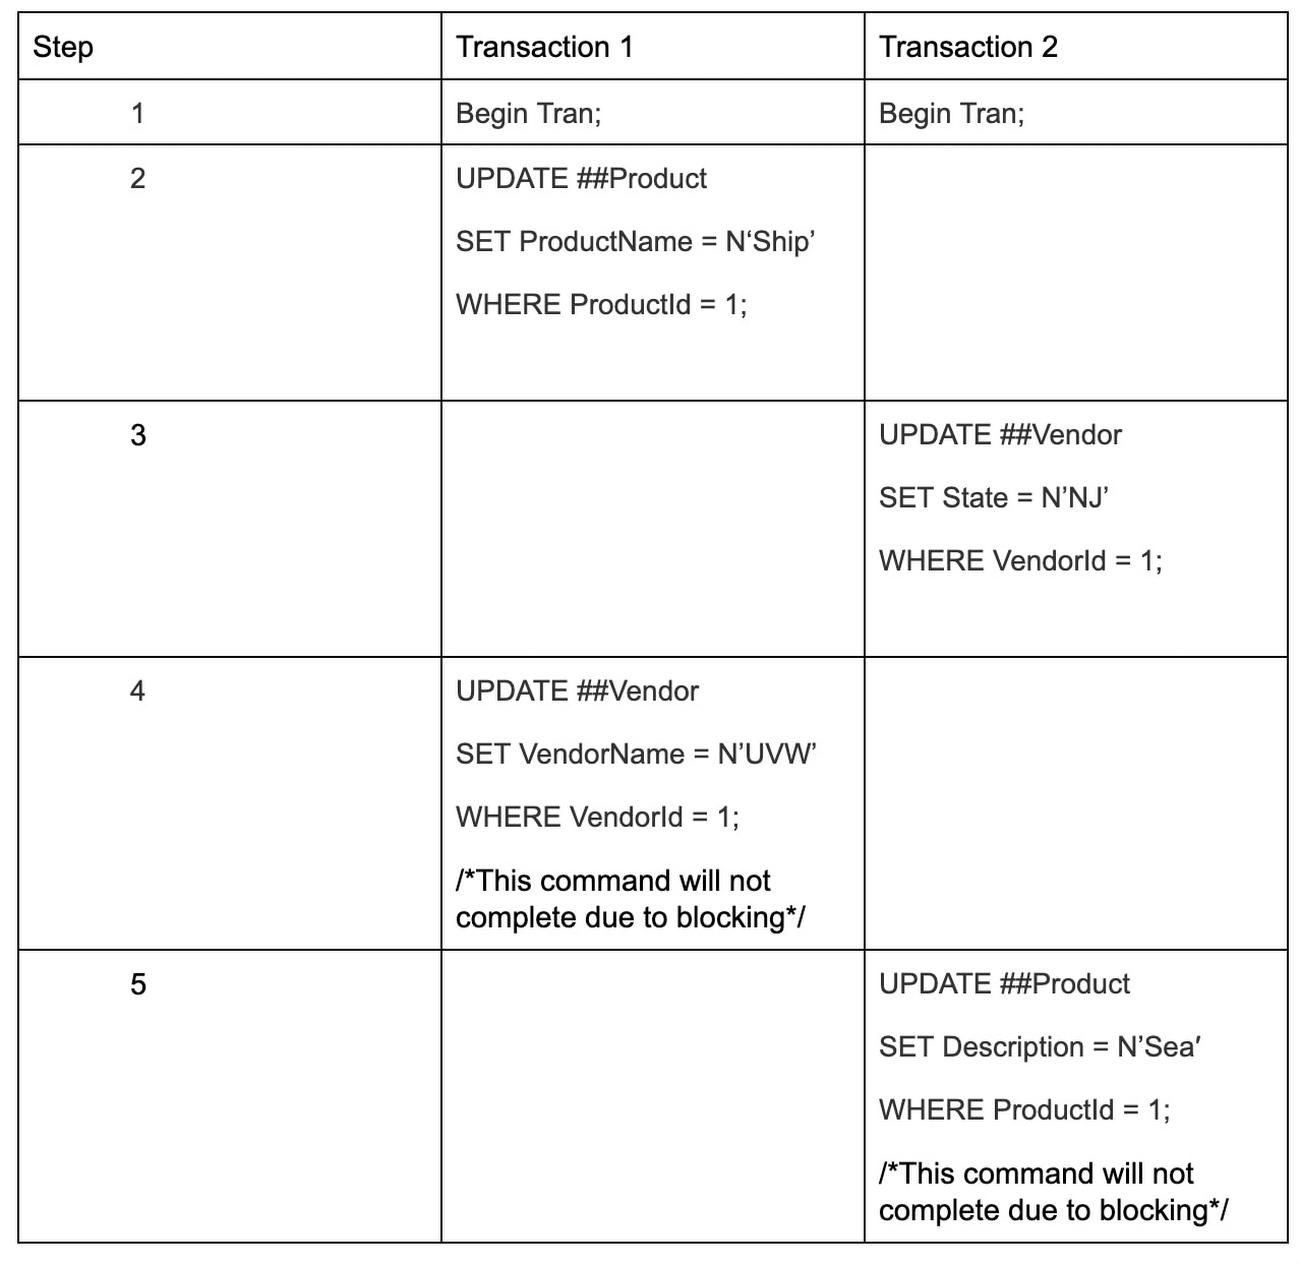

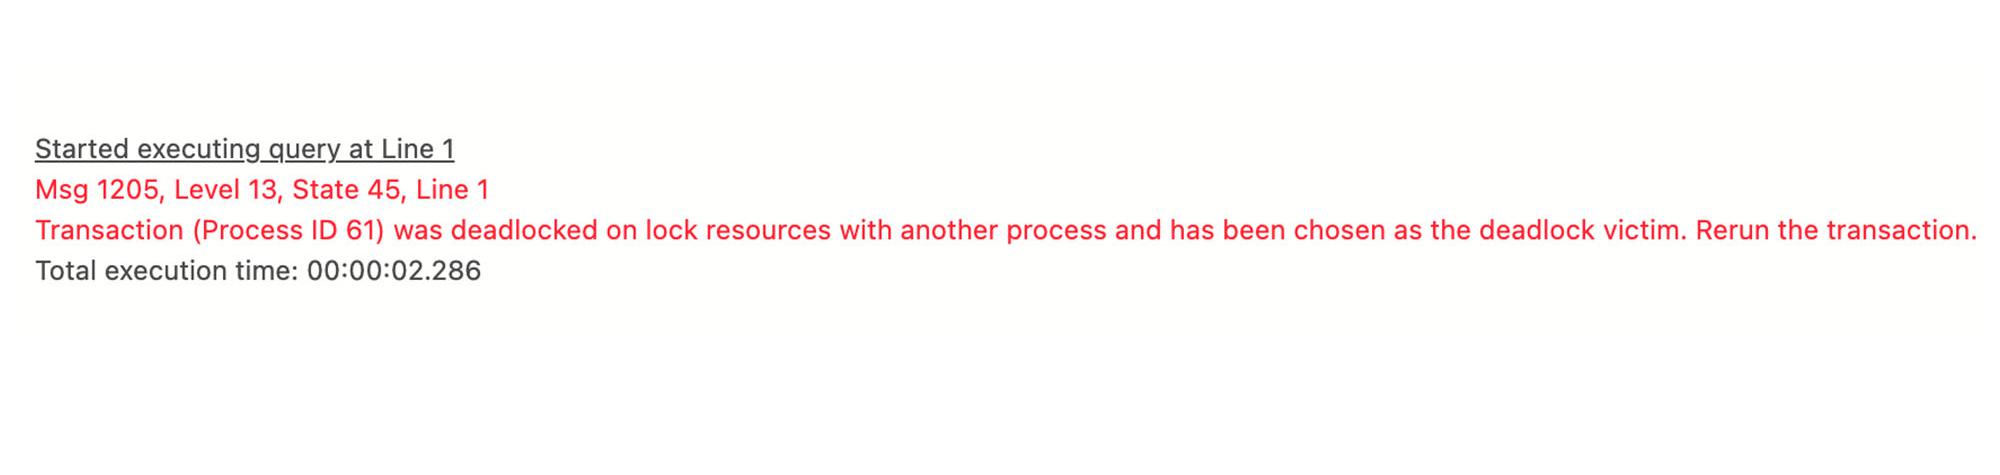
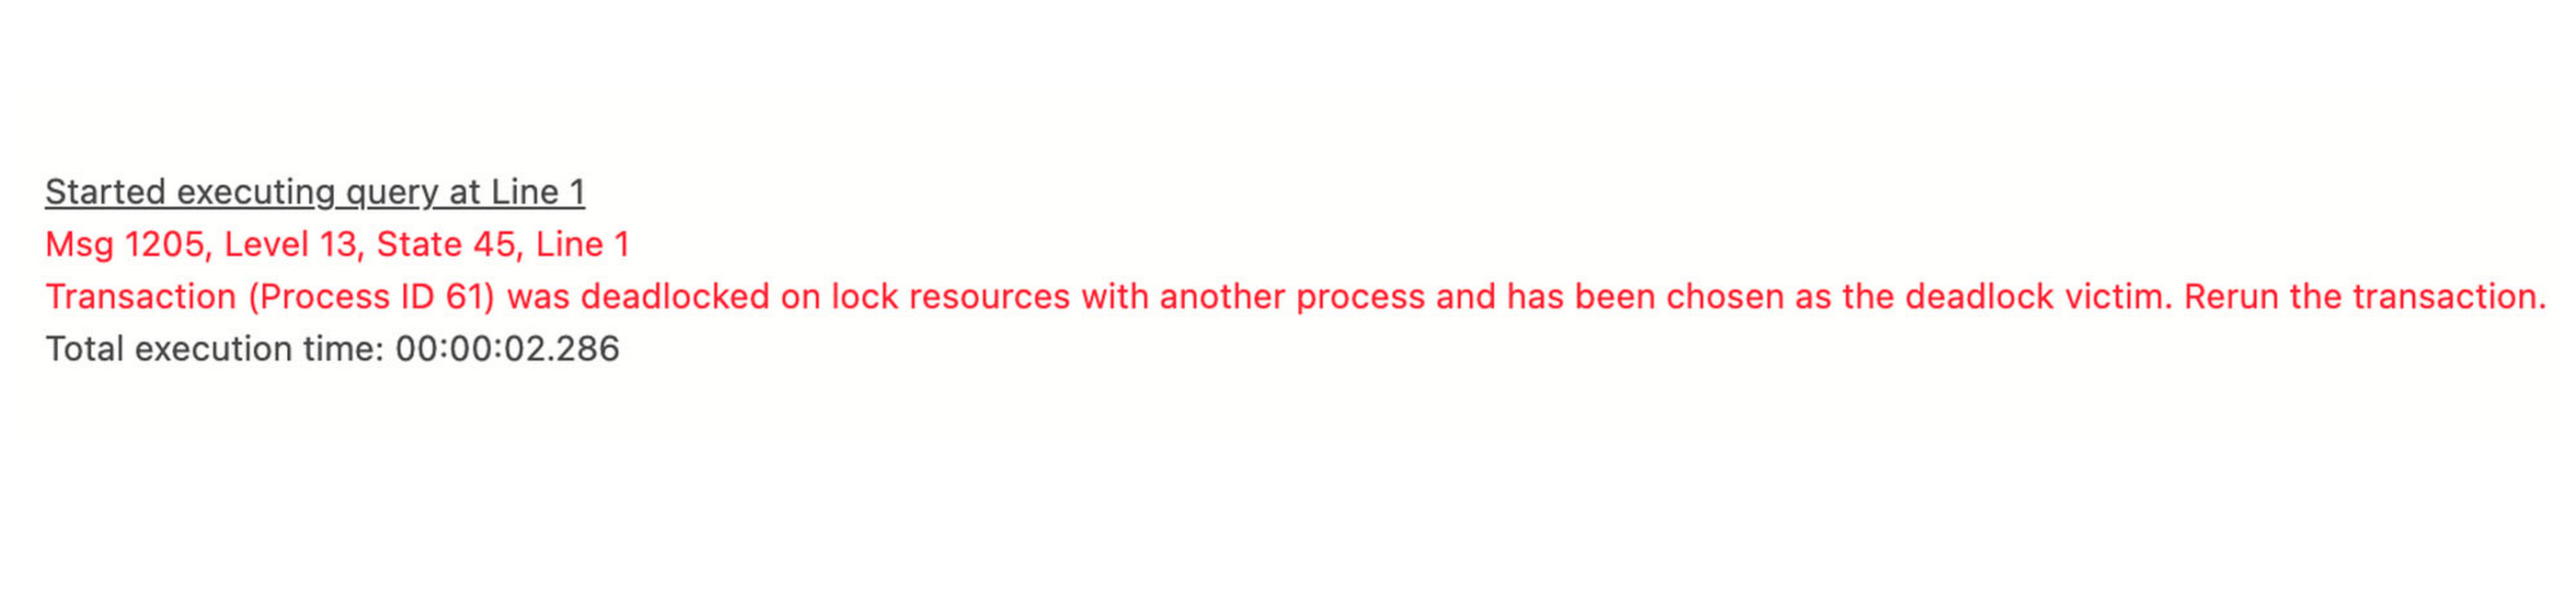
You should receive an error saying one of your sessions was deadlocked.
Viewing the error log in Log Explorer
Now we can view the SQL Server Error Log by going to Cloud Logging in the Google Cloud Console. Logging can be found in the Operations section of the navigation bar or you can type “logging” into the search bar in Google Cloud Console.

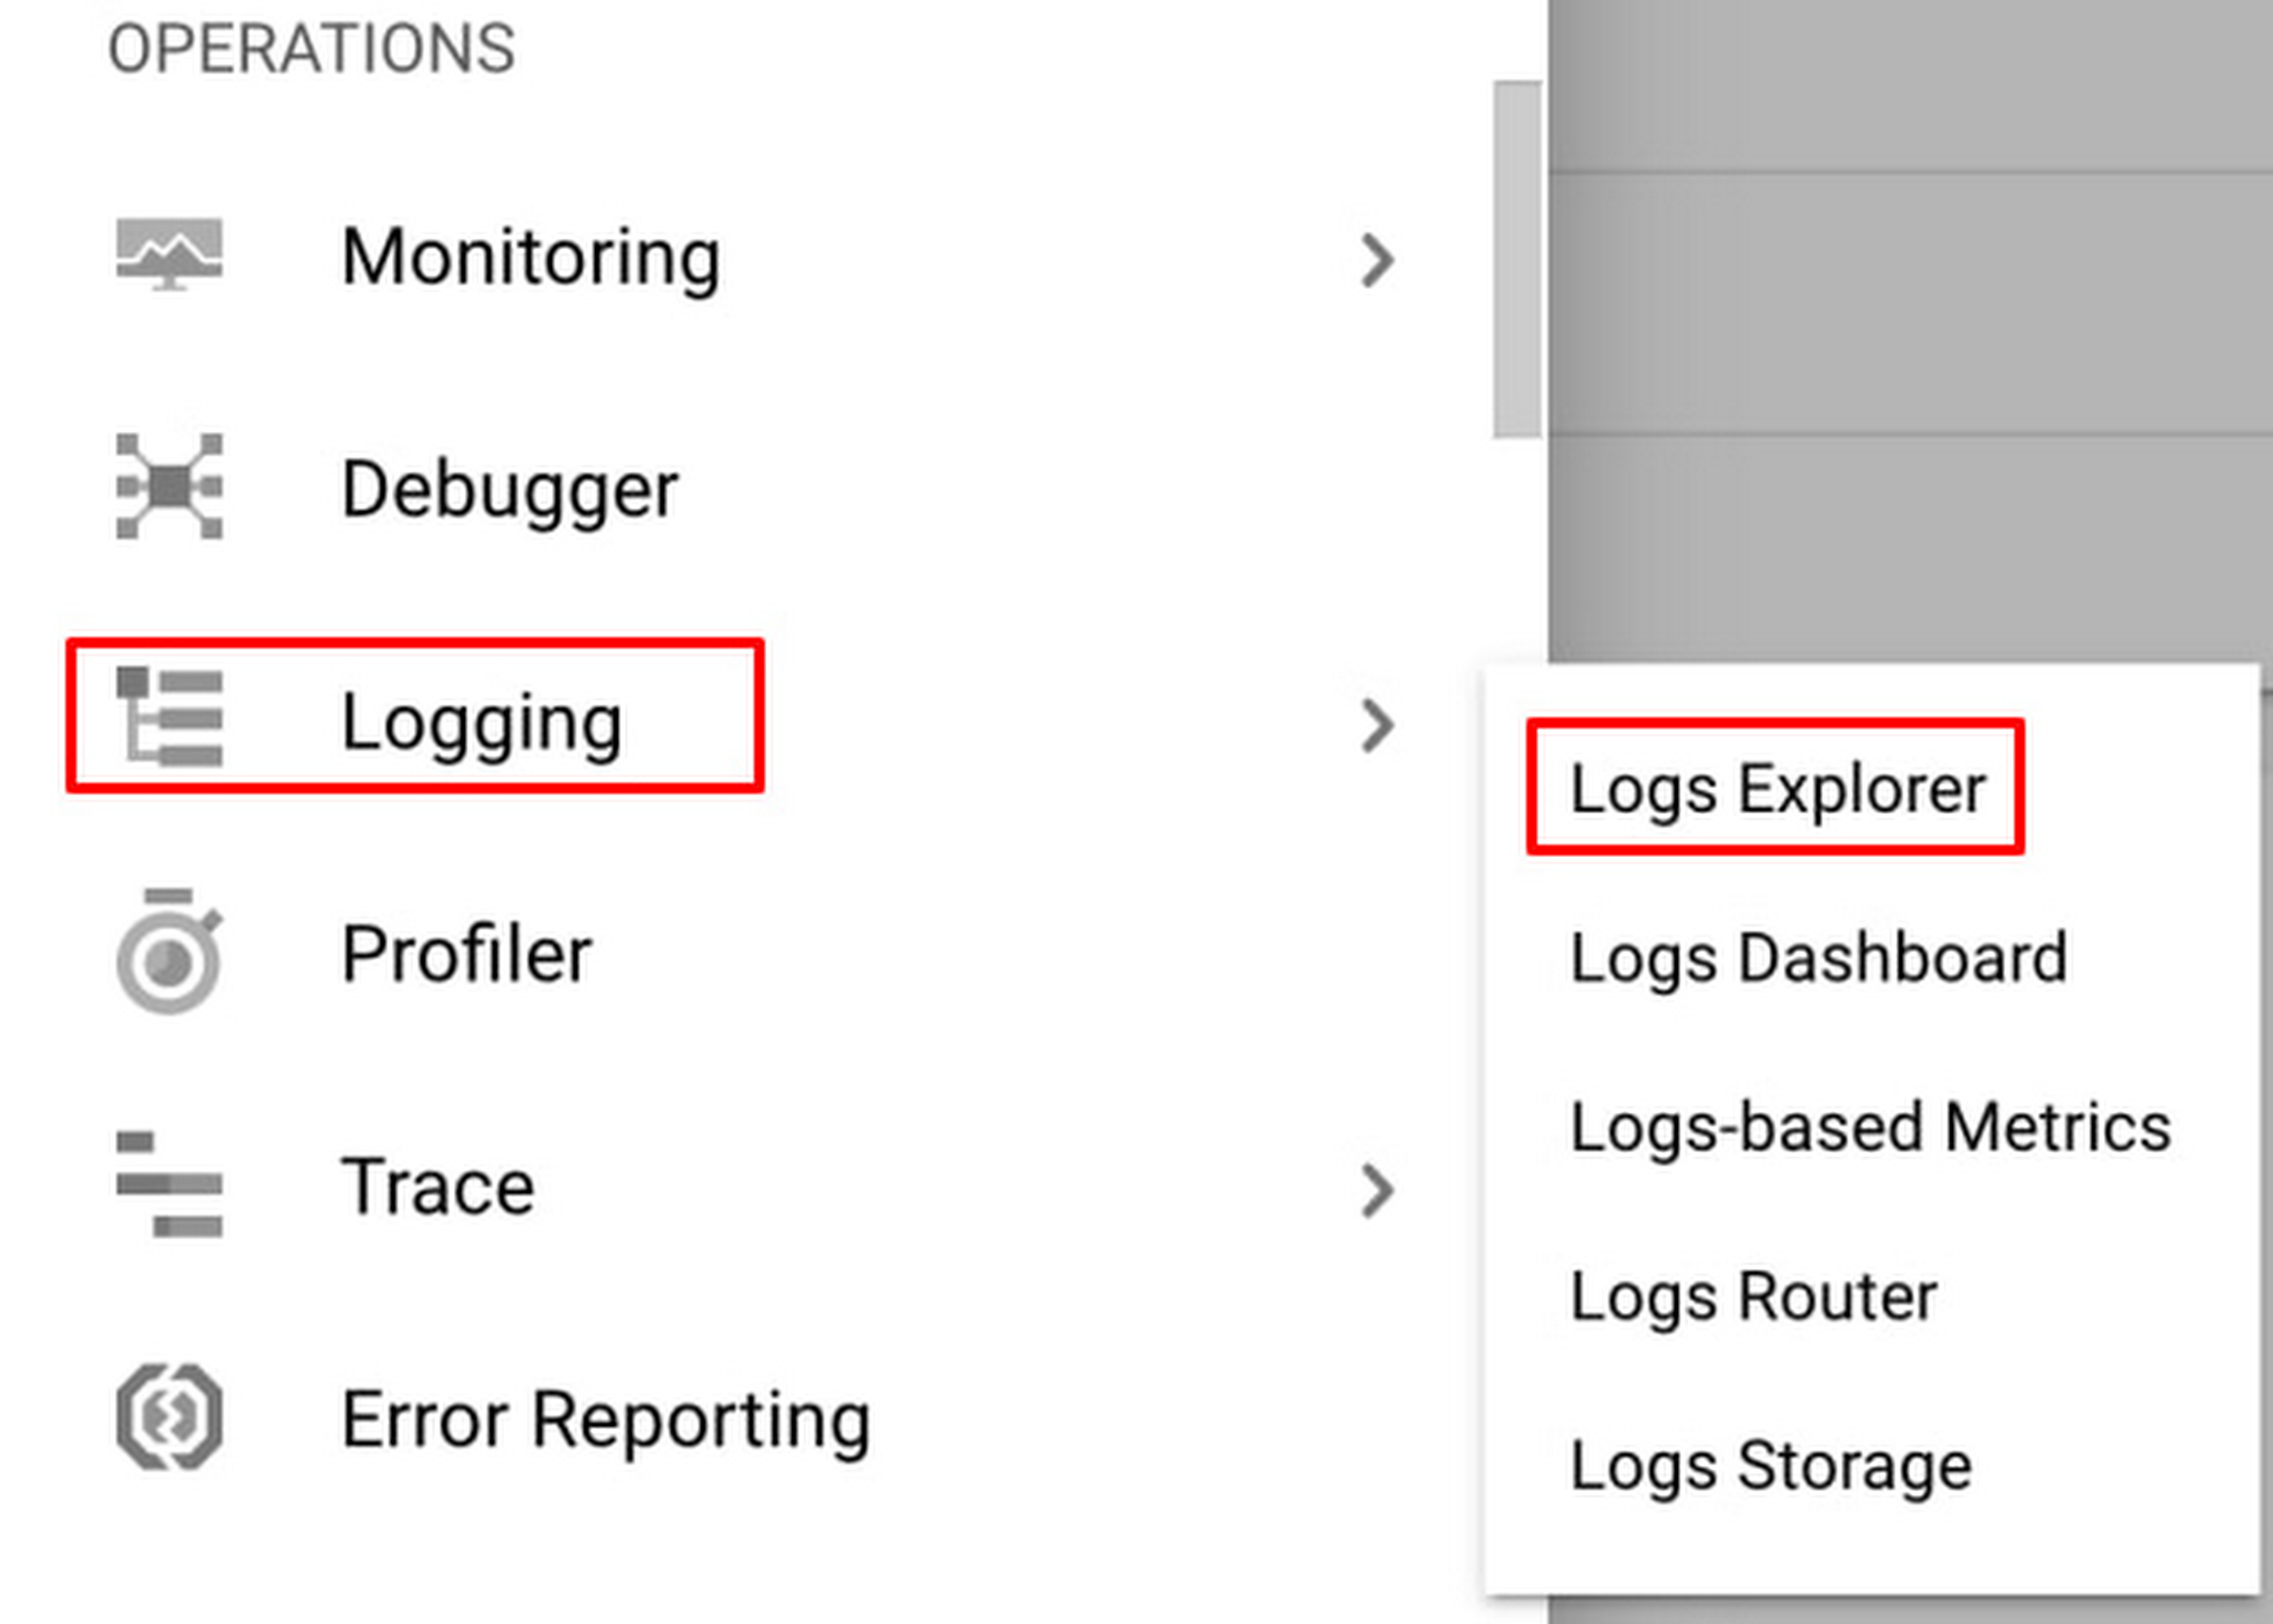
Now in Cloud Logging Log Explorer section you will want to create a query to filter the proper results:
Resource should be → Cloud SQL Database → Cloud SQL For SQL Server Instance Name
Log should be → Cloud SQL Log → sqlserver.err
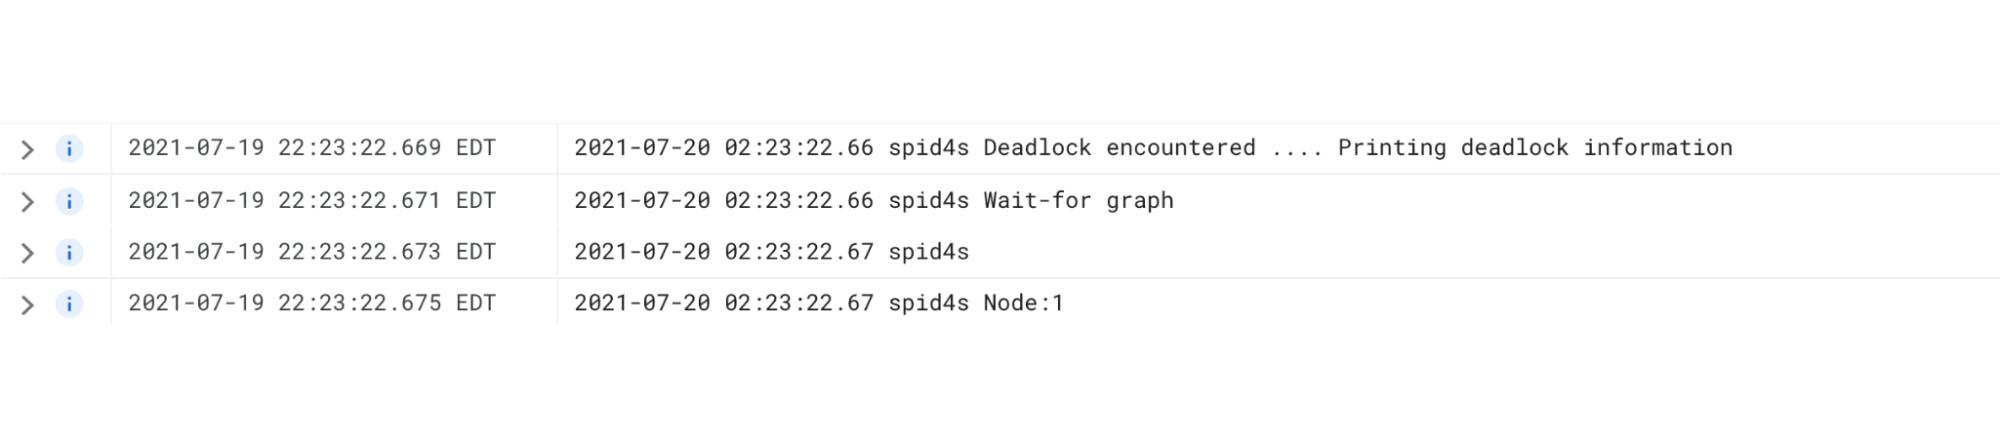
Now you should be able to see the deadlock messages in the log.

Creating a custom log-based metric and alerting policy
To identify a deadlock message to use for your custom metric, we should create a custom query filter in log explorer. You can enter the query below into log explorer.
resource.type="cloudsql_database" resource.labels.database_id="<YourGoogleCloudProject>:<YourCloudSQLInstance>"logName="projects/<YourGoogleCloudProject>/logs/cloudsql.googleapis.com%2Fsqlserver.err"textPayload=~"Deadlock encountered .... Printing deadlock information"
<YourGoogleCloudProject> is the name of the project your Cloud SQL instance is in and <YourCloudSQLInstance> is the name of your Cloud SQL for SQL Server instance.
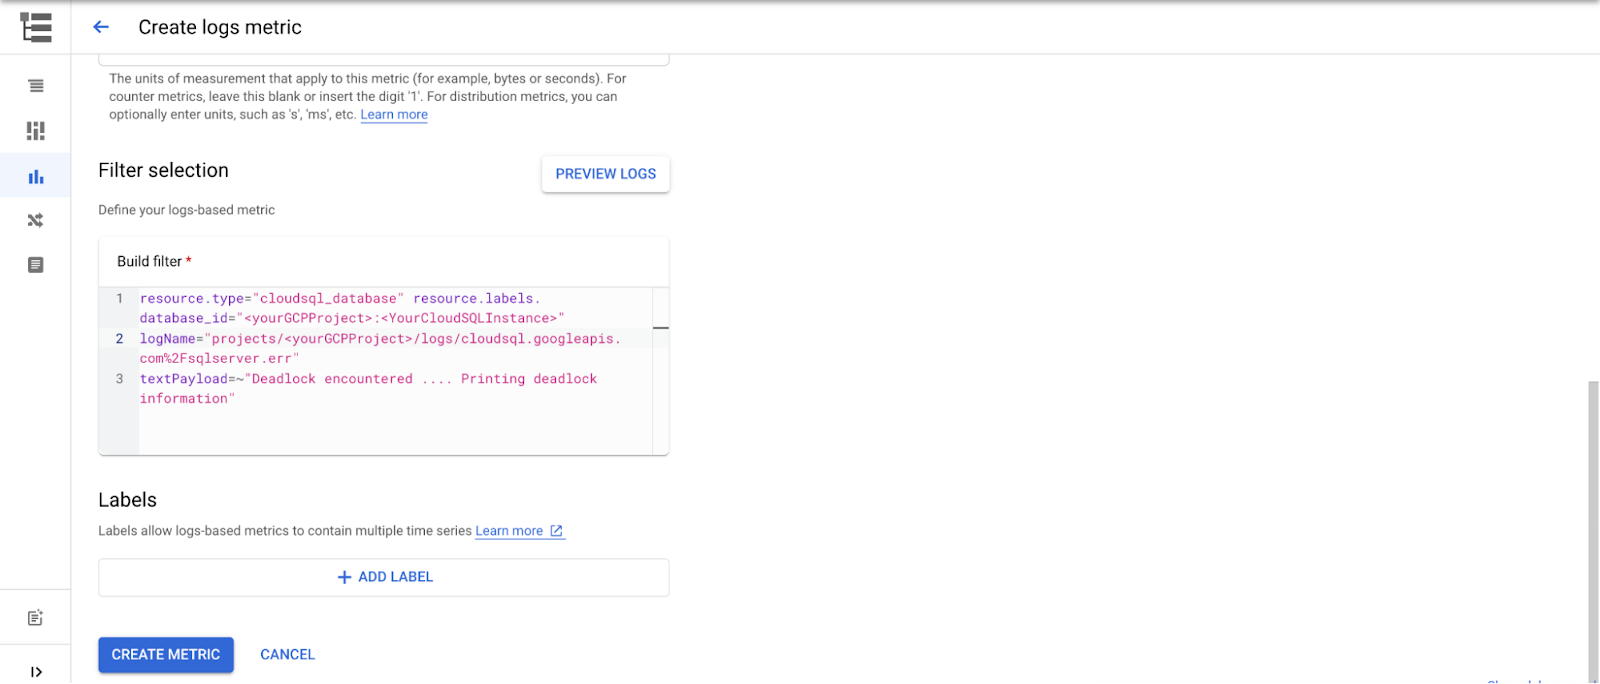
Now you will see the single deadlock log entry. In the query results section there is an action button on the right hand side. Click action and select “Create metric”.


This will open a new window called Create logs metric. Here you can give your custom metric a name and description. Keep it as a counter metric and leave the unit as 1. Add any labels you like and click Create Metric. A label is a key-value pair that helps you organize your Google Cloud resources.
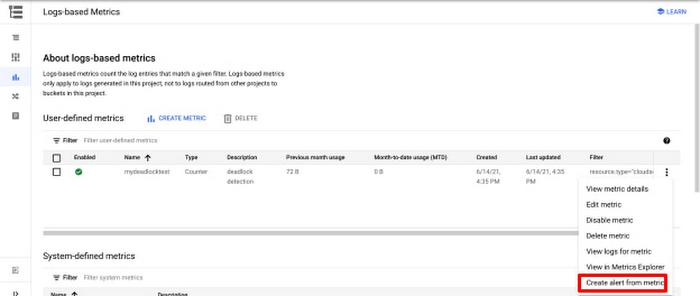
This will give you a new user-defined metric to monitor and track deadlocks. In the User-defined metrics section, click on the three dots on the right side of your custom metric name. You will see options to View in Metrics Explorer and Create alert from metric. If you want to view the metric in Metric Explorer you will need to trigger a new deadlock to see data.
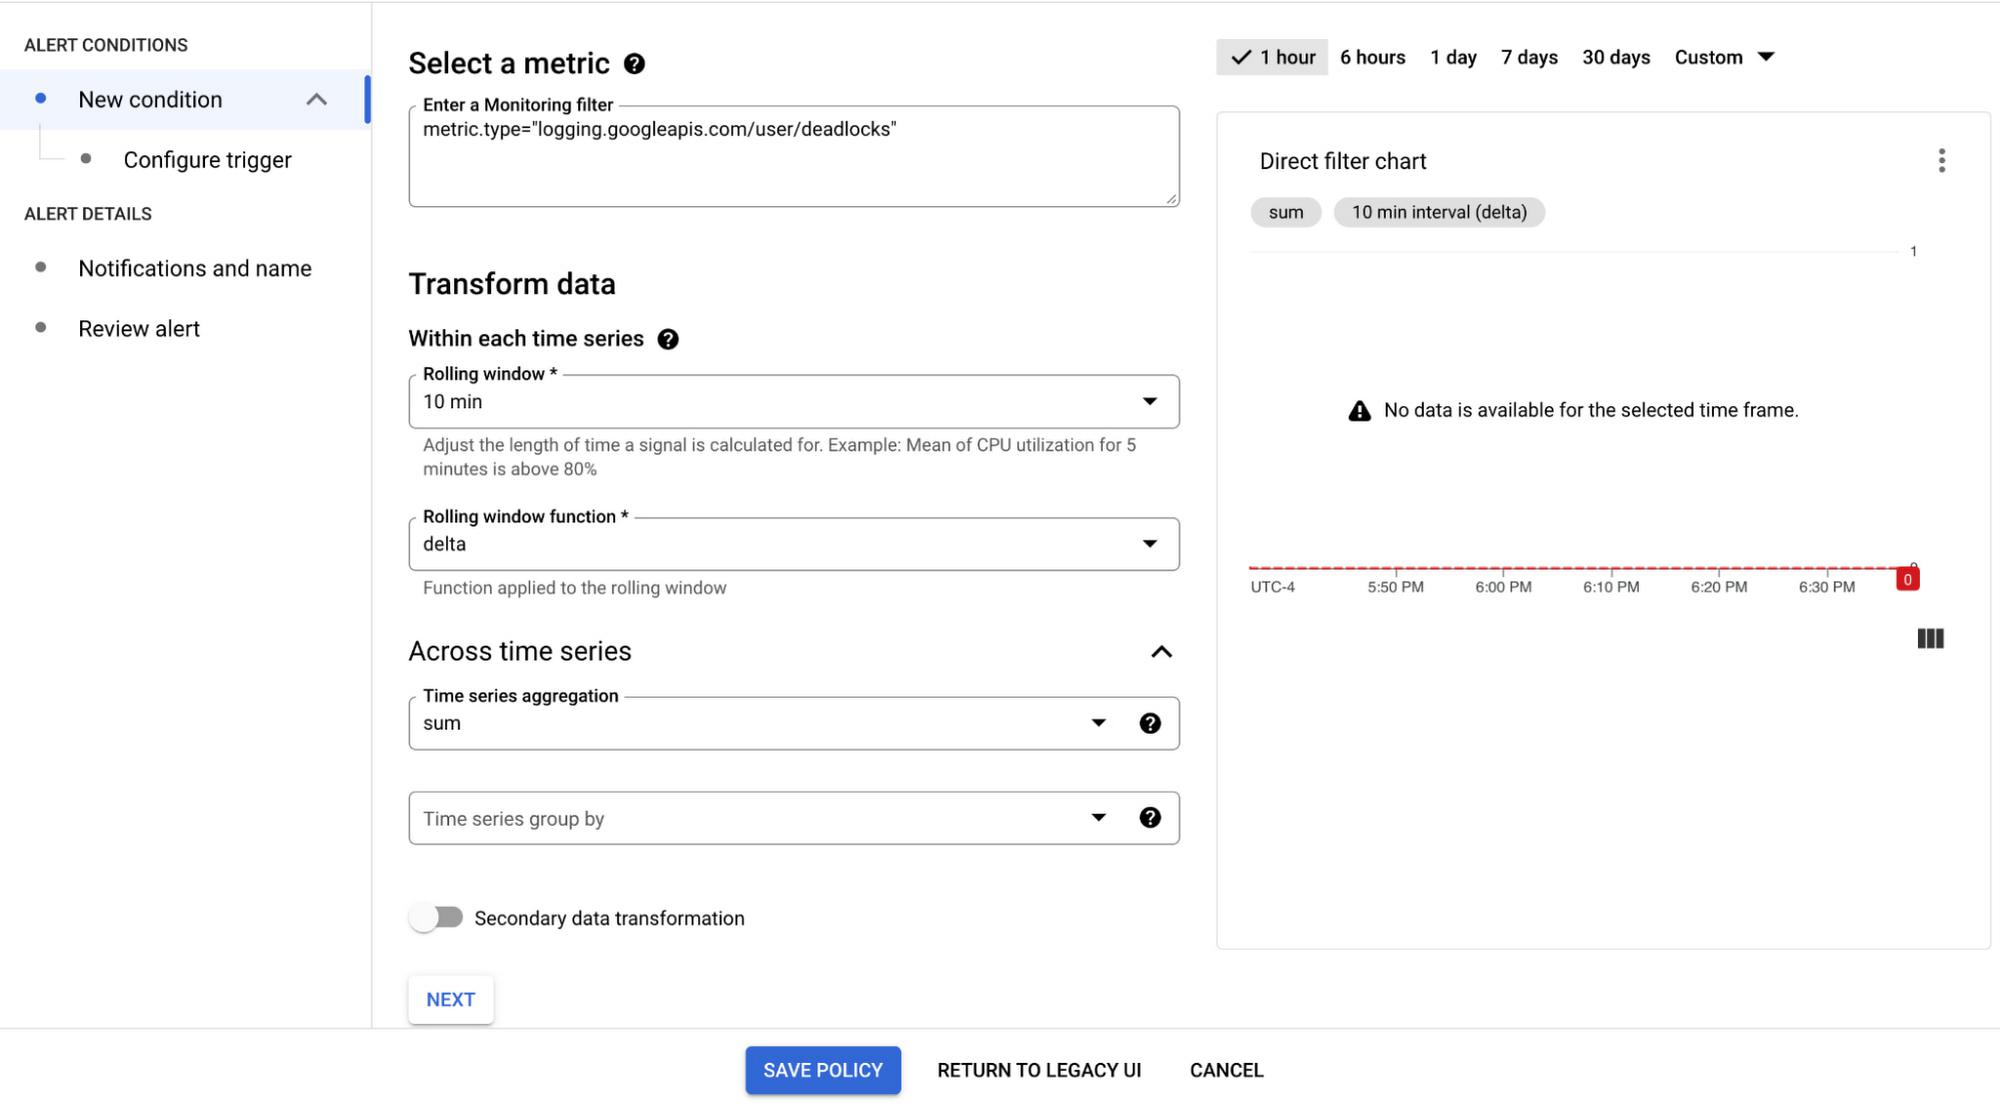
Now, let’s create an alert policy. Click on Create alert from metric to define an alerting policy for your new deadlock metric.

Clicking the Create alert from metric link should have taken you straight to the alerting policy UI, where you can create an alert and identify specific conditions in which that alert should fire. In the condition section, your custom metric should have already been selected for you. You can leave everything as default and then select Notifications and name.

Next decide who should be notified when this alert is triggered. Before you do that you need to set a notification channel. Notification channels can be an email address or it can be various integration tools such as Slack and PagerDuty. After you select who should be notified, name your alert and add instructions on how to resolve the alert. Now save the alert and you are done! I would recommend you test out the new alert by forcing another deadlock. Congratulations – now you know how to create alerts based on SQL Server Error Log messages.
You can create these types of alerts for more than just deadlocks: you can set alerts to monitor for other messages that show up in the error log such as crash dumps, connections issues, and corruption. You can also create alerts based on SQL Server Agent Log messages. Here are a few more examples listed below with the string from the SQL error logs that you can use as the text Payload in your custom metric.
- Agent XPs disabled:
- SQL Server Error Logs will include the string
"Configuration option 'Agent XPs' changed from 1 to 0."
- SQL Server Error Logs will include the string
- SQL Server Agent Status:
- SQL Server Agent Logs will include the string
“SQLServerAgent terminated"
- SQL Server Agent Logs will include the string
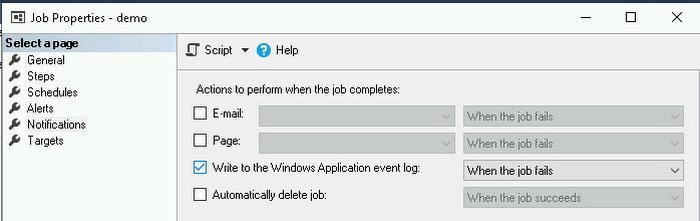
- Job Failures:
- SQL Server Agent Logs will include a string similar to “
SQL Server Scheduled Job 'demo' (0xB83611A22D4FD74B8900ADDFDC9CDD9C) - Status: Failed - Invoked on:” - Option below needs to be checked or set using tsql
- SQL Server Agent Logs will include a string similar to “

- Database Status:
- SQL Server Error logs will include one of the following strings:
- “
Database % cannot be opened. It has been marked SUSPECT” - “
Database % database is in emergency or suspect mode” - “
database % is marked EMERGENCY_MODE” - “
Database % cannot be opened because it is offline.” - “
Setting database option OFFLINE to ON for database”
- “
- SQL Server Error logs will include one of the following strings:
- Custom error messages
- Using SQL Agent jobs, the RAISERROR with log command can be used to write custom messages in the SQL error logs. This could be triggered when any application or database condition is met. One way to do this is to create a SQL Agent job and define a job step with a simple query like the one below.
declare@LongRunningJobThreshold int=300,@runningtime int=0select @runningtime=max(er.total_elapsed_time)/1000from sys.dm_exec_requests erinner join sys.sysprocesses p on er.session_id = p.spidwhere p.program_name like '%SQLAgent%'if @runningtime > @LongRunningJobThresholdRAISERROR ('long running sql agent job',16,1) with LOG
Then schedule this to run every couple of minutes. This will produce an error log message and textPayload as in the image below. The same steps can be used for alerting and monitoring as described above for notifications


Thanks for reading.
By: Latav Dudley (Customer Engineer, Data Management, Google Cloud) and Bryan Hamilton (Database Engineer, SQL Server, Google Cloud)
Source: Google Cloud Blog
For enquiries, product placements, sponsorships, and collaborations, connect with us at [email protected]. We'd love to hear from you!
Our humans need coffee too! Your support is highly appreciated, thank you!