
Step 1
The first step is to create a new project; we will use an existing project called “test-ctd”. If you are unable to use an existing project, you will need to create a new project. Next we’ll enable the Compute Engine API which is necessary for creating a Windows Server VM instance. If you have billing enabled and or are in your free trial mode you’ll be able to enable the necessary APIs with a button labeled “Enable Apis”.
From our partners:
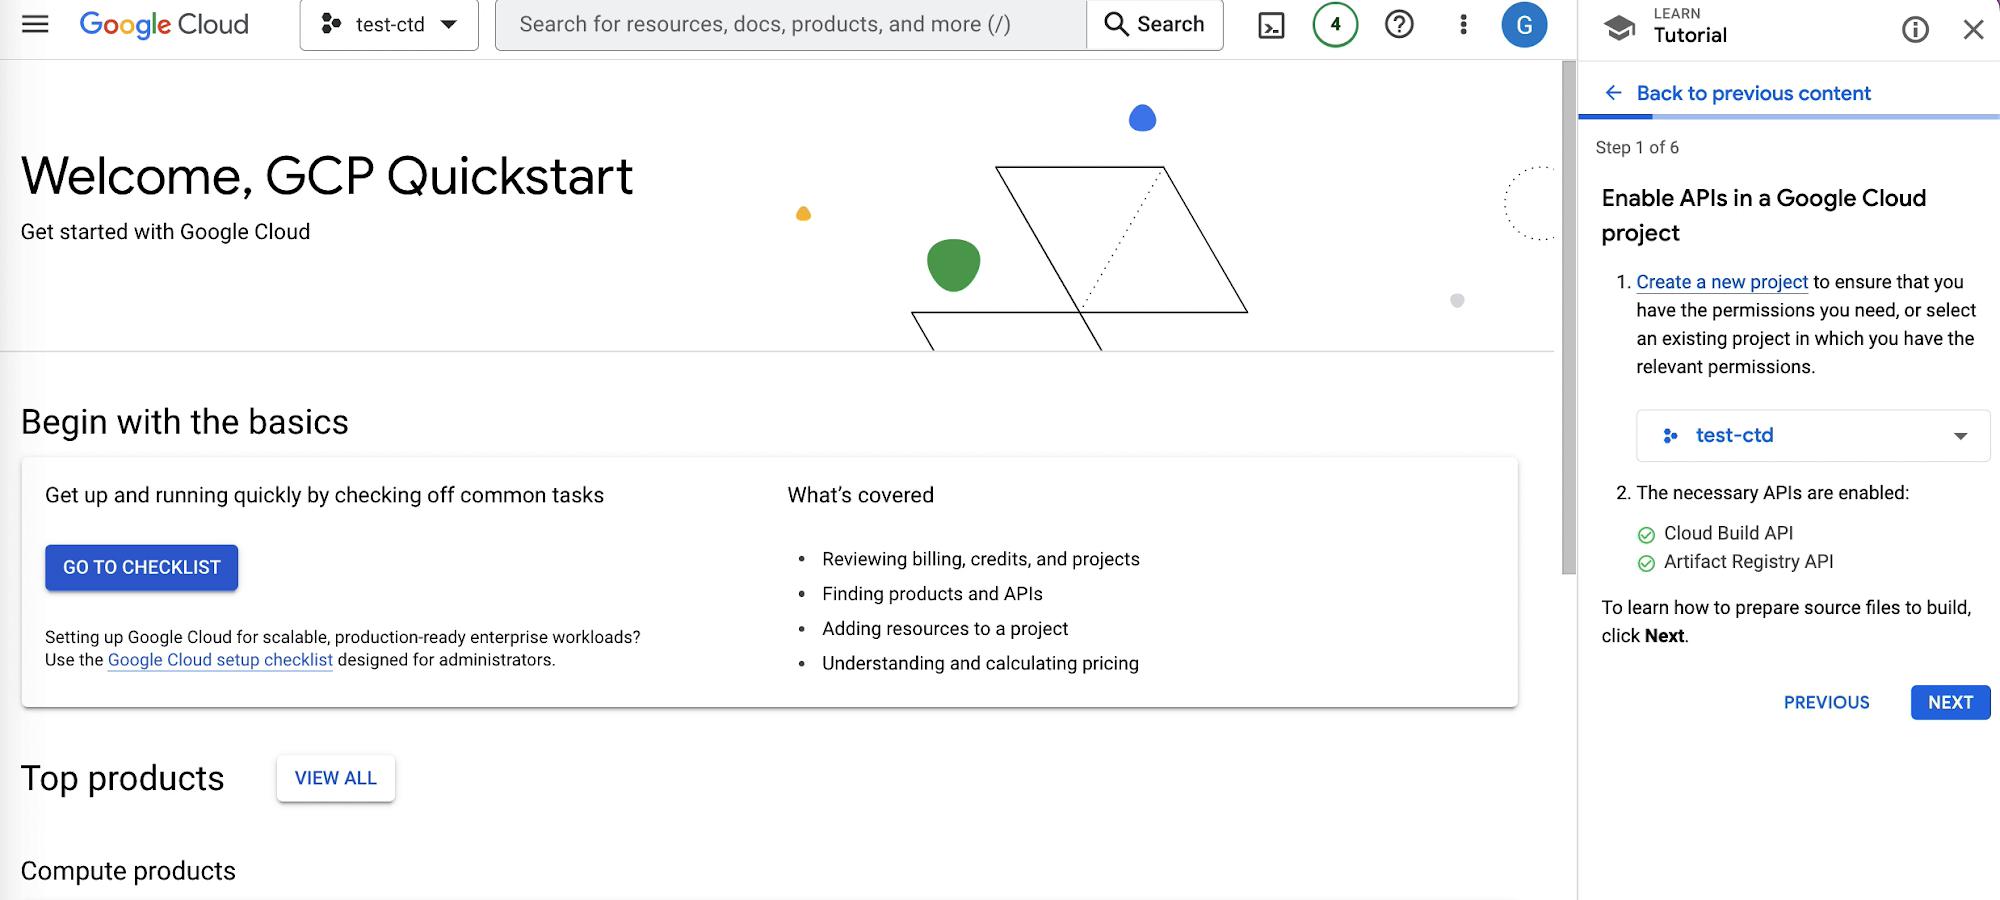
Enable APIs In Google Cloud Project
Step 2
The second step is to create the Windows Server VM instance. In the Google Cloud console navigate to Compute Engine > VM instances, this where you’ll be able to create VM instances from micro-VMs to larger instances like Debian, Windows or Linux.
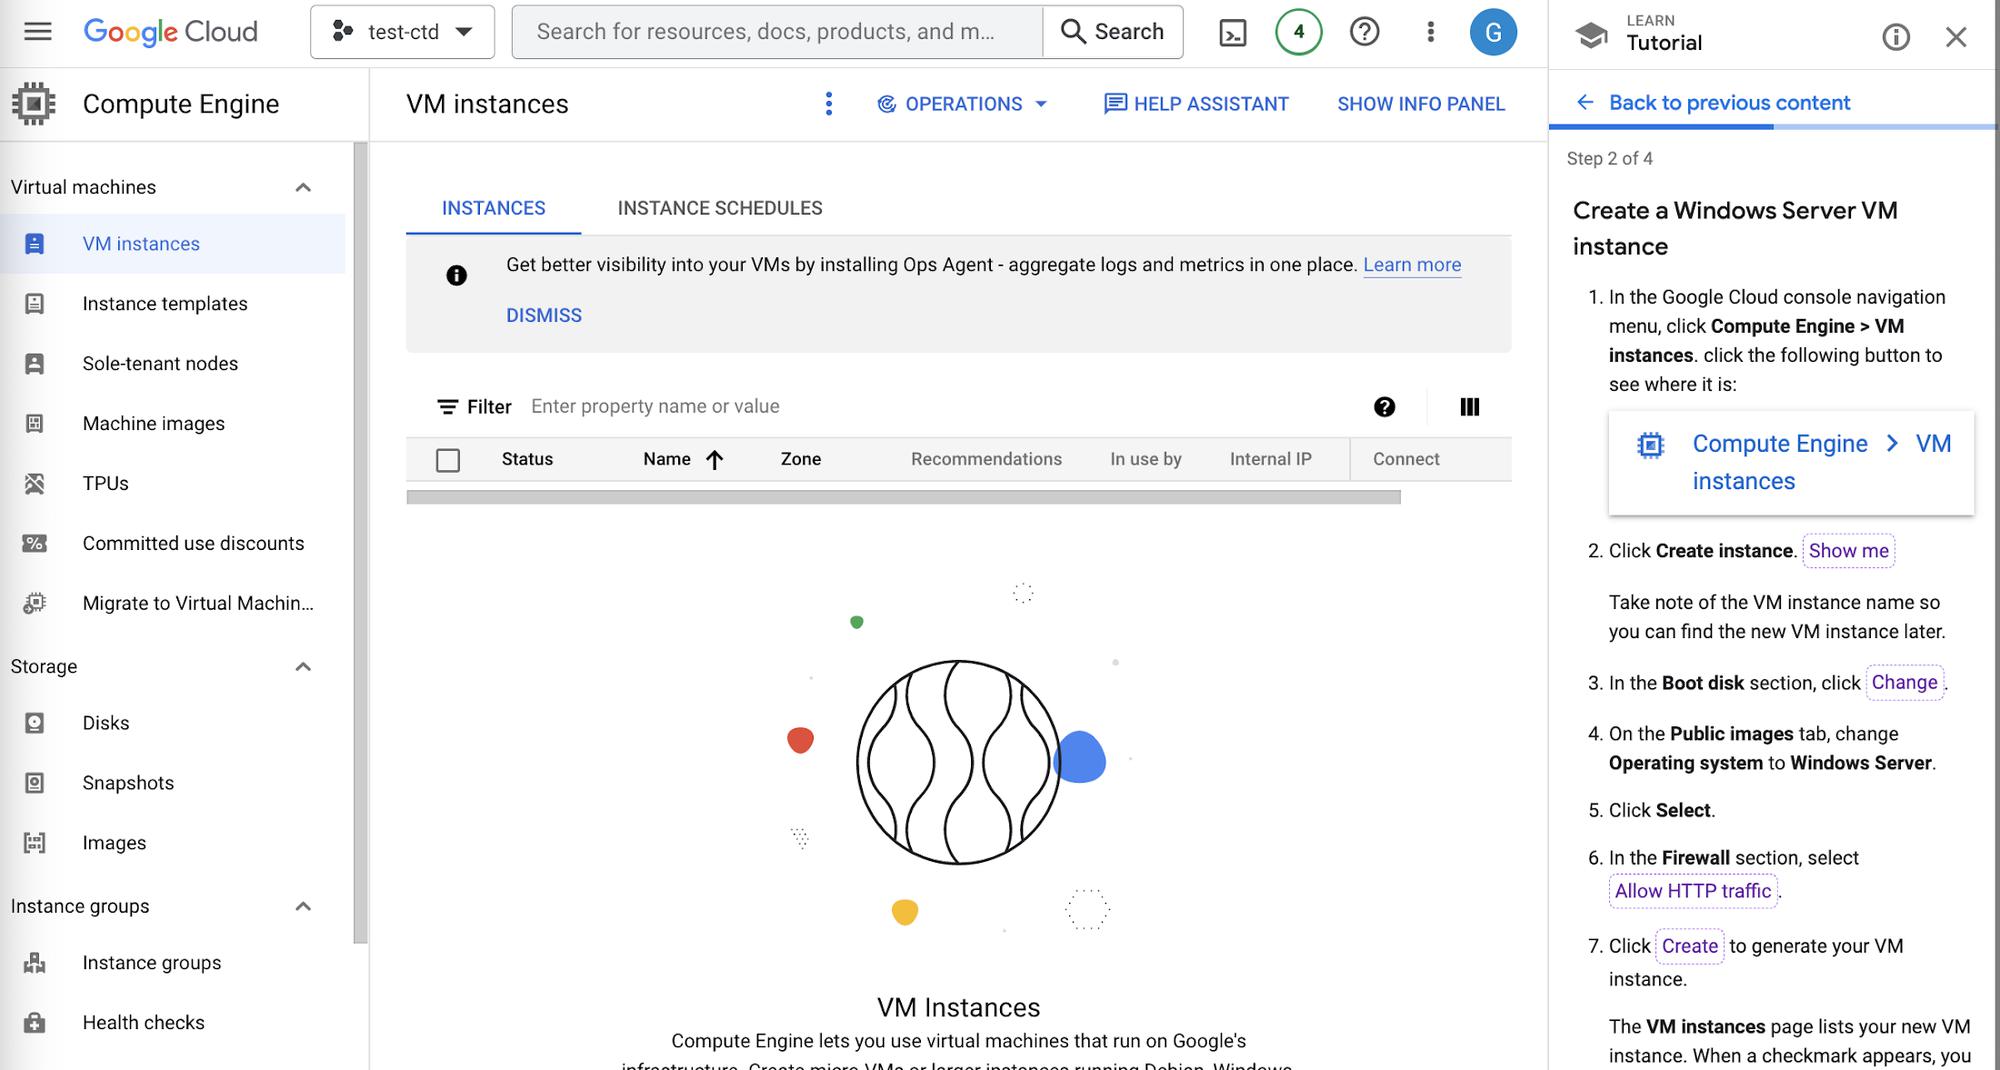
Create Instance Page
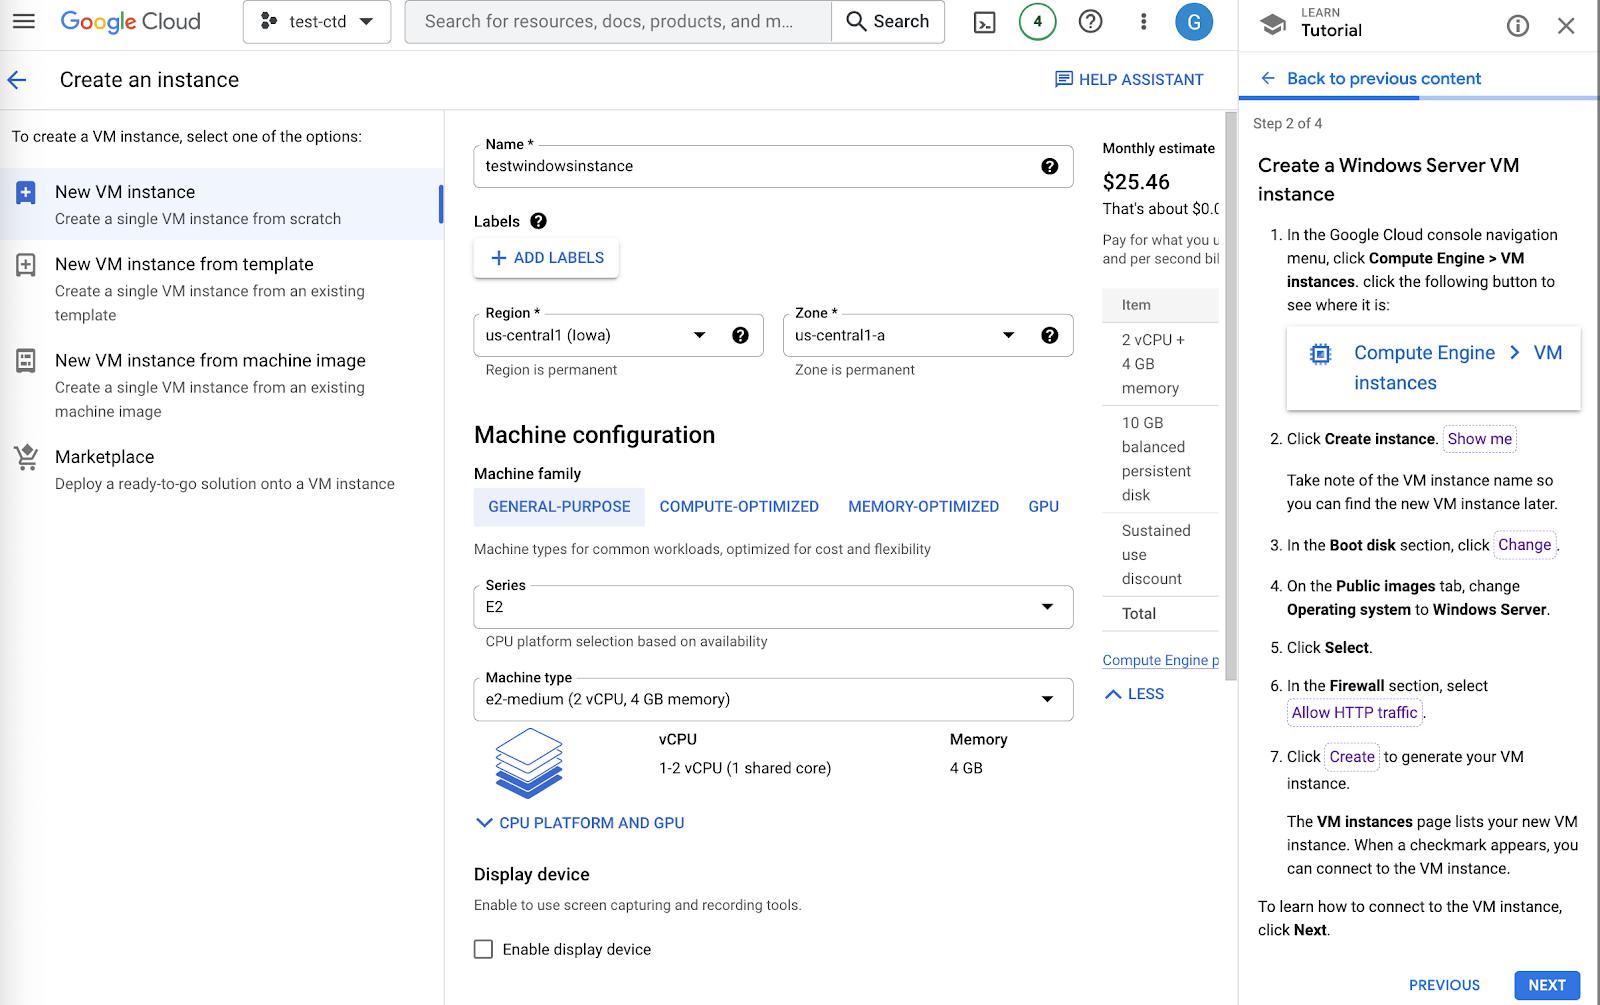
Name VM Instance
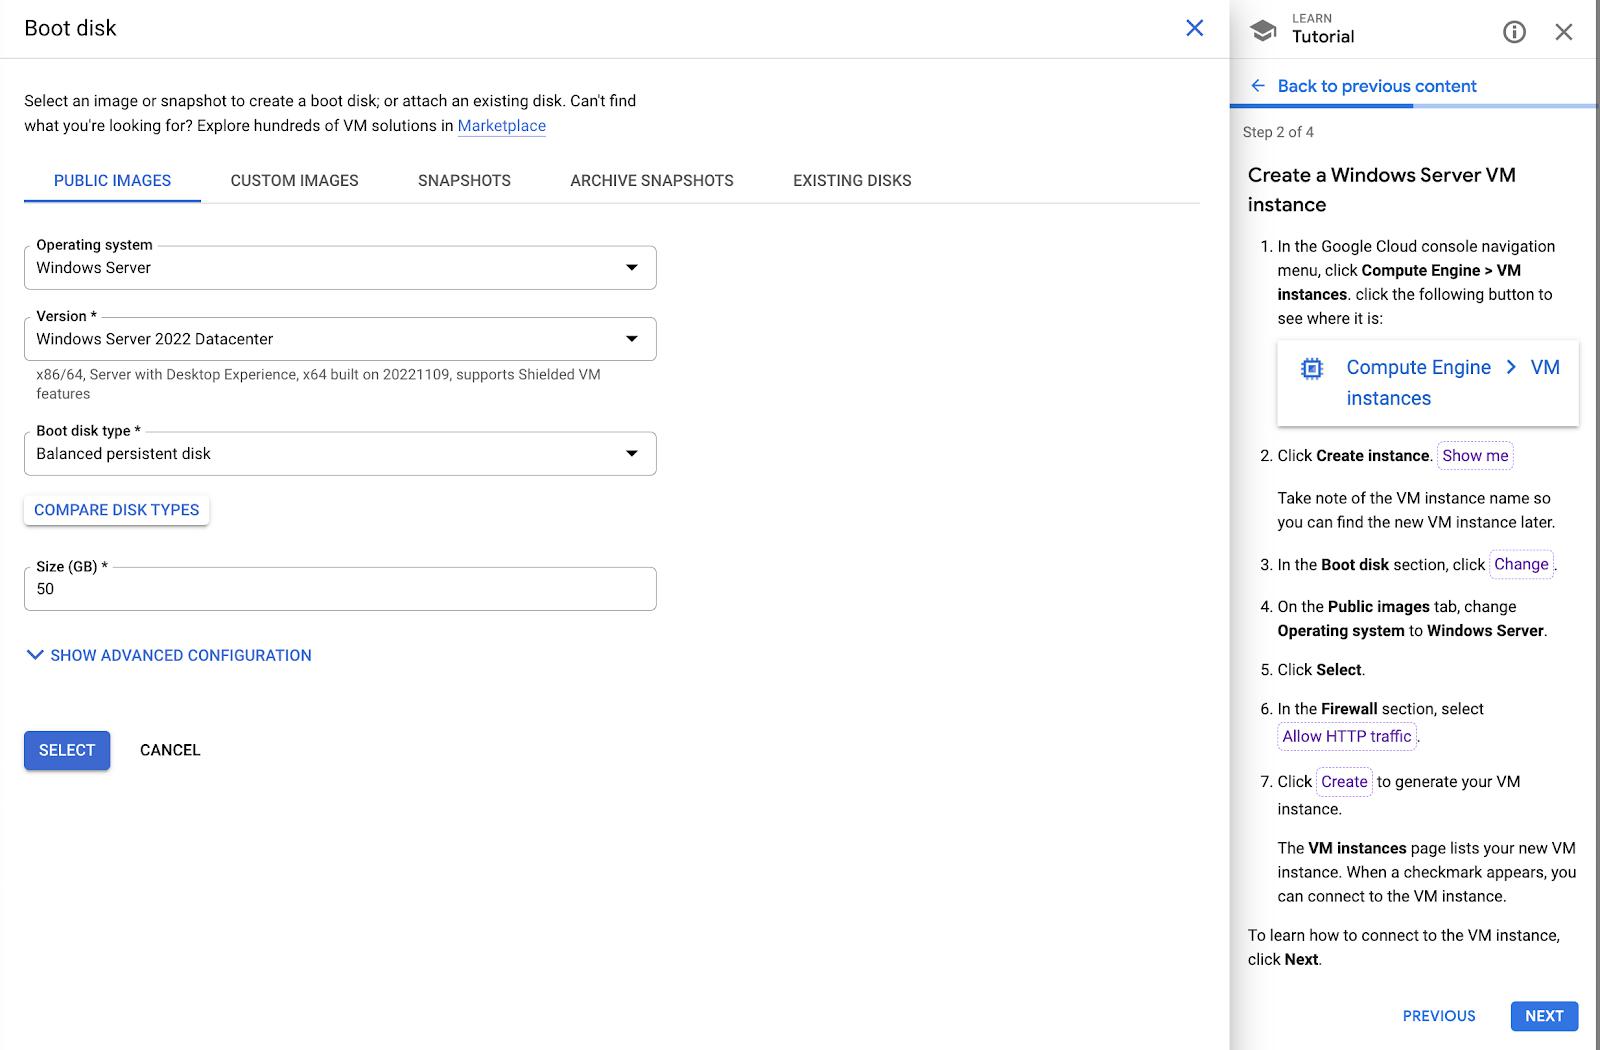
Choose Operating System
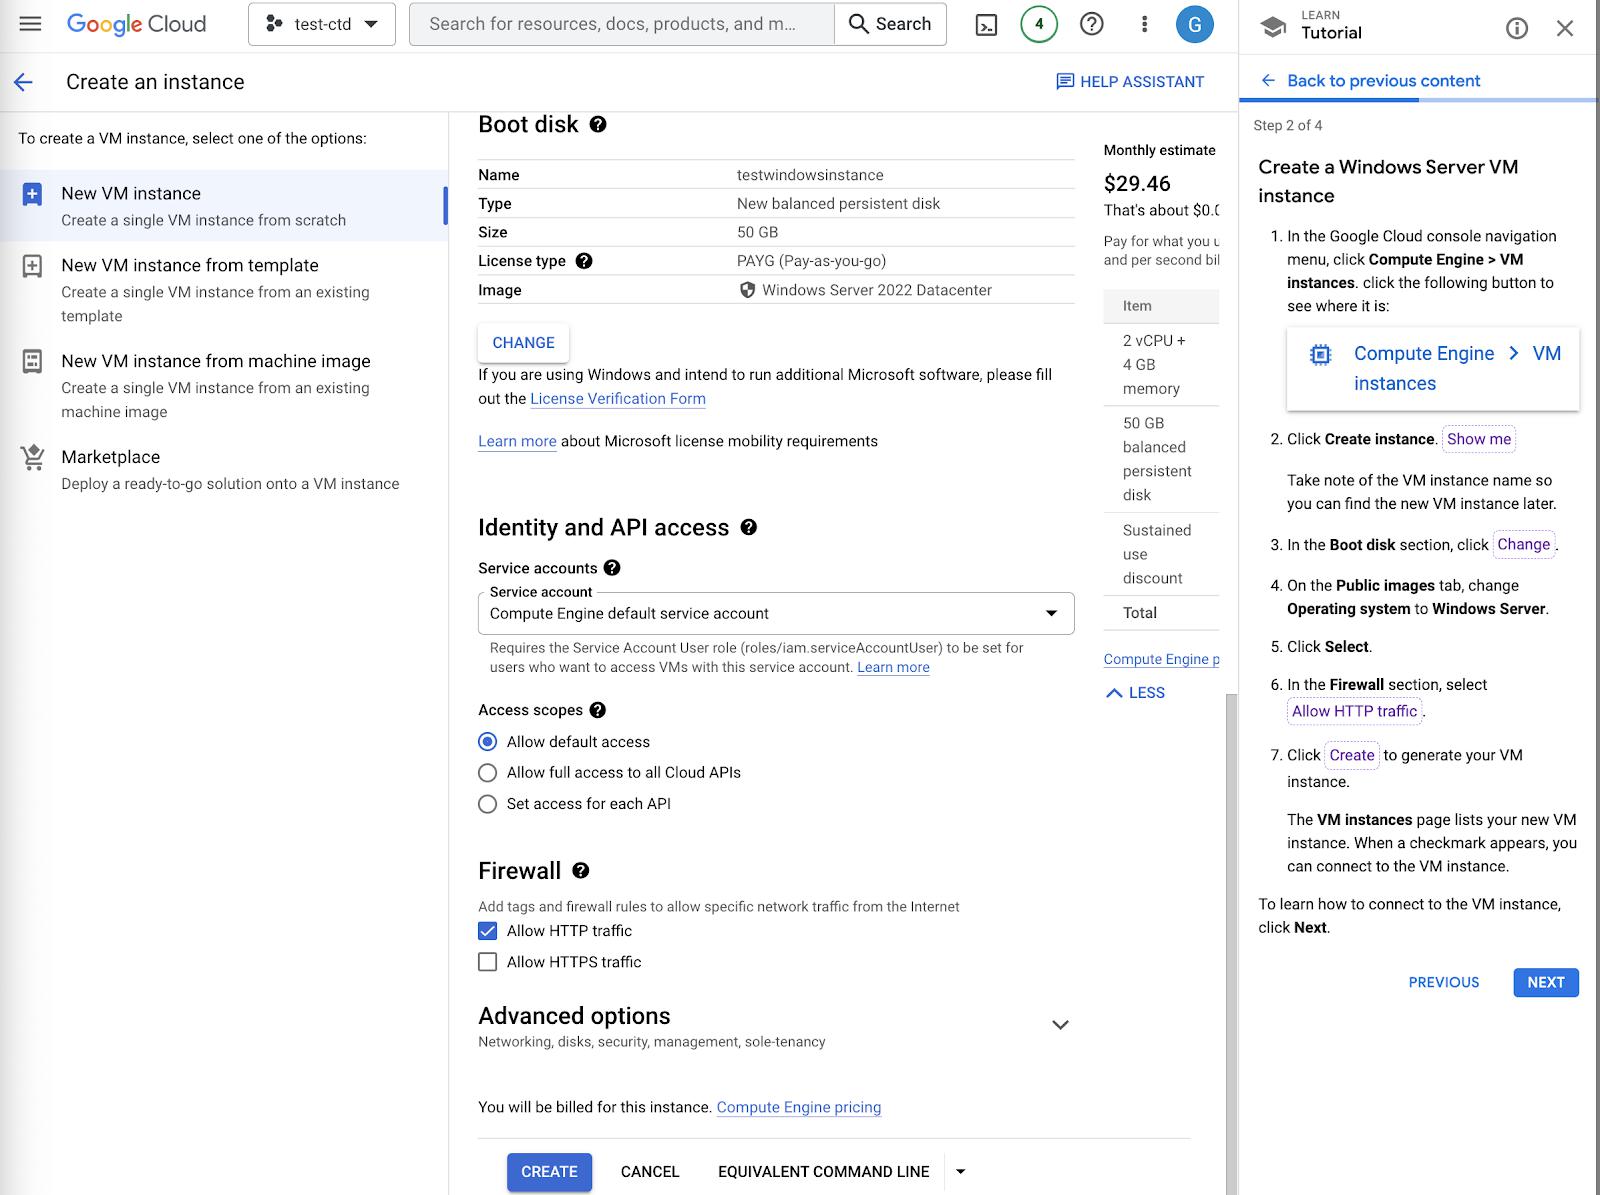
Allow HTTP Traffic
Step 3
With the Windows Server VM instance created, it’s time to connect to the VM instance. If there is a green check mark next to the Status, this indicates that the VM is running.

VM Instance Running

Setting Windows Passwords
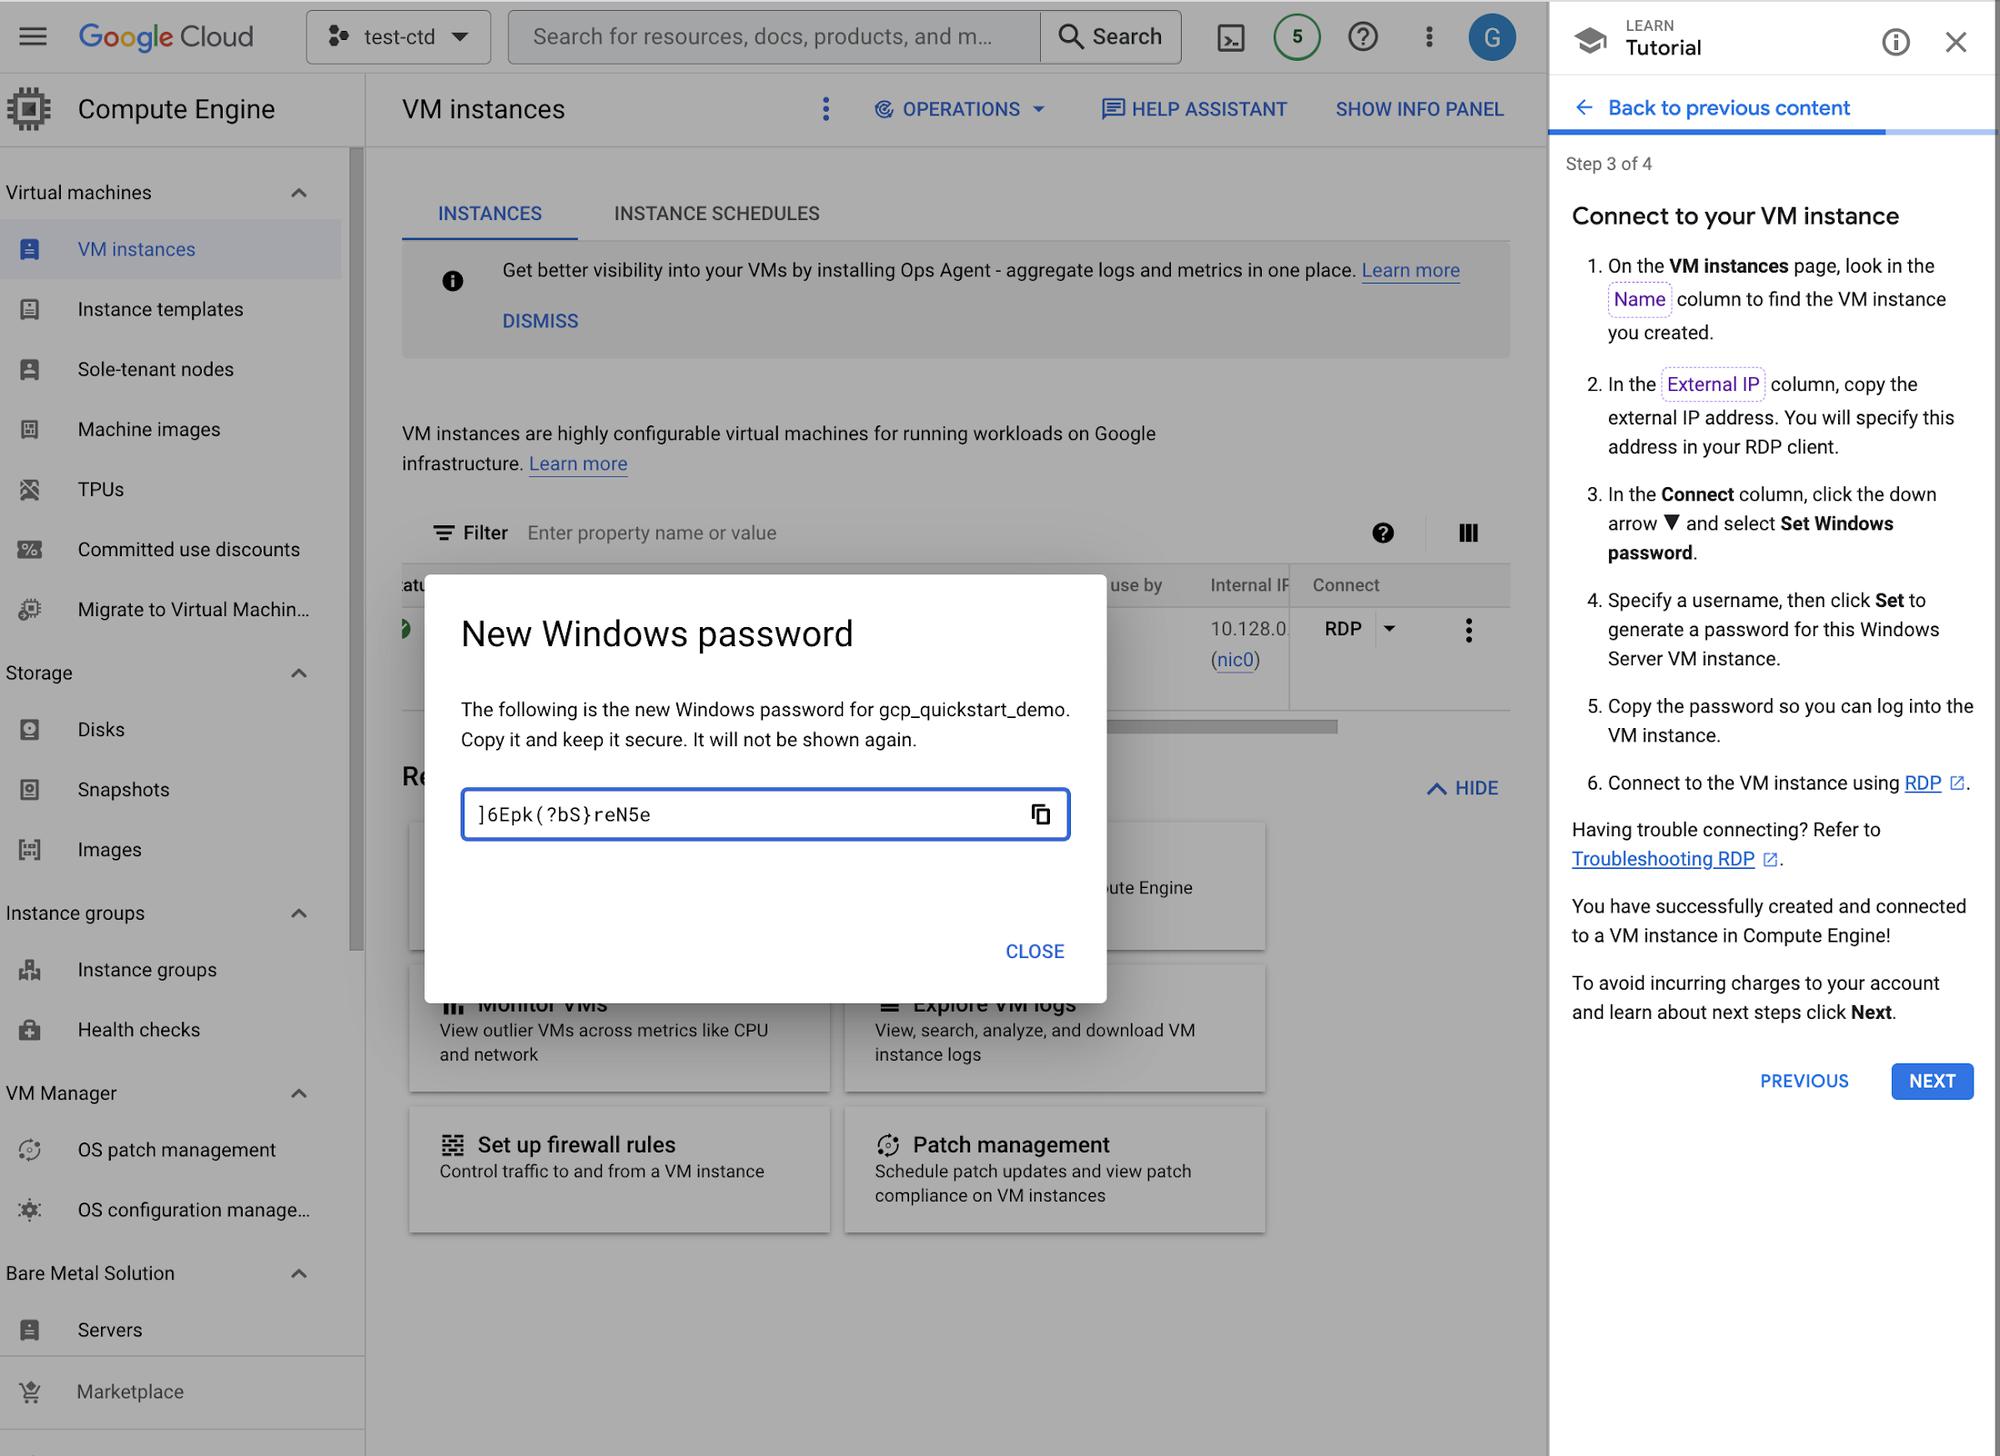
Generating Password
Step 4
For the final step, we will delete the VM instance created to prevent incurring charges. Return to Compute Engine > VM Instance to the side of the instance there is a menu icon that will open a menu bar that allows you to delete the instance. Click DELETE to remove the instance.

Delete Instance
In Conclusion
There you have it! You’ve created a Windows VM Instance in Compute Engine. If you’d like to follow an interactive tutorial, check out this Create a Linux VM instance in Compute Engine tutorial.
By: Bukola Ayodele (Developer Advocate)
Source: Google Cloud Blog
For enquiries, product placements, sponsorships, and collaborations, connect with us at [email protected]. We'd love to hear from you!
Our humans need coffee too! Your support is highly appreciated, thank you!