Install NextcloudPi on your Raspberry Pi in less than 30 minutes, synchronize your mobile devices with your own Nextcloud, and gain total digital sovereignty and privacy.
You can now say goodbye to big commercial cloud providers and manage your appointments, contacts, and other data in your own home network. Install NextcloudPi on your Raspberry Pi in less than 30 minutes, synchronize your mobile devices with your own Nextcloud, and gain total digital sovereignty and privacy!
From our partners:
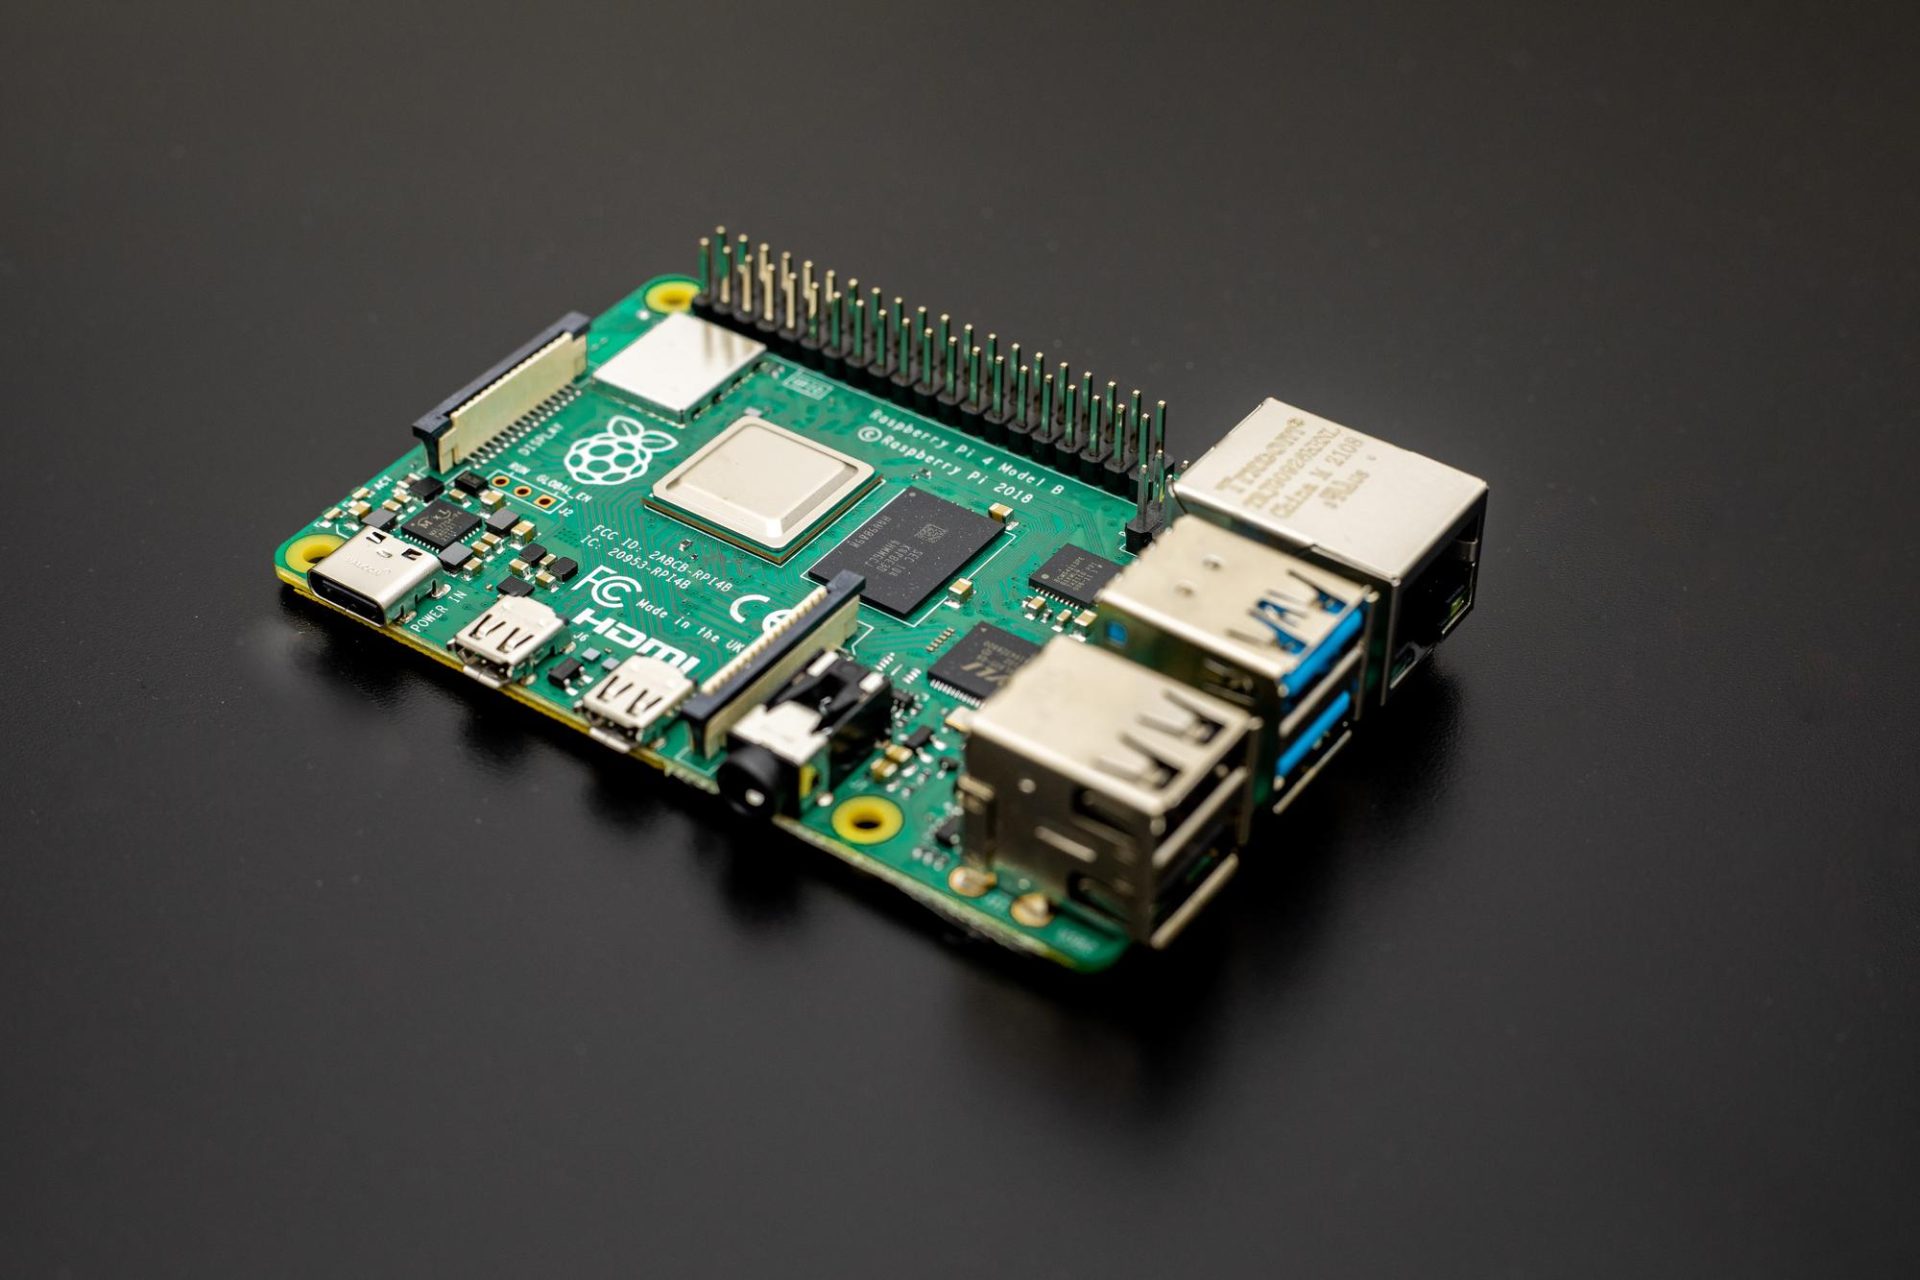
I remember when the first Raspberry Pi hit the market in 2012. My Linux friends and I were absolutely thrilled: a tiny computer, available for little money, but with enough computing power to be useful. It has a fully-fledged Linux system running on it, too! We started all sorts of DIY projects, set up media centers, web servers, blogs, control centers for our smart homes, and even a monitoring solution for bee hives.
Last year in December, I decided to install and run my own cloud on the Raspberry Pi. After some digging around, I settled on NextcloudPi, a ready-made instance of Nextcloud. The open source software runs not only on the Raspberry Pi, but on many other single-board computers and other operating systems.
This article shows how to install and configure NextcloudPi. I also explain how to secure the system and talk about different backup and restore methods.
In addition to this tutorial, you can check out how to synchronize data from Google Workspace and Apple iCloud with Nextcloud in my previous articles.
Prerequisites
To run NextcloudPi on a Raspberry Pi, you need at least a Raspberry Pi 2. However, newer models like the Raspberry Pi 3, Pi 3+, and especially the Raspberry Pi 4 are much faster. At my home, I use a Raspberry Pi 3, Model B+ with a 64 Bit quad-core processor (1,4 GHz) and 1 GB of RAM. Since I don’t use a graphical desktop environment, this equipment is completely sufficient for my purposes (maximum 10 users/devices).
What else do you need? Here is a checklist:
- A microSD card with 8 GB minimum capacity
- A computer to write the NextcloudPi image to the SD card
- An Ethernet cable (NextcloudPi also works via WLAN, but a direct connection is much more stable and faster)
- An optional additional external storage to store the data of your own cloud. This depends on the amount of data you have. You should choose a USB stick or an external hard drive of sufficient size
Normally, you don’t need a monitor or an external keyboard. After you have flashed the NextcloudPi image onto the SD card, the rest of the setup and operation is done with a web interface. You can also access the Raspberry Pi over SSH from Linux, Windows, and macOS. You can also access it from your mobile devices.
Nextcloud vs. NextcloudPi
Of course, you can always install Nextcloud on Raspberry Pi OS (formerly Raspbian) or another operating system on the mini computer. However, this means you have to install the operating system, set up a database server and a database — a complex task that scares off many beginners. The process is easier and faster with NextcloudPi. The open source project offers ready-made images for various single-board computers. It also has an installation script that allows you to set up your own cloud in no time at all.
NextcloudPi takes a lot of work off your hands. It installs and configures Nextcloud so that you can start right away. The developers have published a list of supported hardware/systems on their website. For example, Raspberry Pi (all models, there are also Berryboot images to run NextcloudPi directly from an external hard drive), Odroid, Rock64, RockPro64, Banana Pi, and so on. They also offer a container image that runs on all architectures and operating systems that run containers.
In addition to the current Nextcloud version, NextcloudPi includes a web server with a pre-configured database connection. An administration interface for the web browser is also included so that beginners can quickly find their way around. Those who prefer administration on the command-line can activate SSH access. NextcloudPi has a number of useful presets, including automatic HTTPS forwarding, HSTS (HTTP Strict-Transport-Security, a security mechanism for HTTPS connections), PHP extensions to improve performance, and more. The configuration wizard assists you with the first steps and the formatting of external USB media as well as access from outside using various Dynamic DNS services.
Nextcloud itself has a number of pre-installed apps, including a calendar, address book, dashboard, file sharing, PDF viewer, image and file management, notes and tasks, and Nextcloud Activities.
Flash the image to the SD card
The GitHub repository contains ready-made images for the Raspberry Pi and other devices. After downloading and unpacking the zip file, you can use the dd command on Linux or macOS to write the image to the SD card:
sudo dd bs=4M conv=fsync if=NextCloudPi[…].img of=/dev/mmcblkXX
Replace the device name of the SD card with the correct name. Be careful to choose the correct device name, because dd does not ask for confirmation!
Alternatively, you can use the open source program Etcher to write the image to the SD card. It runs on Linux, Windows, and macOS. Simply select the image on your hard drive (Flash from file) or enter the address of the NextcloudPi image in GitHub (Flash from URL). After that, click Select target, select the SD card, and Flash starts the writing process.

Boot and activate NextcloudPi
Insert the prepared SD card into the slot of the Raspberry Pi, connect the Ethernet cable to a free port on your network switch or router, and connect the Raspberry Pi to the power supply to boot it. First, you need to find out the IP address of the Raspberry Pi. This is how you access both the web interface for setting up NextcloudPi and Nextcloud itself.
If you are using a router equipped with a DHCP server, you can look in the router’s administration interface to see which address it has assigned to the Raspberry Pi.
Alternatively, use a network scanner like nmap on the command-line to find out the IP.
Open a web browser and enter the IP address or hostname of your Pi. This opens the configuration wizard. By default, NextcloudPi only has a self-signed SSL/TLS certificate that hasn’t been signed by a known certificate authority (CA). Most web browsers warn against such self-signed certificates. In this case, it’s safe to ignore the warning, accept the risk and continue.
Next, you see the NextcloudPi Activation screen. The web interface contains information about the two accounts it has created: one for the NextcloudPi administrator and one for Nextcloud. At this point, it’s a good idea to take notes or save the passwords in a password manager so you can change them later. Click on the Activate button, log in as the user ncp along with the associated password to start the configuration wizard.

NextcloudPi configuration wizard
The first time you navigate to your Pi in your browser, click the Run button to start the configuration wizard.

Switch to the USB Configuration tab to set up an external USB device (for example, an external hard disk or a USB stick) for the Nextcloud data. If the USB medium already has a suitable file system (Ext2, Ext3, Ext4 or Btrfs), you can continue by clicking Skip. Otherwise, instruct NextcloudPi with the Format USB button to format the disk with the Btrfs file system. Caution! Formatting erases all data on medium!
In the External access tab, you can set up NextcloudPi so that the system can be accessed from outside (the internet). At this point, I recommend selecting no. You can always connect various dynamic DNS services through the NextcloudPi NETWORKING menu. After this last step, the initial setup is complete. The Finish tab offers two links to access your new Nextcloud installation and the NextcloudPi dashboard:
- https://nextcloudpi.local: your Nextcloud
- https://nextcloudpi.local:4443: NextcloudPi administration interface
First steps in NextcloudPi
The NextcloudPi administration interface is very intuitive. The menu bar shows the version number, a language switcher, a search function, and icons that link to your own Nextcloud installation. You can also find information about the system, access existing backups and snapshots, display an overview of the Nextcloud configuration, log files, and re-start the configuration wizard. Use the icon on the far right to shut down or restart the operating system.
In the left sidebar, there are seven menus containing essential options for managing the NextcloudPi system:
- BACKUPS: (Automatic) backups, configure backup media, define a backup schedule, export and import the NextcloudPi configuration, create a snapshot of the Btrfs file system, restore existing backups
- CONFIG: Display and (re)set the password for the administrator account ncp, move the Nextcloud database to an external (USB) device, move the Nextcloud data directory, force secure HTTPS connections, restart Nextcloud with a clean configuration, and configure system limits
- NETWORKING: Activate NFS, SSH access, various DNS services and providers, TLS/SSL certificates with Let’s Encrypt, port forwarding for access from the outside, a static IP address, trusted proxy servers, and Samba
- SECURITY: Configure the firewall and the intrusion prevention system Fail2ban, and initiate a manual security check
- SYSTEM: Activate the monitoring for Prometheus and automatic mounting of USB devices, check the status of external hard disks and save the system logs in RAM to protect the SD card, define the size and location of the swap space, and activate compressed RAM to improve swap performance
- TOOLS: Uses various utilities for fixing permissions of Nextcloud data files, formatting USB drives (Btrfs file system) and switching Nextcloud’s maintenance mode on and off
- UPDATES: Enables automatic Nextcloud and NextcloudPi updates, notifications about new versions and regular updates of all installed Nextcloud apps, update the current instance to a new Nextcloud version, install NextcloudPi updates, and activate the automatic installation of security updates
Starting Nextcloud
You can log into your Nextcloud with the username ncp and the password displayed in the activation window. The Nextcloud dashboard offers quick access to certain files and folders, your calendar, and your online status (Online, Away, Do not disturb, and so on). You can also select your location for a weather forecast.
All installed Nextcloud apps are listed in the top menu bar: Files, Photos, Activity, Contacts, Calendar, Notes, and so on. If you select an app, a menu in the left sidebar provides filters and tasks associated with it. In the Files app, for example, you get search functions and filters that provide quick access to your own files and folders or those shared with you. In the Contacts app, on the other hand, there is a button for creating new contacts and managing groups and circles. At the bottom left, you can access the app’s settings.
All Nextcloud users can find their personal settings by clicking on the profile picture or the initials of the username in the top right corner. The administrator account ncp may also (un)install apps, manage user accounts, and perform other administrative tasks.

Before you start importing your address book and calendars, it’s a good idea to create a new user account without administrator privileges for your daily work. For security reasons, you should only use the ncp account when you change something in the configuration. This includes installing and updating Nextcloud apps, creating users and groups, and so on.
To create a new user, click on the icon with the N in the top right corner to open the settings and select the Users entry there. In the left sidebar, click the New user button, enter the username, first and last name, a password, and an email address. You can also add the account to an existing group. In the Default quota field, you can define how much hard disk space is granted to the user in the cloud.
Synchronize
Once you have Nextcloud up and running, you can synchronize your Android or Apple devices. You can read about how to do that in my previous articles, Switch from Google Workspace to Nextcloud and Switch from iCloud to Nextcloud.
Set access to your system
Even if you operate Nextcloud in the local network only and no services are accessible from the outside, it’s vital to consider additional security measures. Here are some suggestions:
- Activate SSH access: To enable SSH access for the Raspberry Pi, go to NETWORKING > SSH in the NextcloudPi web interface. Click the Active checkbox and enter a password for the pi account. Finally, click Apply to start the SSH service on the Raspberry Pi. By default, the password raspberry is set up for the user pi. You must change it to something different. After your first login through SSH, the system prompts you to change this password as well!
- Set up a Firewall: You can activate the firewall in the Security > UFW section. The Uncomplicated Firewall (UFW) is a frontend for the powerful but quite complex Netfilter firewall Iptables. The NextcloudPi developers simplify the setup by entering the three essential ports in the web interface that UFW should allow: 80 (HTTP), 443 (HTTPS), and 22 (SSH). Click Active and then Apply to start the firewall. In the dialogue window you can see messages from the operating system about added rules.
- Fail2ban: If you only use Nextcloud on your home network, you can do without the setup. If, on the other hand, Nextcloud is accessible from the Internet, then set up this additional protective measure via SECURITY / fail2ban. Fail2ban secures services against DoS attacks. For this purpose, the program blocks IP addresses after a certain number of failed connection attempts — first temporarily and then permanently.
- TLS/SSL Certificates: By default, NextcloudPi includes self-signed SSL/TLS certificates.This can lead to a warning. In the case of NextcloudPi in your local network, the warning is merely a technicality and you can define an exception for the respective web browser. Alternatively, you can generate valid TLS/SSL certificates with the Let’s Encrypt certification authority (or set up your own Certification Authority).
- Enable 2FA for Nextcloud: You can activate the two-factor authentication (2FA) through the menu Administration > Security. In the security section of the Nextcloud app catalog, there are numerous apps that set up a second factor for logging in — provided by an app or as hardware (with a YubiKey, for example). If you have enabled two-factor authentication, set up an app password under Personal > Security. You can use this password for authentication in the Apple or Android devices so that the synchronization of contacts and calendars succeeds. For security reasons, the password is only displayed once.
- Password Policies: You can also set up password policies for Nextcloud in Administration > Security. For example, you can define a minimum password length, the number of days until a user password expires, and the number of login attempts before an account gets blocked. Additionally, you can forbid common passwords and enforce combinations of upper and lower case, numeric, and special characters.

For the security of an operating system, it is essential to install security updates promptly. For NextcloudPi, there are a total of three different updates: NextcloudPi updates, Nextcloud updates, and the apps installed. There are also updates for the underlying operating system (Raspberry Pi OS). Use the menu Updates in the NextcloudPi interface to activate notifications about new versions, automatic updates, and manual updates of Nextcloud apps.
Backup and restore
Now that you have your own cloud, ideally within your own four walls — that’s the end of the setup. The article could end right here. It could, that is, if there weren’t one more essential topic to discuss: backups! The small SD cards in the Raspberry Pi are particularly prone to hardware defects compared to standard disks, but there can also be other reasons for hardware failure. NextcloudPi contains all the necessary tools to create automated backups and restore them in an emergency.
You can immediately back up your data at any time via the NextcloudPi web interface. To do this, open the nc-backup entry from the BACKUPS menu. The backups are better off on an external USB device than on the SD card — an external hard drive not only has more space but is also more reliable. To create a full backup that includes not only the NextcloudPi configuration but also the Nextcloud database, the Nextcloud apps and the users’ data (calendar, contacts, and other files), activate the Include data checkbox. Optionally compress the data by ticking the checkbox Compress. An alternative to the full backup is to simply export the NextcloudPi configuration via the menu entry BACKUPS > nc-export-ncp. This way you only save the NextcloudPi settings — without the Nextcloud database, its configuration, and user data.
To make things easier, you can activate automatic backups (BACKUPS > nc-backup-auto). Again, it’s up to you whether you want to include the users’ data and whether you want to compress the backups. In the default settings, NextcloudPi creates a full backup every seven days after clicking Apply. After four weeks, it overwrites the oldest version. Both methods, the manual backup and the automatic backup, have the advantage that they can be set up quickly. However, the backups can — depending on the amount of data in your Nextcloud — take up a large amount of space, even if they are compressed. As the amount of data grows, NextcloudPi also needs more time to create the backups. The cloud is in maintenance mode during this time and cannot be used.
As an alternative, you can create incremental backups by creating and synchronizing Btrfs snapshots. This backup method saves disk space and is significantly more performant than the other approaches. Especially for large amounts of data in the cloud. This variant has a real advantage: during the backup, Nextcloud does not have to be put into maintenance mode, so there is no downtime. The B-tree FS (also called Butter FS) is a so-called Copy-On-Write file system (COW) and allows snapshots of the current data to be created from the running system. These are frozen images of a subvolume at the time of creation. They do not require any additional disk space.
Please note: To do this, the Nextcloud data directory must be moved from the SD card (or another data medium) to a USB drive with a Btrfs file system. You may have already configured this in the configuration wizard, otherwise you can move the data:
- Format the external USB drive with the Btrfs file system (TOOLS > nc-format-USB).
- Move the Nextcloud data directory to the external USB disk (CONFIG > nc-datadir). You should see the message
The NC data directory has been moved successfullyin the window below. - As a test, you can now create a snapshot (BACKUPS > nc-snapshot) before activating the automatic snapshots feature.
- To create the snapshots automatically, open the nc-snapshot-auto entry from the BACKUPS menu, check Active and click Apply. NextcloudPi now automatically creates a Btrfs snapshot of the Nextcloud data directory every hour.
The newly cloned directories only ever take up as much additional storage space as new files have been added since the last snapshot — so the whole thing is extremely efficient in terms of space. You can incrementally send the snapshots to another Btrfs file system. NextcloudPi supports you with the setup (BACKUPS > nc-snapshot-sync). You can choose either another external drive or a directory on a remote computer. This must be accessible over SSH (without a password) and the disk must also be formatted with Btrfs.
After you have set up your backup strategy, you should always test whether you can restore your data with the NextcloudPi web interface. For almost all methods presented here, there is a corresponding menu item for recovery:
- nc-import-ncp: import your NextcloudPi configuration
- nc-restore-snapshot: restore a specific snapshot
- nc-restore: restore a full backup of your Nextcloud

Explore Nextcloud
There is an active Nextcloud community out there:
- Nextcloud forum
- NextcloudPi topics in the Nextcloud forum
- Bug reports and feature requests for NextcloudPi
- Matrix chat
The NextcloudPi developers have put together a website explaining which questions are best asked where.
NextcloudPi offers a cost-effective and robust alternative to commercial cloud providers. By installing it on a Raspberry Pi, you can have control over your data and ensure privacy. With its compatibility with Android and Apple devices, it makes it easy to synchronize your appointments, contacts, and other data. The installation process is straightforward and can be completed in under 30 minutes. By taking the necessary steps to secure the system and implementing backup and restore methods, you can have peace of mind knowing your data is safe.
For more in-depth information on NextcloudPi, you can check out my book Nextcloud on the Raspberry Pi: Set up your own cloud with NextcloudPi. It provides a comprehensive guide to setting up and using NextcloudPi, and will help you get the most out of your personal cloud solution — take the first step towards digital sovereignty!
This article has been adapted from Heike Jurzik’s book, Nextcloud on the Raspberry Pi.
By: Heike Jurzik
Originally published at Opensource
Source: Cyberpogo
For enquiries, product placements, sponsorships, and collaborations, connect with us at [email protected]. We'd love to hear from you!
Our humans need coffee too! Your support is highly appreciated, thank you!