aster.cloud aster.cloud
  • /
  • Platforms
    • Public Cloud
    • On-Premise
    • Hybrid Cloud
    • Data
  • Architecture
    • Design
    • Solutions
    • Enterprise
  • Engineering
    • Automation
    • Software Engineering
    • Project Management
    • DevOps
  • Programming
    • Learning
  • Tools
  • About
  • /
  • Platforms
    • Public Cloud
    • On-Premise
    • Hybrid Cloud
    • Data
  • Architecture
    • Design
    • Solutions
    • Enterprise
  • Engineering
    • Automation
    • Software Engineering
    • Project Management
    • DevOps
  • Programming
    • Learning
  • Tools
  • About
aster.cloud aster.cloud
  • /
  • Platforms
    • Public Cloud
    • On-Premise
    • Hybrid Cloud
    • Data
  • Architecture
    • Design
    • Solutions
    • Enterprise
  • Engineering
    • Automation
    • Software Engineering
    • Project Management
    • DevOps
  • Programming
    • Learning
  • Tools
  • About
  • DevOps
  • Programming

How To: Create A Flask / API Project In Windows

  • root
  • May 24, 2019
  • 1 minute read

Prerequisites

  • Operating System: Windows 7 and above
  • Python 3.7 or greater installed
  • Python Pip is installed
  • Python Virtual Environment is installed (Optional)


Structure Overview


|__ geek_flask_api

  |__ api

    |__ res

      |__ __init__.py

      |__ application_res.py

    |__ __init__.py

  |__ app_wsgi.py

  |__ runserver.py

  |__ requirements.txt

  |__ README.md


Partner with aster.cloud
for your next big idea.
Let us know here.


From our partners:

CITI.IO :: Business. Institutions. Society. Global Political Economy.
CYBERPOGO.COM :: For the Arts, Sciences, and Technology.
DADAHACKS.COM :: Parenting For The Rest Of Us.
ZEDISTA.COM :: Entertainment. Sports. Culture. Escape.
TAKUMAKU.COM :: For The Hearth And Home.
ASTER.CLOUD :: From The Cloud And Beyond.
LIWAIWAI.COM :: Intelligence, Inside and Outside.
GLOBALCLOUDPLATFORMS.COM :: For The World's Computing Needs.
FIREGULAMAN.COM :: For The Fire In The Belly Of The Coder.
ASTERCASTER.COM :: Supra Astra. Beyond The Stars.
BARTDAY.COM :: Prosperity For Everyone.

Steps

01. Create the necessary directories and files.


|__ geek_flask_api

  |__ api

    |__ res

      |__ __init__.py

      |__ application_res.py

    |__ __init__.py

  |__ app_wsgi.py

  |__ runserver.py

  |__ requirements.txt

  |__ README.md


02. Update the necessary Python library/packages by setting the value of the geek_flask_api\requirements.txt


flask


03. (Optional but recommended). Create a virtual environment dedicated to the Flask/API project.

For instructions on how to install and configure virtual environment. Check this post.


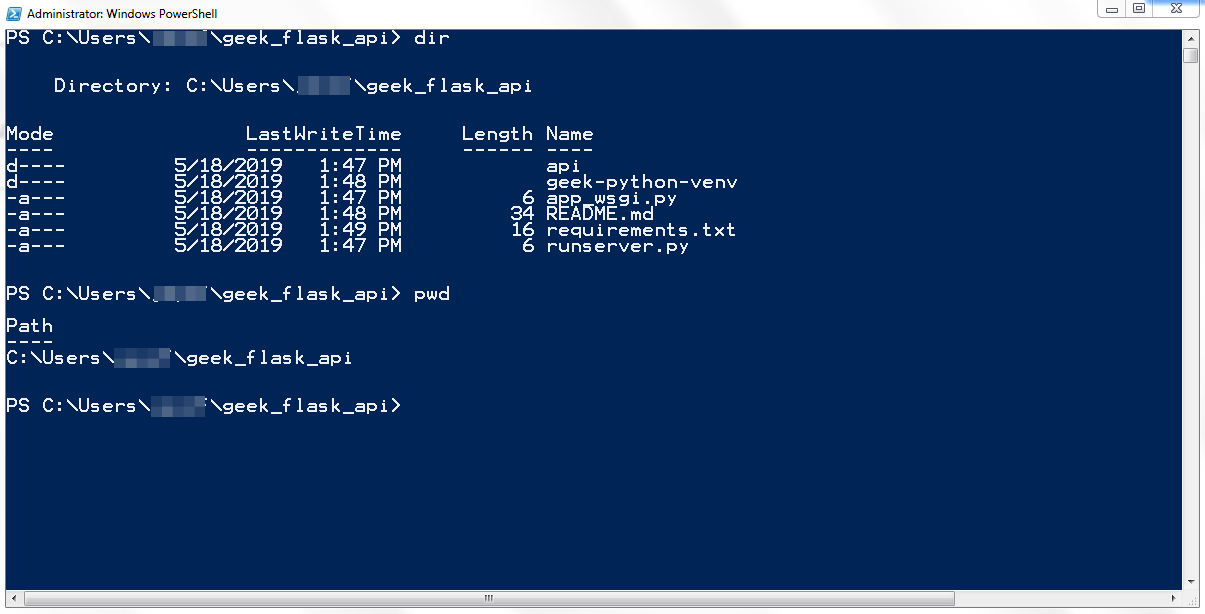
$ cd ~

$ cd geek_flask_api

$ virtualenv geek-python-venv

The directory structure should look something like below


04. Activate the Virtual Environment.


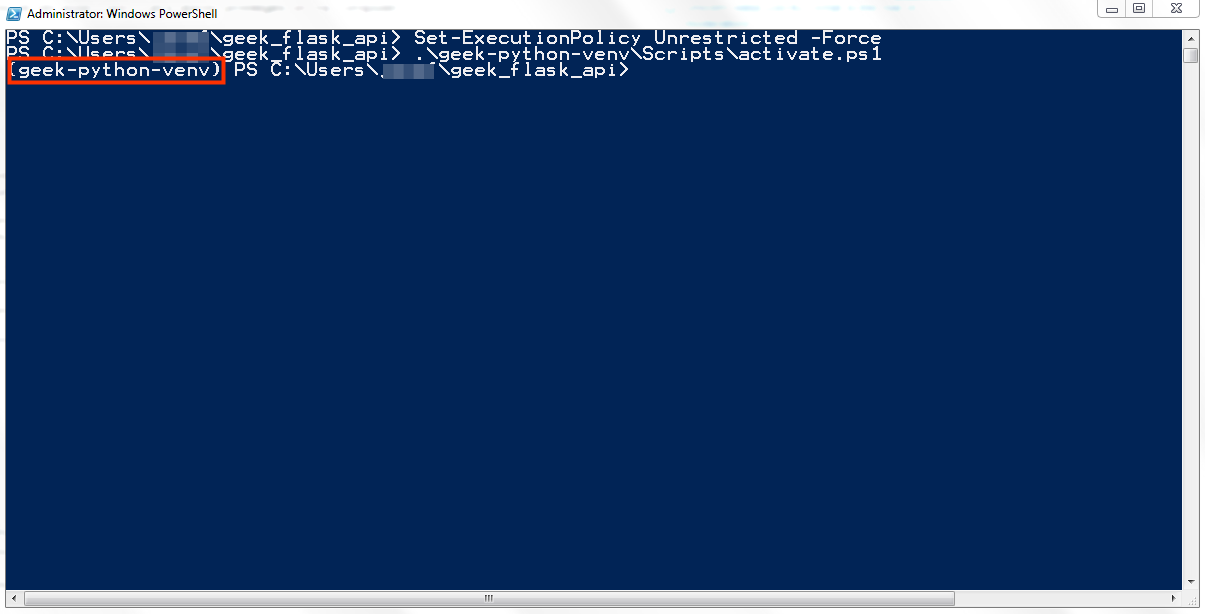
# Need to execute this beforehand to enable to run activate shell script

$ Set-ExecutionPolicy Unrestricted -Force

$ .\geek-python-venv\Scripts\activate.ps1

Notice that the command prompt has changed to include virtual environment


05. Install the flask library via Pip using the requirements.txt


(geek-python-venv) $ pip install -r .\requirements.txt


06. Update the content of geek_flask_api\runserver.py using the editor of your choice and set the content as follows


# -*- coding: utf-8 -*-

# Start Flask with default web server

from api import application

application.run(host='127.0.0.1', port=8888, debug=True)


07.Update the dunder geek_flask_api\api\__init__.py python file. This imports the res python module, the endpoints will be located at the application_res or other res (Resource) python file.


from flask import Flask

application = Flask(__name__)

import api.res.application_res


08. Update the geek_flask_api\api\res\application_res.py


# -*- coding: utf-8 -*-

from flask import jsonify

from api import application

@application.route('/', methods=['GET'])

def get_app_properties():

  name = 'geek-flask-api'
  version = '0.0.1'

  app_properties = \
  {
    'name' : name
    , 'version' : version
  }

  return jsonify(app_properties)

Above will create a GET endpoint accessible by the root path, (/).

Read More  How To Setup A Django Web App Project Using CLI


09. Run the application


(geek-python-venv) $ python runsever.py

It should show something similar


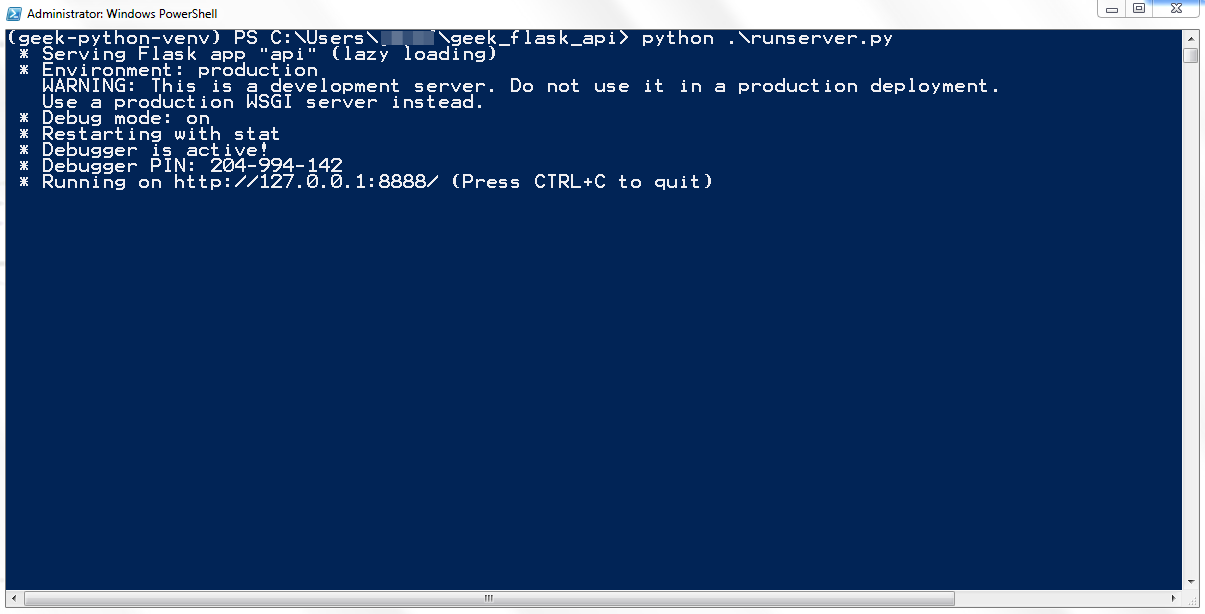
Note that running the application via this way (runserver.py) should only be used on local development. If needed to deploy on a Web Application server, a middleware or WSGI server should be used instead.


10. Test the application on the browser.


http://localhost:8888


For enquiries, product placements, sponsorships, and collaborations, connect with us at [email protected]. We'd love to hear from you!

Our humans need coffee too! Your support is highly appreciated, thank you!

root

Related Topics
  • Flask
  • How To
  • Python
You May Also Like
View Post
  • DevOps
  • Engineering
  • Platforms

How To Fail At Platform Engineering

  • March 11, 2024
View Post
  • Computing
  • DevOps
  • Platforms

The IBM Approach To Reliable Quantum Computing

  • November 28, 2023
DevOps artifact management
View Post
  • Design
  • DevOps
  • Engineering

10 Awesome Benefits Of Artifact Management And Why You Need It

  • August 2, 2023
Automation | Gears
View Post
  • Automation
  • DevOps
  • Engineering

Automating CI/CD With GitHub Actions

  • June 13, 2023
View Post
  • Architecture
  • Data
  • Engineering
  • People
  • Programming
  • Software Engineering
  • Technology
  • Work & Jobs

Predictions: Top 25 Careers Likely In High Demand In The Future

  • June 6, 2023
View Post
  • DevOps
  • People

What’s The Future Of DevOps? You Tell Us. Take The 2023 Accelerate State Of DevOps Survey

  • June 2, 2023
View Post
  • Programming
  • Software Engineering
  • Technology

Build a Python App to Alert You When Asteroids Are Close to Earth

  • May 22, 2023
View Post
  • Programming

Illuminating Interactions: Visual State In Jetpack Compose

  • May 20, 2023

Stay Connected!
LATEST
  • college-of-cardinals-2025 1
    The Definitive Who’s Who of the 2025 Papal Conclave
    • May 7, 2025
  • conclave-poster-black-smoke 2
    The World Is Revalidating Itself
    • May 6, 2025
  • 3
    Conclave: How A New Pope Is Chosen
    • April 25, 2025
  • Getting things done makes her feel amazing 4
    Nurturing Minds in the Digital Revolution
    • April 25, 2025
  • 5
    AI is automating our jobs – but values need to change if we are to be liberated by it
    • April 17, 2025
  • 6
    Canonical Releases Ubuntu 25.04 Plucky Puffin
    • April 17, 2025
  • 7
    United States Army Enterprise Cloud Management Agency Expands its Oracle Defense Cloud Services
    • April 15, 2025
  • 8
    Tokyo Electron and IBM Renew Collaboration for Advanced Semiconductor Technology
    • April 2, 2025
  • 9
    IBM Accelerates Momentum in the as a Service Space with Growing Portfolio of Tools Simplifying Infrastructure Management
    • March 27, 2025
  • 10
    Tariffs, Trump, and Other Things That Start With T – They’re Not The Problem, It’s How We Use Them
    • March 25, 2025
about
Hello World!

We are aster.cloud. We’re created by programmers for programmers.

Our site aims to provide guides, programming tips, reviews, and interesting materials for tech people and those who want to learn in general.

We would like to hear from you.

If you have any feedback, enquiries, or sponsorship request, kindly reach out to us at:

[email protected]
Most Popular
  • 1
    IBM contributes key open-source projects to Linux Foundation to advance AI community participation
    • March 22, 2025
  • 2
    Co-op mode: New partners driving the future of gaming with AI
    • March 22, 2025
  • 3
    Mitsubishi Motors Canada Launches AI-Powered “Intelligent Companion” to Transform the 2025 Outlander Buying Experience
    • March 10, 2025
  • PiPiPi 4
    The Unexpected Pi-Fect Deals This March 14
    • March 13, 2025
  • Nintendo Switch Deals on Amazon 5
    10 Physical Nintendo Switch Game Deals on MAR10 Day!
    • March 9, 2025
  • /
  • Technology
  • Tools
  • About
  • Contact Us

Input your search keywords and press Enter.