Overview
This guide shows how to create the following resources in Microsoft Azure via the Azure Portal.
- Resource Group
- Virtual Network
- Virtual Machine
From our partners:
Prerequisites
- Azure account with access rights to create the following resources
- Resource Group
- Virtual Network
- Virtual Machine
Resource Group
Here are some considerations when naming and creating a Resource Group
- All resources belonging in the group should share the same lifecycle. Example if you create a resource group for Testing environment that has a Database and Virtual Machine(s), they should be deployed, updated and deleted together.
- A resource can existing only in one resource group. To manage or identity resources you can use Tagging.
- Resources in a group can be added or removed anytime.
- Resource group can contain resources from a different region.
- Resource group metadata are stored in a specific location. This is important if there are compliance requirements that needs data to be located in specific places only.
01: Login to Azure portal at https://azure.microsoft.com
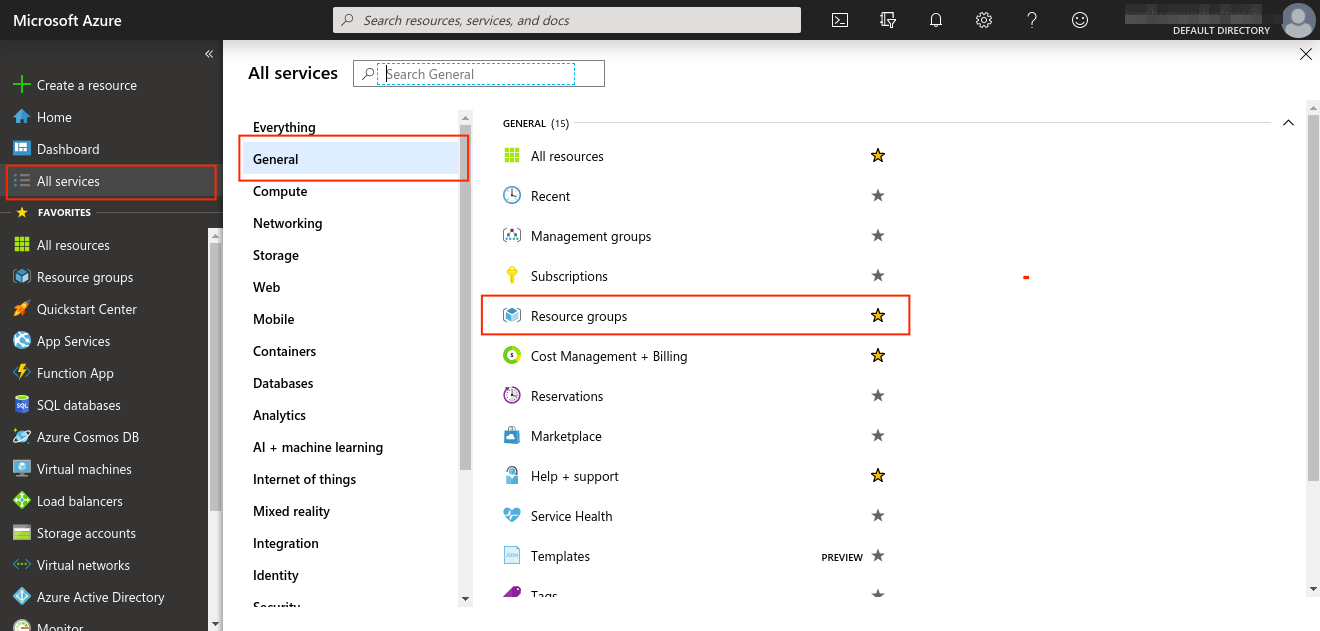
02: From the sidebar, select All Services > General > Resource groups.
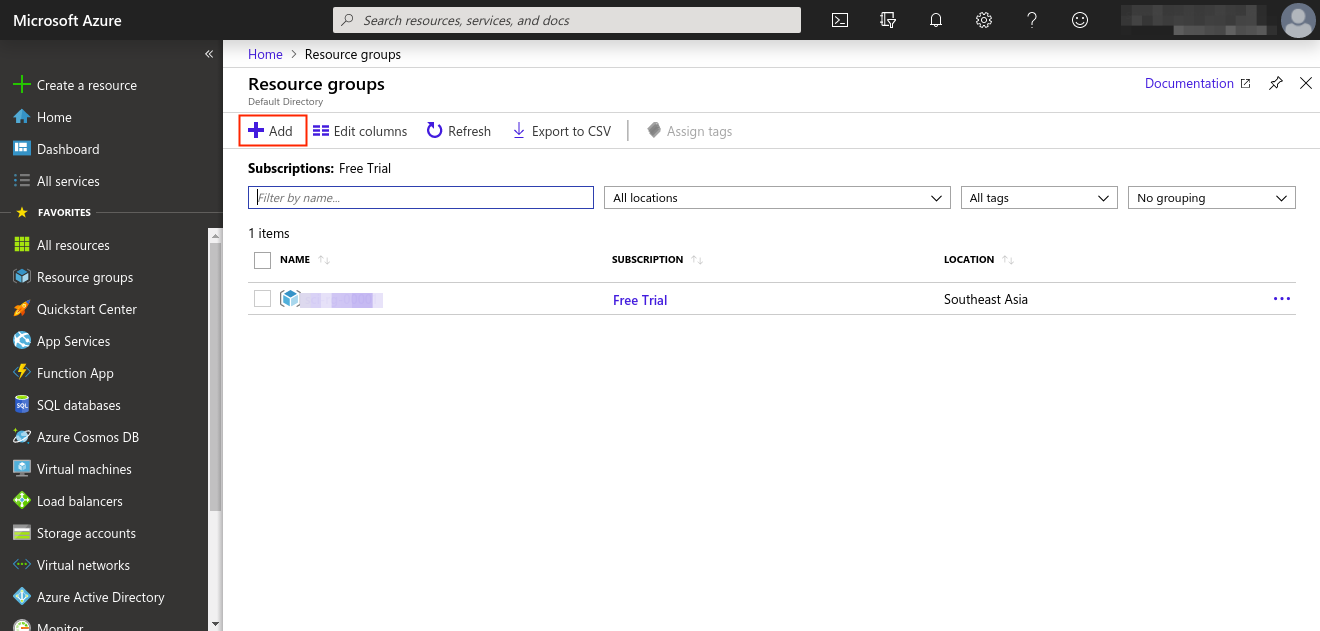
03: The resource group main page will be displayed. It shows any existing Resource group. Select the “+ Add” button to create a Resource group.
04: Fill up the required details.
| Subscription | {{your-subscription}} |
| Resource group (name) | rg-geek-test |
| Region
(This will be where the metadata will be stored) |
(Asia Pacific) Southeast Asia |
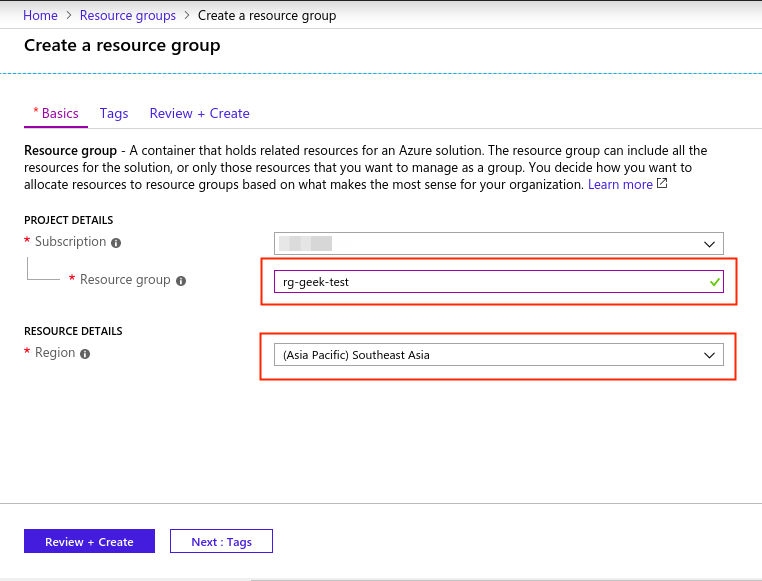
05: Then select “Next: Tags” if you want to add tags to the resource group. Tags are useful as another way of grouping resources. In this example, we will skip tags by selecting the “Review + Create” button.
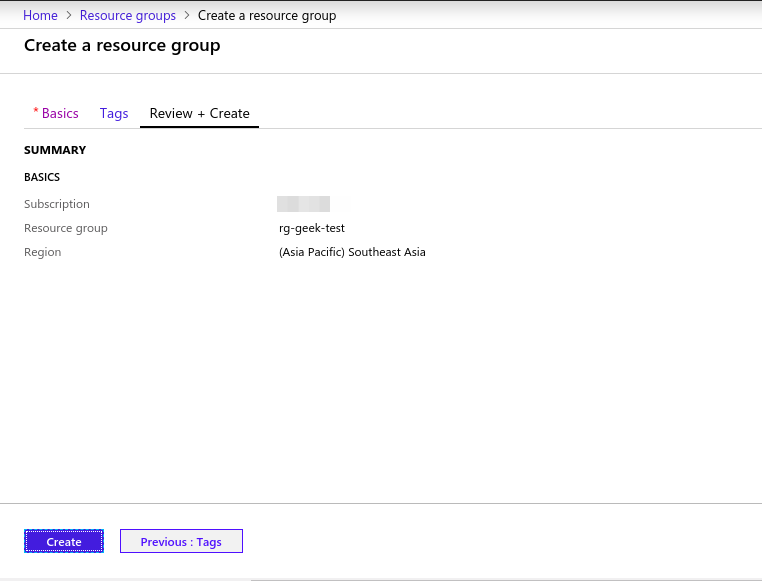
06: A summary of the previous step(s) will be shown. Select the “Create” button to setup the Resource group.
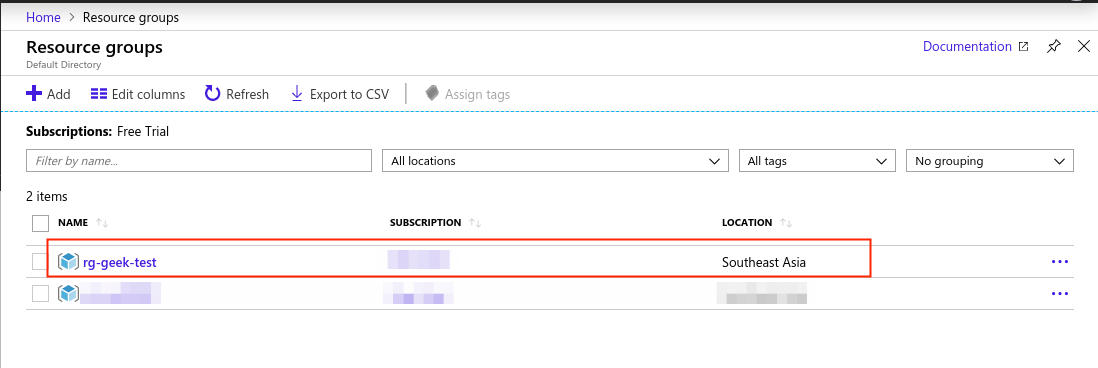
07: The resource group should now be visible in the Resource group page.
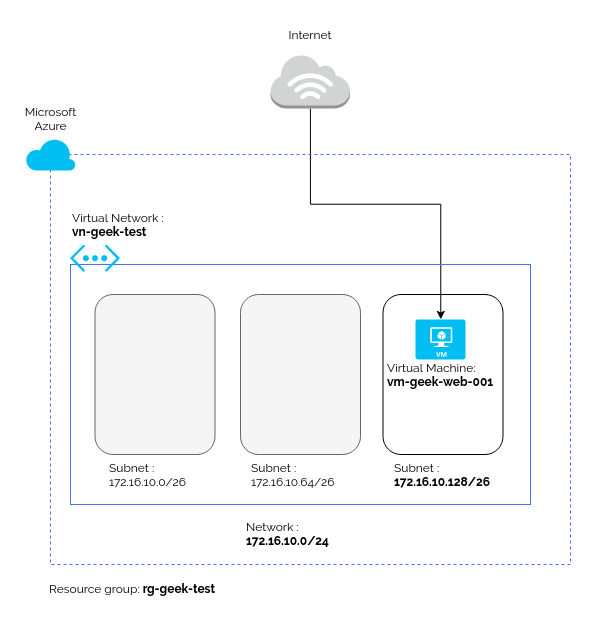
Virtual Network
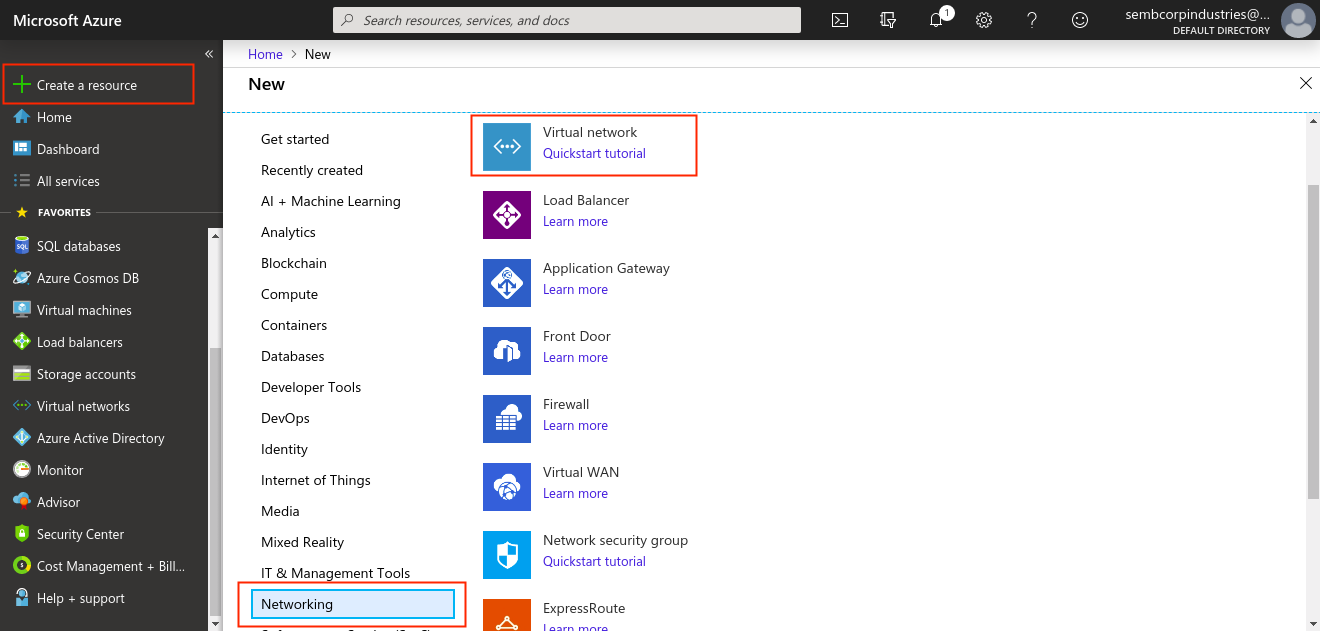
01: From the sidebar select, Create a resource > Networking > Virtual network. Note that you can also use the following step All services > Networking > Virtual networks > Add.
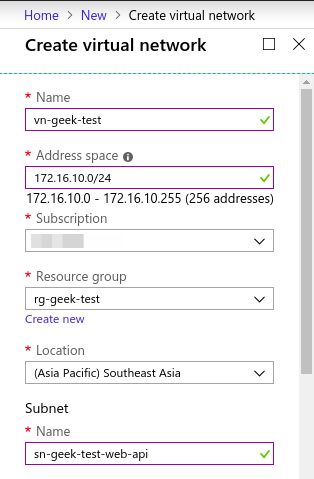
02: Enter the default for the Virtual Network.
| Name | vn-geek-test |
| Address space | 172.16.10/24
— Provides 256 addresses |
| Subscription | {{your-subscription}} |
| Resource group | rg-geek-test |
| Location | (Asia Pacific) Southeast Asia |
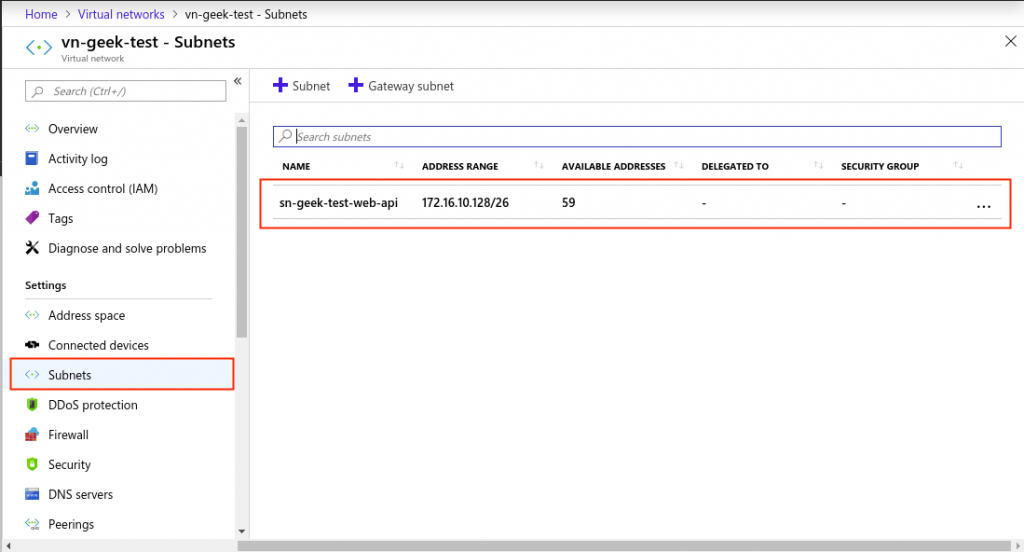
| Subnet name | sn-geek-test-web-api |
| Subnet Address range | 172.16.10.128/26
— Provides 64 address to use, but not all of them can be used. Some will be reserved by the network. — Can use also 172.16.10.0/26 or 172.16.10.64/26 for other subnets that belong to this network |
| DDoS protection | Basic |
| Service endpoints | Disabled |
| Firewall | Disabled |
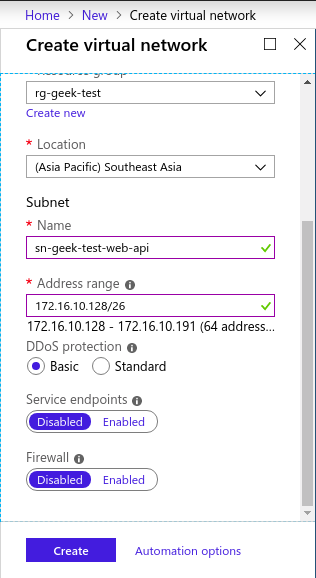
03: Review the details and select the “Create” button.
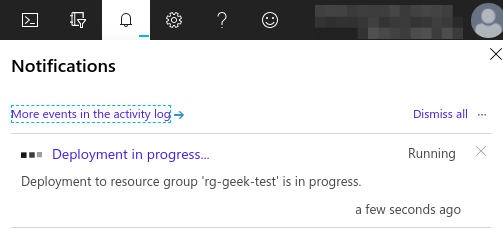
04: Wait until the Virtual network has been created. This might take some time. You can view the notifications by clicking on the bell icon on the upper-right corner of the portal.
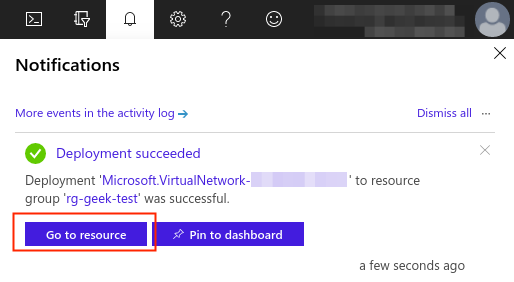
05: From the notification select “Go to resource” button. If using the sidebar menu select All Services > Networking > Virtual networks, then select the virtual network from the list.
06: It should show the details of the Virtual network. Take note of the connected devices, it is currently empty.
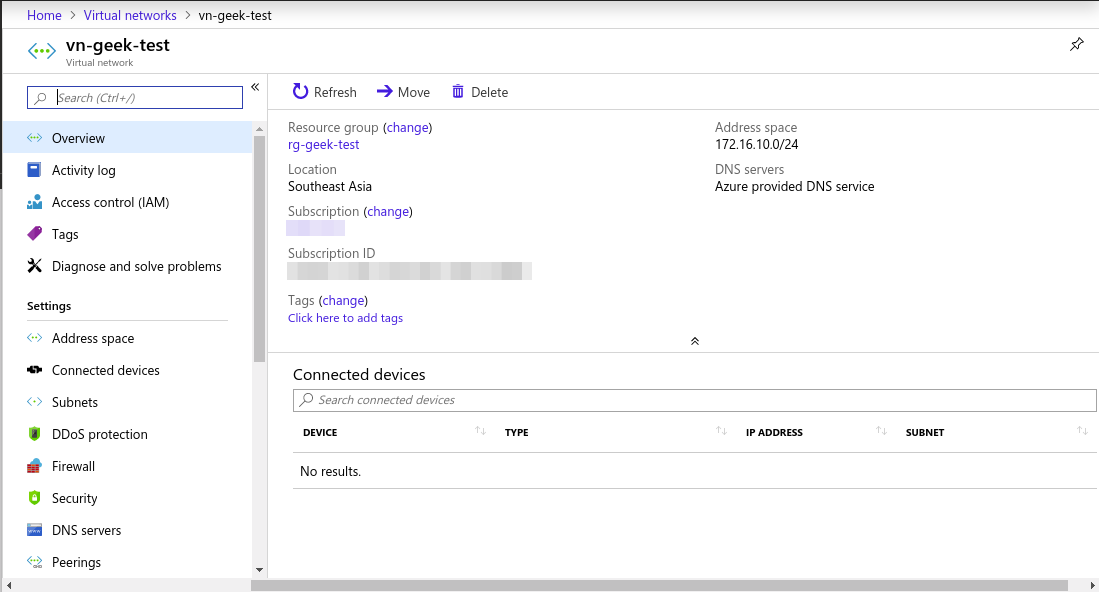
07: Under “Settings” there is the “Subnets” menu, which will list the subnets under this Virtual network.
Virtual Machine
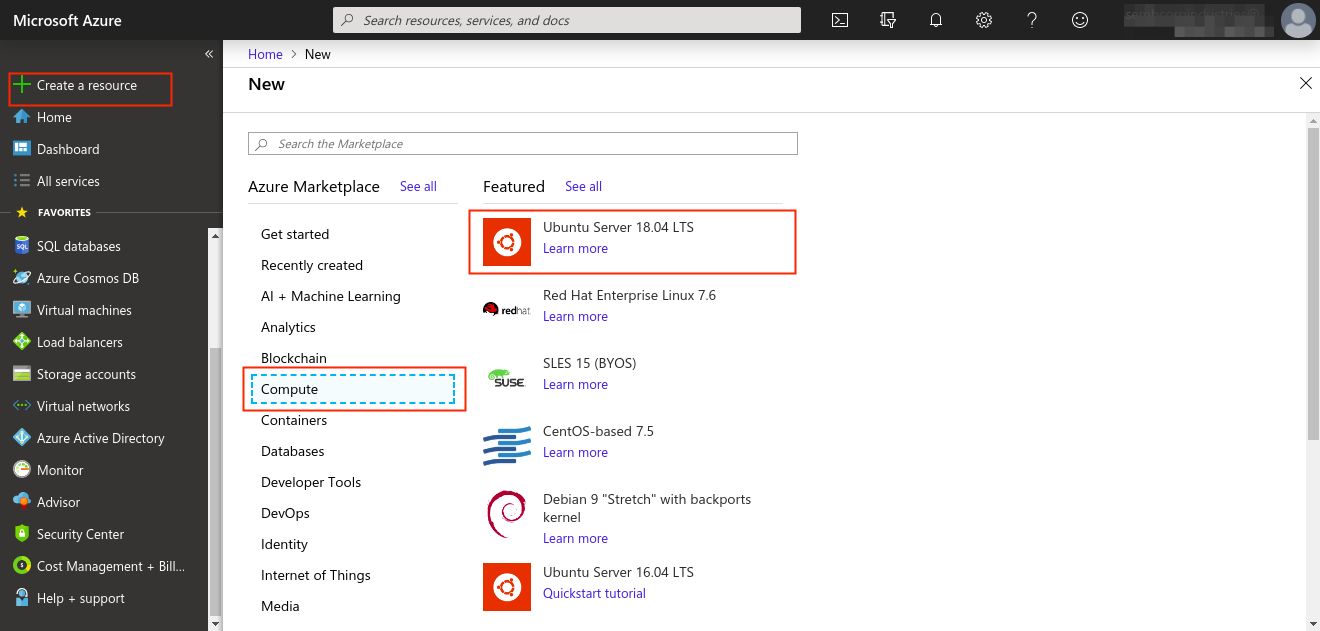
01: From the sidebar menu, select Create a resource > Compute > Ubuntu Server 18.04 LTS. You can select the Operating System this page and you can edit it later during the next steps.
02: Set the details of the Virtual Machine
| PROJECT DETAILS | |
| Subscription | {{your-subscription}} |
| Resource group | rg-geek-test |
| INSTANCE DETAILS | |
| Virtual machine name | vm-geek-web-001 |
| Region | (Asia Pacific) Southeast Asia |
| Availability options | No infrastructure redundancy required
Useful if you want your instance to be provisioned in other availability zones |
| Image | Ubuntu Server 18.04 LTS |
| Size | Standard B1ls
(1 vcpu, 0.5 GiB memory) Select the “Change size” link to view the list of available size. For this case we will be selecting the smallest instance for testing purposes. |
| ADMINISTRATOR ACCOUNT | |
| Authentication type | SSH public key
“Password” is also another option. For this example we will be creating |
| Username | geek-devops |
| SSH public key | {{your-ssh-public-key}}
You can generate your own public from tools like bartday.com |
| Login with Azure Active Directory (Preview) | Off |
| INBOUND PORT RULES | |
| Public Inbound Port(s) | Allow selected ports |
| Selected Inbound ports | SSH (22)
To test access to the instance, we will be exposing the SSH port on the internet. |
03: Then select the “Next: Disk >” button to set the disk details.
Warning! Data Disks costs are separate from the OS Disk included in the VM size. You can ignore these steps if you do not need the additional disk space and proceed to step #09, Networking config.
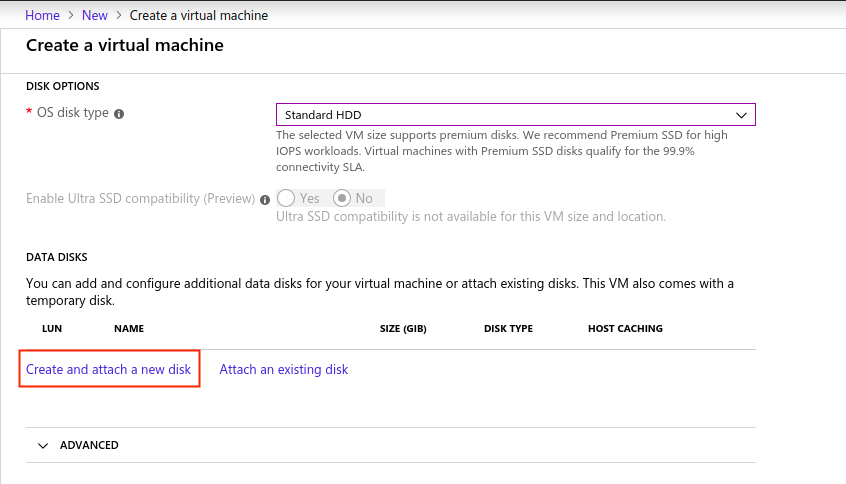
| DISK OPTIONS | |
| OS Disk Type | Standard HDD
Depending on the workload for this VM, you might opt to choose Standard SSD and Premium SSD for higher IOPS. |
07: Data disks can also be added to provide additional storage. Note that the included Temporary Storage when selecting VM Size will not be carried over when migrated due to a hardware failure or other scenarios. For example, it is recommended to create a data disk for your web application resources. Select the “Create and attach a new disk”
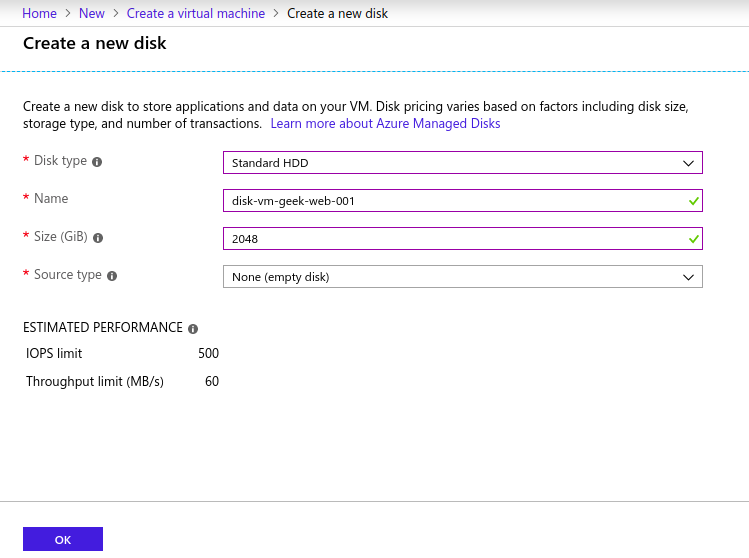
08: Set the details for the disk. Then select the “OK” button.
| Disk type | Standard HDD |
| Name | disk-vm-geek-web-001 |
| Size (GiB) | 2048
Depending on the usage, increase or decrease the size. In this case this will be used for application logs and configuration files of the web app. |
| Source type | None (empty disk) |
09: Select the “Next: Networking >” button to continue.
10: By default the Virtual network and subnet will be selected if you only have one Virtual network for the Resource group you selected. Set the other details as follows.
| NETWORK INTERFACE | |
| Virtual network | vn-geek-test |
| Subnet | sn-geek-test-web-api (172.16.10.128/16) |
| Public IP | (new) vm-geek-web-001-ip |
| NIC network security group | Basic |
| Public inbound ports | Allowed selected ports |
| Select inbound ports | SSH (22) |
| Accelerated networking | Off
This can be turned On, depending on the selected VM size. In this case it is not possible to turn it On. |
| LOAD BALANCING | |
| Place this virtual machine behind a load balancing solution? | No |
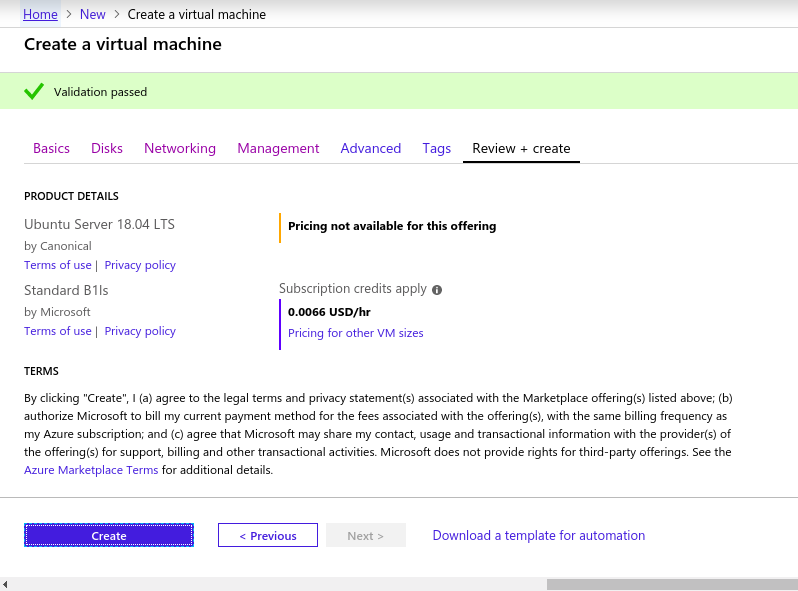
11: Then select “Review + create” button. Other options can be configured such as Monitoring, Backup, and others. But for this guide, we will use the defaults.
12: A summary of the VM instance that will be created will be shown including the estimated cost. Review the details then select the “Create” button if the configurations are set as expected.
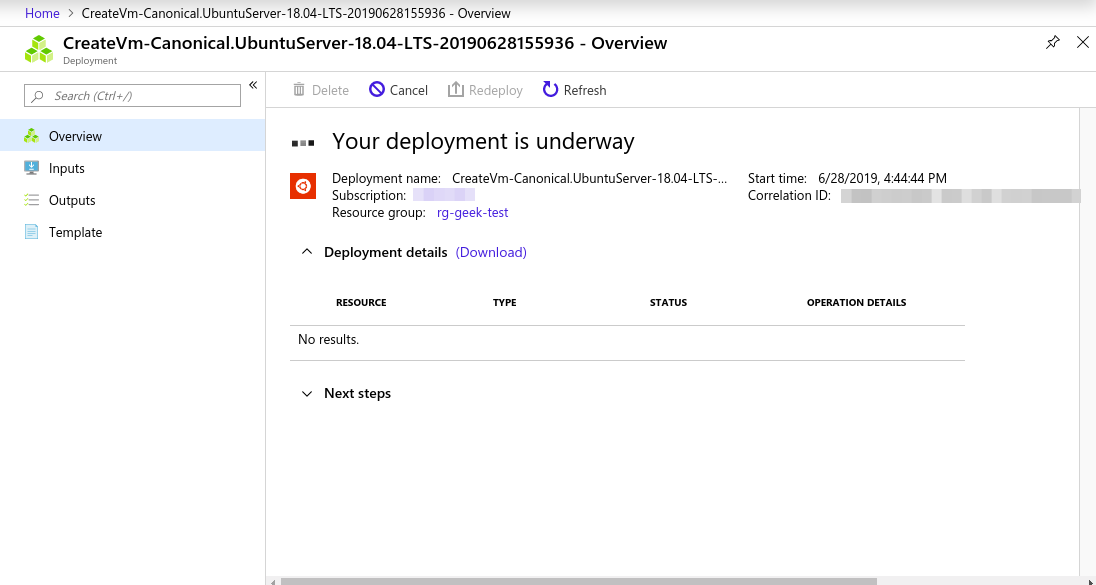
13: Wait until the provisioning is completed.
14: Select “Go to resource” button to view the details of the instance.
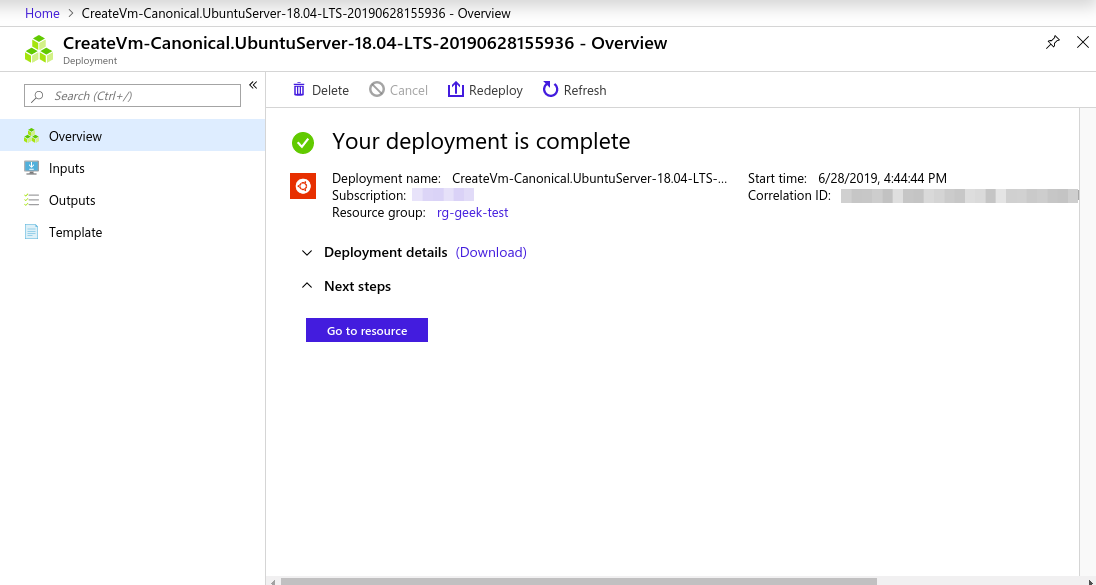
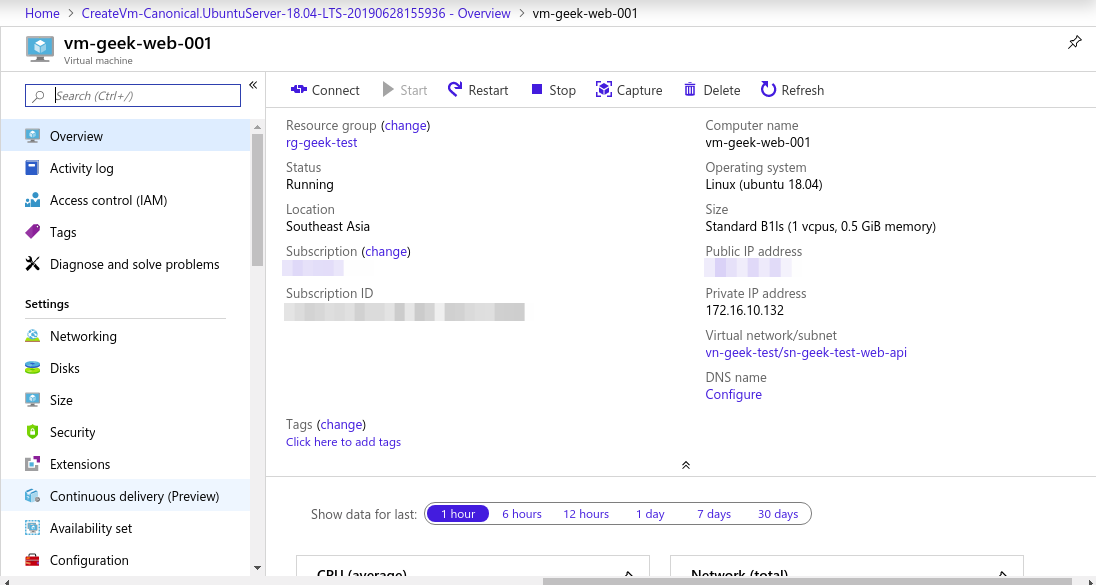
15: Below are the details of the instance.
Remote Access
Access the instance via SSH using the following command
$ ssh -i {{ssh-private-key-file}} geek-devops@{{vm-instance-public-ip}}
For enquiries, product placements, sponsorships, and collaborations, connect with us at [email protected]. We'd love to hear from you!
Our humans need coffee too! Your support is highly appreciated, thank you!