aster.cloud aster.cloud
  • /
  • Platforms
    • Public Cloud
    • On-Premise
    • Hybrid Cloud
    • Data
  • Architecture
    • Design
    • Solutions
    • Enterprise
  • Engineering
    • Automation
    • Software Engineering
    • Project Management
    • DevOps
  • Programming
    • Learning
  • Tools
  • About
  • /
  • Platforms
    • Public Cloud
    • On-Premise
    • Hybrid Cloud
    • Data
  • Architecture
    • Design
    • Solutions
    • Enterprise
  • Engineering
    • Automation
    • Software Engineering
    • Project Management
    • DevOps
  • Programming
    • Learning
  • Tools
  • About
aster.cloud aster.cloud
  • /
  • Platforms
    • Public Cloud
    • On-Premise
    • Hybrid Cloud
    • Data
  • Architecture
    • Design
    • Solutions
    • Enterprise
  • Engineering
    • Automation
    • Software Engineering
    • Project Management
    • DevOps
  • Programming
    • Learning
  • Tools
  • About
  • DevOps

Top 4 Things To Do On A Fresh Ubuntu Server

  • root
  • March 14, 2020
  • 4 minute read

A fresh and newly provisioned server is a clean slate for a lot of ideas and projects. Here are the various things you can do on a new Ubuntu server to ensure smooth project setup.

Update and upgrade

Install the latest security patches and upgrades to the existing applications.


Partner with aster.cloud
for your next big idea.
Let us know here.


From our partners:

CITI.IO :: Business. Institutions. Society. Global Political Economy.
CYBERPOGO.COM :: For the Arts, Sciences, and Technology.
DADAHACKS.COM :: Parenting For The Rest Of Us.
ZEDISTA.COM :: Entertainment. Sports. Culture. Escape.
TAKUMAKU.COM :: For The Hearth And Home.
ASTER.CLOUD :: From The Cloud And Beyond.
LIWAIWAI.COM :: Intelligence, Inside and Outside.
GLOBALCLOUDPLATFORMS.COM :: For The World's Computing Needs.
FIREGULAMAN.COM :: For The Fire In The Belly Of The Coder.
ASTERCASTER.COM :: Supra Astra. Beyond The Stars.
BARTDAY.COM :: Prosperity For Everyone.

$ sudo apt-get update 

$ sudo apt-get upgrade


Add a new sudo-er user

With a newly provisioned server you will be given a default user account. This account usually have access to root or is a sudo-er. The user you add here requires you to use an SSH key instead of password. You need to create your own keys using tools or CLI.

If you already have your key pair, you can continue to step 5

01. To generate a key-pair in your terminal, execute the following. An email address is usually provided as the comment for the key.

Format

$ ssh-keygen -t rsa -b 4096 -C "{{comment}}"

Example

$ ssh-keygen -t rsa -b 4096 -C "[email protected]"


02. Enter the directory to save the key pair. If left empty, it will be saved in the default path at /home/{user}/.ssh/id_rsa.

03. Next is you would be asked a passphrase. A passphrase provides additional authentication for the key pair. You can ignore and press enter if you opt to.

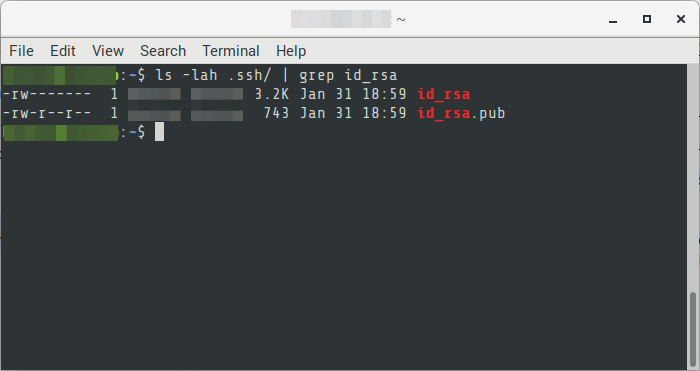
04. In the directory you specified or in the default, it will generate 2 files. A public and private key. The public key has the extension .pub while the private has no extension.

On the new ubuntu server

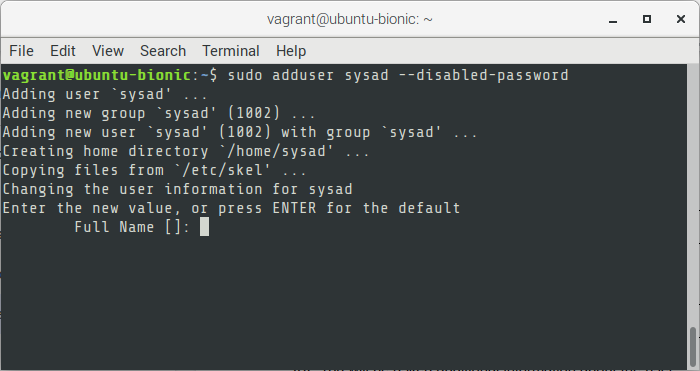
05. On your new ubuntu server, create a new user.

Format

$ sudo adduser {{username}} --disabled-password

Example

$ sudo adduser sysad --disabled-password


Read More  How To: GIMP, Graphics Image Editor For Ubuntu - Installation

06. You will be asked additional information about the user. All of these are optional

  • Full Name
  • Room Number
  • Work Phone
  • Home Phone
  • Other


07. Add the new user to the sudo-er group

Format

$ sudo usermod -aG sudo {{username}}

Example

$ sudo usermod -aG sudo sysad


08. Switch access to the new user

Format

$ sudo su - {{username}}

Example

$ sudo su - sysad


09. You will be switched to the user. Next is to create the authorized_keys file, which will contain the public key that was previously created.

$ mkdir .ssh

$ chmod 700 .ssh

$ touch .ssh/authorized_keys

$ chmod 600 .ssh/authorized_keys


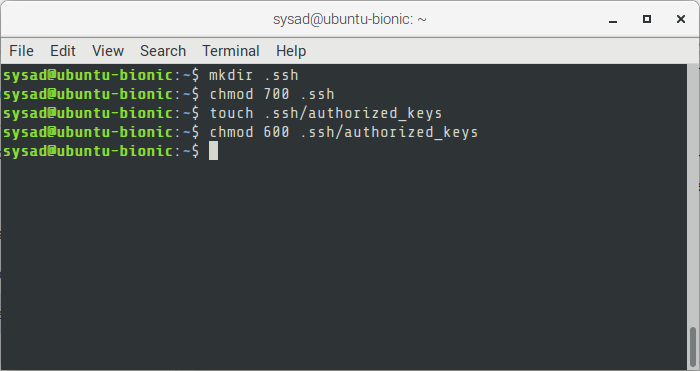
10. Edit the authorized_keys file and append the content of the public key.

$ nano .ssh/authorized_keys


11. Copy the content. Then press Ctrl+O and Enter to save the changes. Then Ctrl-X and Enter to exit from the editor.


12. Exit from the user, then exit from the remote server.

$ exit

$ exit


13. You should now be in your local machine. Try accessing the remote machine using the new user and private key.

Format

$ ssh -i {{rsa-key-private}} {{username}}@{{hostname-or-ip}}

Example

$ ssh -i ~/.ssh/id_rsa [email protected]


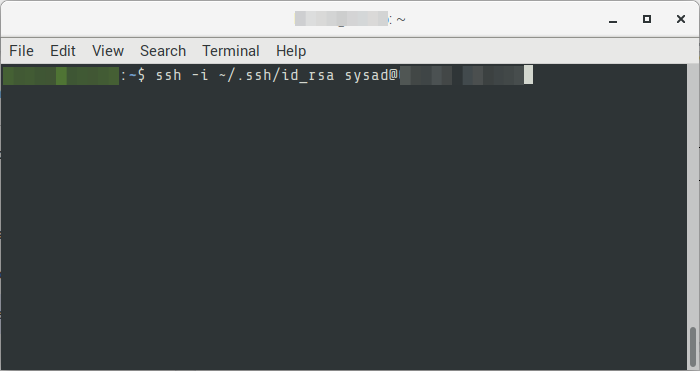
14. You should now be remotely accessing the server with the new username.


Configuring Swap

01. Define the swap directory and swap size

Format

$ sudo fallocate -l {{swap-size}} {{swap-path}}

Example

$ sudo fallocate -l 1G /swapfile

02. Verify the swap directory

Format

$ ls -lh {{swap-path}}

Example

$ ls -lh /swapfile

03. Update the permission the swap directory, setting only root to have the only access to it

Read More  Top Trends In Cybersecurity 2022: A Gartner® Report

Format

$ sudo chmod 600 {{swap-path}}

Example

$ sudo chmod 600 /swapfile


04. Mark as swap

Format

$ sudo mkswap {{swap-path}}

Example

$ sudo mkswap /swapfile


05. Enable swap

Format


$ sudo swapon {{swap-path}}

Example

$ sudo swapon /swapfile

06. Verify the swap configuration, it should now show the swap directory

$ sudo swapon --show

07. Make the swap to be permanent and applied on boot. Backup of the fstab config also.

Format

$ sudo cp /etc/fstab /etc/fstab.bak

$ echo '{{swap-path}} none swap sw 0 0' | sudo tee -a /etc/fstab

Example

$ sudo cp /etc/fstab /etc/fstab.bak

$ echo '/swapfile none swap sw 0 0' | sudo tee -a /etc/fstab


08. Update the swappiness factor if preferred. This value determines the behavior if it should put it into swap rather than RAM. The lower the value, the less chance it will put into swap. The value ranges from 0 to 100. With the default swappiness value of 60.

Set the swappiness by running the following command

Format

$ sudo sysctl vm.swappiness={{swappiness-value}}

Example

$ sudo sysctl vm.swappiness=10


To make it permanent, update the /etc/sysctl.conf file.

$ sudo nano /etc/sysctl.conf


And add the following add the bottom

Format

$ vm.swappiness={{swappiness-value}}

Example

$ vm.swappiness=10


09. Verify the swap using the following command

$ free -hm


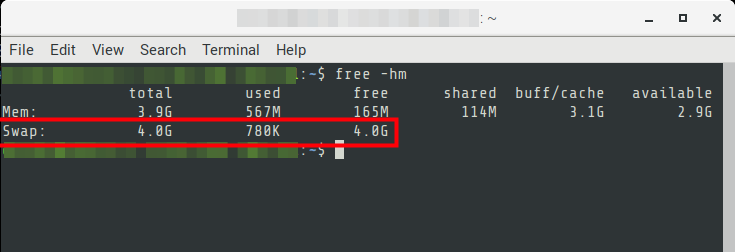
Add timestamp to your bash history

01. Switch OS user you want to add timestamp

$ sudo su - {os-user}


02. Run the following to update the bashrc file.

$ echo 'export HISTTIMEFORMAT="%y %m %d %T "' >> ~/.bashrc


03. Then apply the changes made

$ source ~/.bashrc


04. Check the bash history if it has been updated. It should now output the history with date and time info. Note that commands executed before this process is not the actual date and time. But for the new commands, it will reflect the date and time when it is executed.

$ history

For enquiries, product placements, sponsorships, and collaborations, connect with us at [email protected]. We'd love to hear from you!

Our humans need coffee too! Your support is highly appreciated, thank you!

root

Related Topics
  • Configs
  • Server
  • Ubuntu
You May Also Like
View Post
  • DevOps
  • Engineering
  • Platforms

How To Fail At Platform Engineering

  • March 11, 2024
View Post
  • Computing
  • DevOps
  • Platforms

The IBM Approach To Reliable Quantum Computing

  • November 28, 2023
DevOps artifact management
View Post
  • Design
  • DevOps
  • Engineering

10 Awesome Benefits Of Artifact Management And Why You Need It

  • August 2, 2023
Automation | Gears
View Post
  • Automation
  • DevOps
  • Engineering

Automating CI/CD With GitHub Actions

  • June 13, 2023
View Post
  • DevOps
  • People

What’s The Future Of DevOps? You Tell Us. Take The 2023 Accelerate State Of DevOps Survey

  • June 2, 2023
View Post
  • Cloud-Native
  • DevOps
  • Software

7 Ways To Turn Developer Experience Into A Competitive Edge

  • May 10, 2023
View Post
  • DevOps
  • Programming
  • Software Engineering

PromptOps In application Delivery: Empowering Your Workflow with ChatGPT

  • April 30, 2023
View Post
  • Cloud-Native
  • DevOps

How To Use Weave GitOps As Your Flux UI

  • April 25, 2023

Stay Connected!
LATEST
  • college-of-cardinals-2025 1
    The Definitive Who’s Who of the 2025 Papal Conclave
    • May 7, 2025
  • conclave-poster-black-smoke 2
    The World Is Revalidating Itself
    • May 6, 2025
  • 3
    Conclave: How A New Pope Is Chosen
    • April 25, 2025
  • Getting things done makes her feel amazing 4
    Nurturing Minds in the Digital Revolution
    • April 25, 2025
  • 5
    AI is automating our jobs – but values need to change if we are to be liberated by it
    • April 17, 2025
  • 6
    Canonical Releases Ubuntu 25.04 Plucky Puffin
    • April 17, 2025
  • 7
    United States Army Enterprise Cloud Management Agency Expands its Oracle Defense Cloud Services
    • April 15, 2025
  • 8
    Tokyo Electron and IBM Renew Collaboration for Advanced Semiconductor Technology
    • April 2, 2025
  • 9
    IBM Accelerates Momentum in the as a Service Space with Growing Portfolio of Tools Simplifying Infrastructure Management
    • March 27, 2025
  • 10
    Tariffs, Trump, and Other Things That Start With T – They’re Not The Problem, It’s How We Use Them
    • March 25, 2025
about
Hello World!

We are aster.cloud. We’re created by programmers for programmers.

Our site aims to provide guides, programming tips, reviews, and interesting materials for tech people and those who want to learn in general.

We would like to hear from you.

If you have any feedback, enquiries, or sponsorship request, kindly reach out to us at:

[email protected]
Most Popular
  • 1
    IBM contributes key open-source projects to Linux Foundation to advance AI community participation
    • March 22, 2025
  • 2
    Co-op mode: New partners driving the future of gaming with AI
    • March 22, 2025
  • 3
    Mitsubishi Motors Canada Launches AI-Powered “Intelligent Companion” to Transform the 2025 Outlander Buying Experience
    • March 10, 2025
  • PiPiPi 4
    The Unexpected Pi-Fect Deals This March 14
    • March 13, 2025
  • Nintendo Switch Deals on Amazon 5
    10 Physical Nintendo Switch Game Deals on MAR10 Day!
    • March 9, 2025
  • /
  • Technology
  • Tools
  • About
  • Contact Us

Input your search keywords and press Enter.