Overview
This guide provides an intro to the GCP BigQuery and how it can be used for data analysis. It also shows how to query the data using Python.
From our partners:
Prerequisites
- Access to Google Cloud Console
- Installed Python on your machine. Refer to the following for Ubuntu and Windows installation.
- Installed Google Cloud SDK. Refer to the following on how to install for Ubuntu.
Reviewing the Data Structure
For this guide we’ll be using the “Predicted hourly heights of tides in 2019 – Quarry bay” (in Hongkong). You can get the data here at this link. Download the CSV file and save it to your local storage with the name, predicted_hourly_tide_2019.csv.
The CSV has 26 columns, where the first 2 are the month and day, the next 24 are the hours of the day. It has 365 records, each prediction for every single day of the year.
BigQuery is a service that is designed for data warehouse and analytic applications. While our sample data set is less than 500, BigQuery can work with larger numbers. It is even designed to store data at the petabyte scale. Note also that BigQuery is billed on amount of scanned data.
Setting up BigQuery
This example uses the GCP console to load the CSV data directly into BigQuery. There are other ways of importing data, see here.
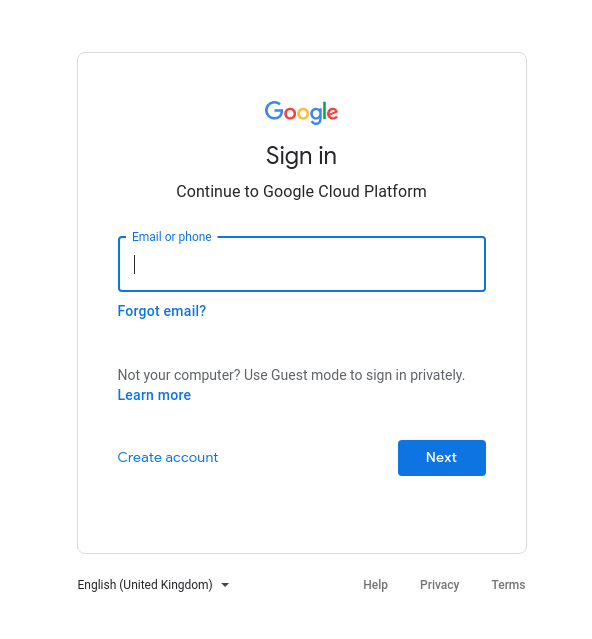
01. Login to the GCP console at https://console.cloud.google.com.
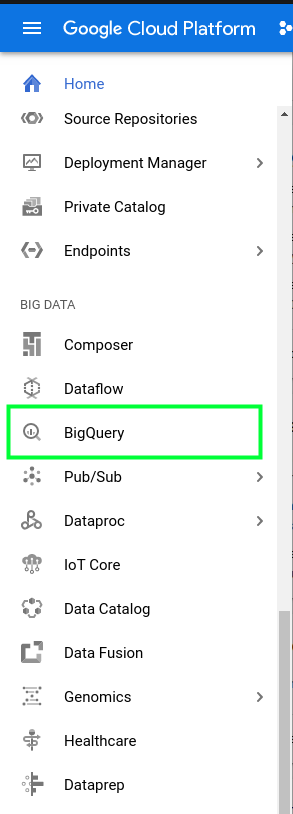
02. On the sidebar menu, under “Big Data” select “BigQuery”.
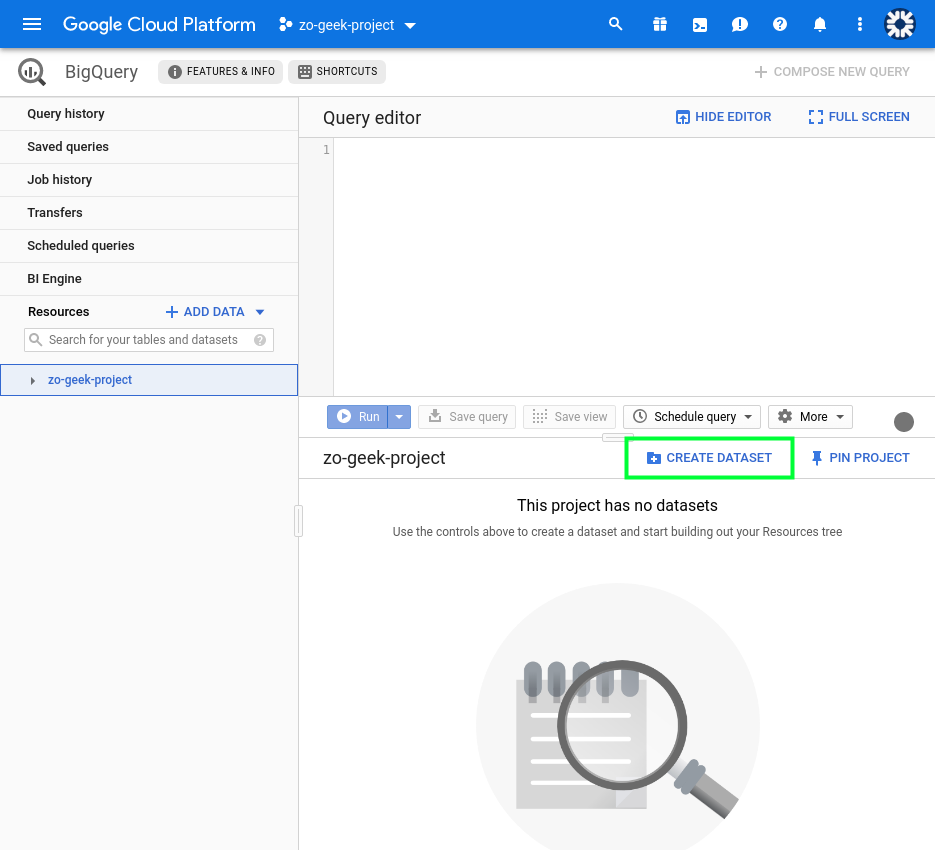
03. Select the Project from which to create the BigQuery dataset and table. On the lower-right part of the screen, you will see the “CREATE DATASET” button. This is like the database when comparing it an RDBMS database like MySQL and PostgreSQL. If the button does not appear, select the project from the “Resources’ section on the left side of the page.
04. It will show the following form on the right-side of the page.
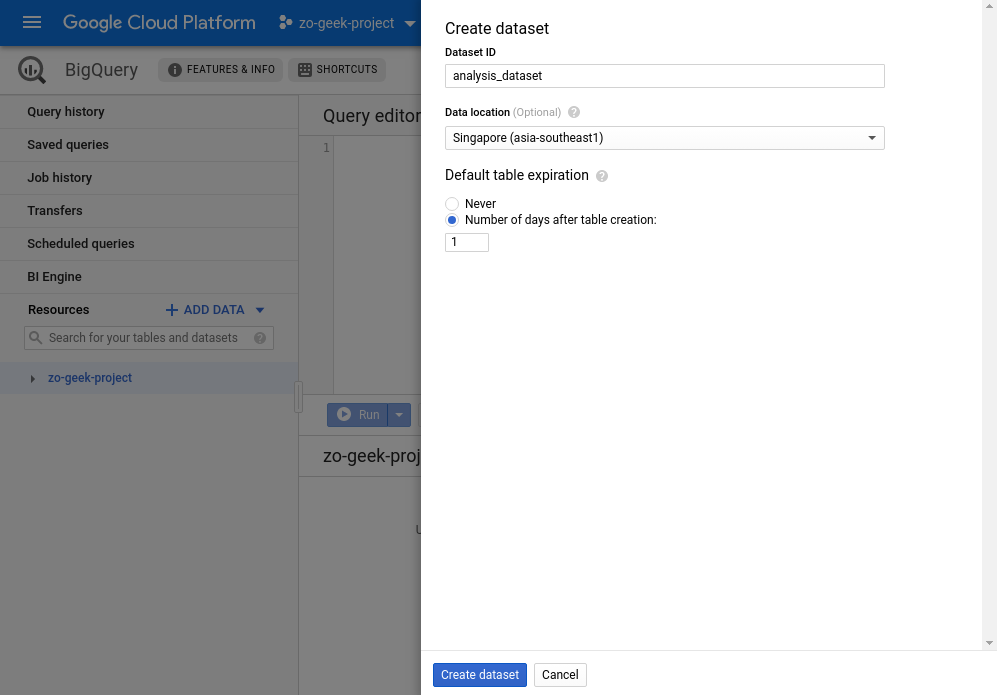
| Dataset ID | Name of the dataset. Only numbers, letters and underscores are allowed. If comparing with SQL, this is like the Database Name.
Example: analysis_dataset |
| Data location | Determines in what location the data is stored.
Example: Singapore (asia-southeast1) |
| Default table expiration | — Never
— Number of days after table of creation If you plan to use the dataset for only a short amount of time it is recommended to set an expiration days. BigQuery is billed for its storage and queries. Example: 1 (days) |
05. Then select the “Create dataset” button once ready.
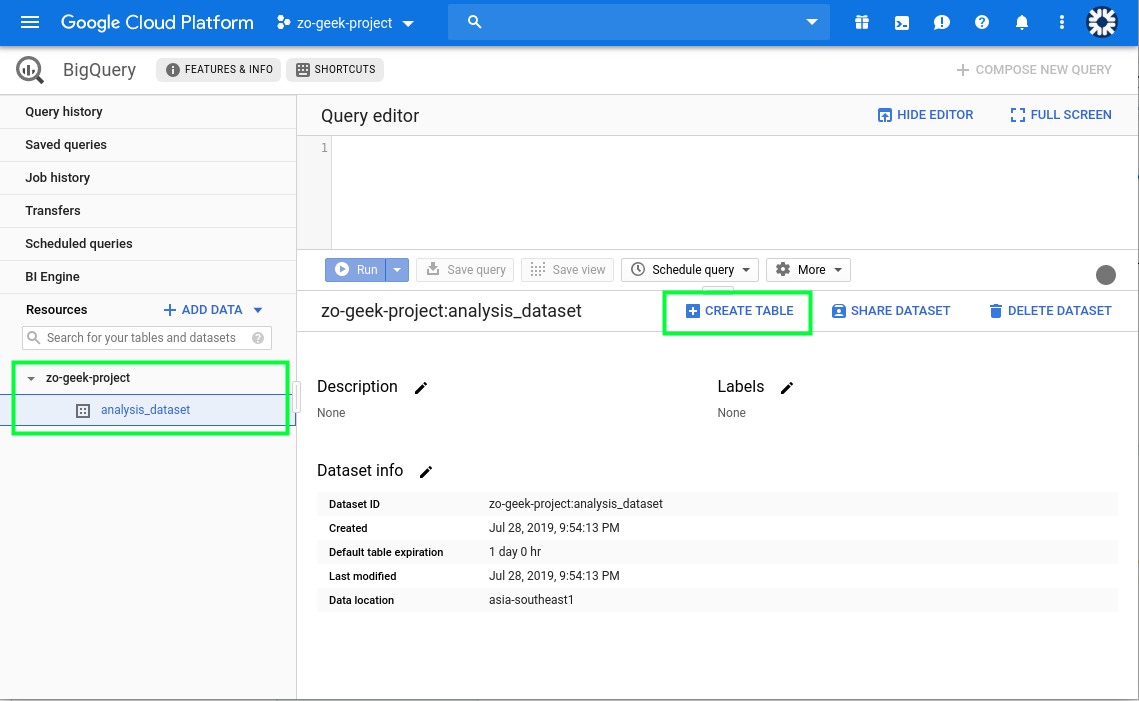
06. On the “Resources” section on the left. You can select the project then the dataset. The details of the dataset will now be visible, along with the Create Table button. Select the “Create Table” button.
07. A new form will appear from the right-side of the page.
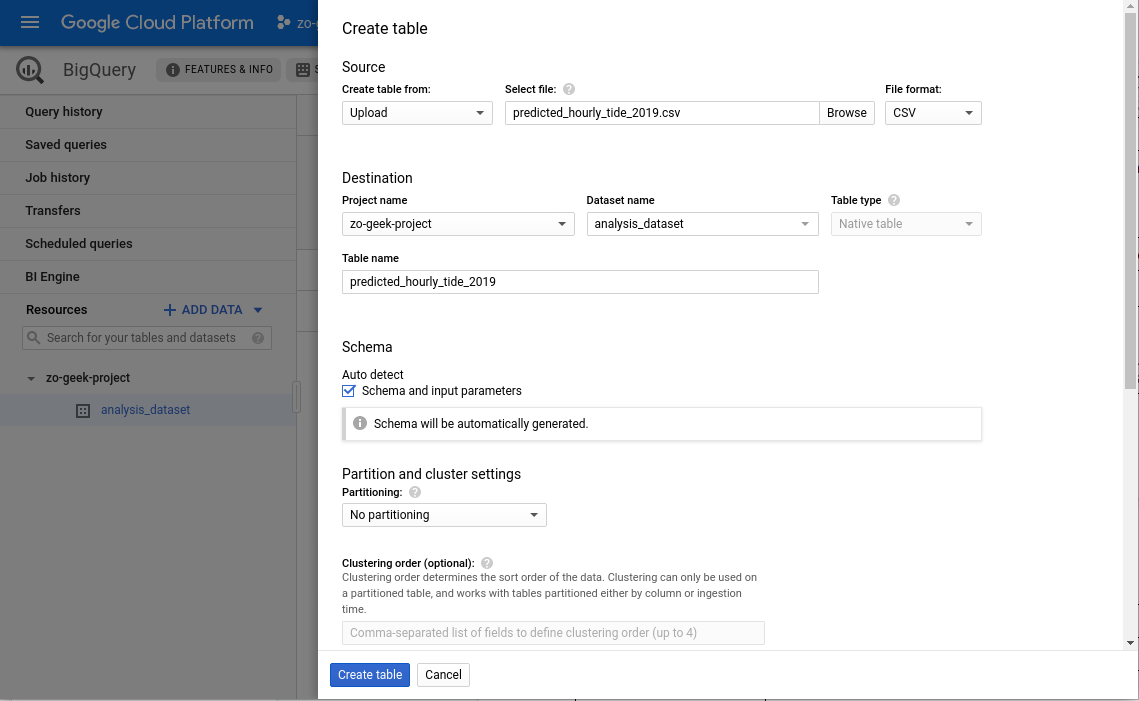
08. At the “Create table from” select “Upload”. You can use other ways to import data to BigQuery. For this example we are using a CSV. Then select the file from local. Complete the following details.
| Create table from | Options:
— Empty table — Google Cloud storage — Upload — Drive — Google Cloud Bigtable It is possible to load data from other sources, but for this example, we will be selecting the “Upload” option which allows us to select a CSV file from our local machine. Example: Upload |
| Select file | Select the CSV file to import. This is the data that will be created as a table in BigQuery. We will be using the data we reviewed in the previous section.
Example: predicted_hourly_tide_2019.csv |
| File format | The structure of the file loaded. It will autodetect the selection based on the selected file. BigQuery supports different file formats, including Avro, which is useful for data serialization.
Example: CSV |
| Project name | The name of the GCP Project to load the data
Example: zo-geek-project |
| Dataset name | Name of the dataset to place the new table to.
Example: analysis_dataset |
| Table type | This will be automatically set to Native table. |
| Table name | Name of the table. Hierarchically, this is the same as the table name in SQL.
Example: predicted_hourly_tide_2019 |
| Schema > Auto detect | If your CSV file has a fixed structure, you can let BigQuery derive the structure from t. Or you can manually add the columns. |
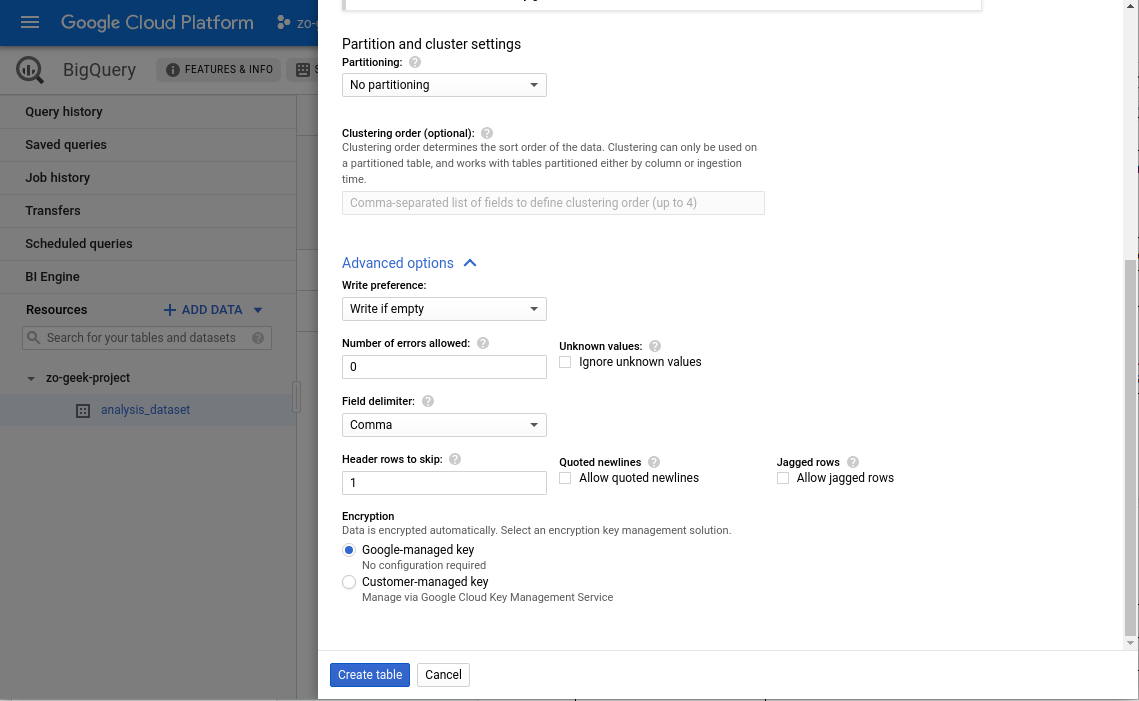
| Partitioning | “No Partitioning”
Can be used to divide the table into smaller segments. Partitioned tables can then be queried using filters based on the partitioning column. |
| Clustering order | |
| ADVANCED OPTIONS | |
| Header rows to skip | If your CSV data has a header, specify the row number when the data start.
Example: 1 |
| Encryption | “Google-managed key”
You can select your own key if there are needed compliance or policies set by the company or organization. For this example, we will let Google create and manage our key. |
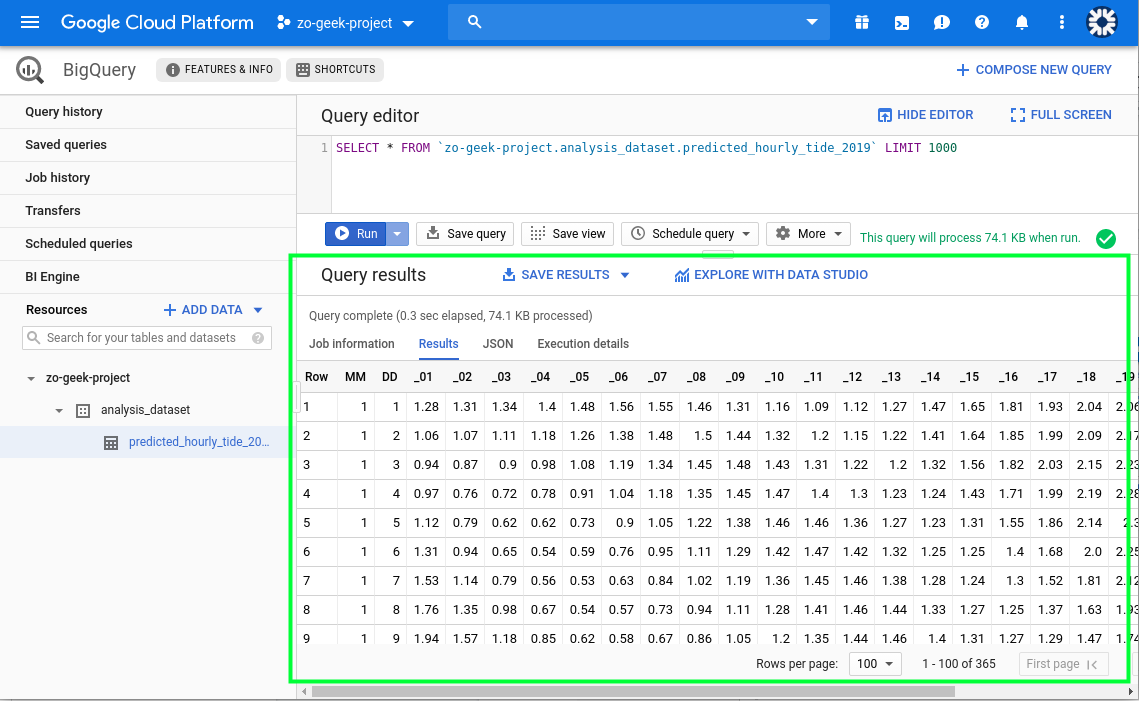
09. After data import, you can query the content using the Query Editor input field.
# FORMAT
$ SELECT * FROM `{{project-name}}.{{dataset-name}}.{{table-name}}` LIMIT 1000

# SAMPLE
SELECT * FROM `zo-geek-project.analysis_dataset.predicted_hourly_tide_2019` LIMIT 1000
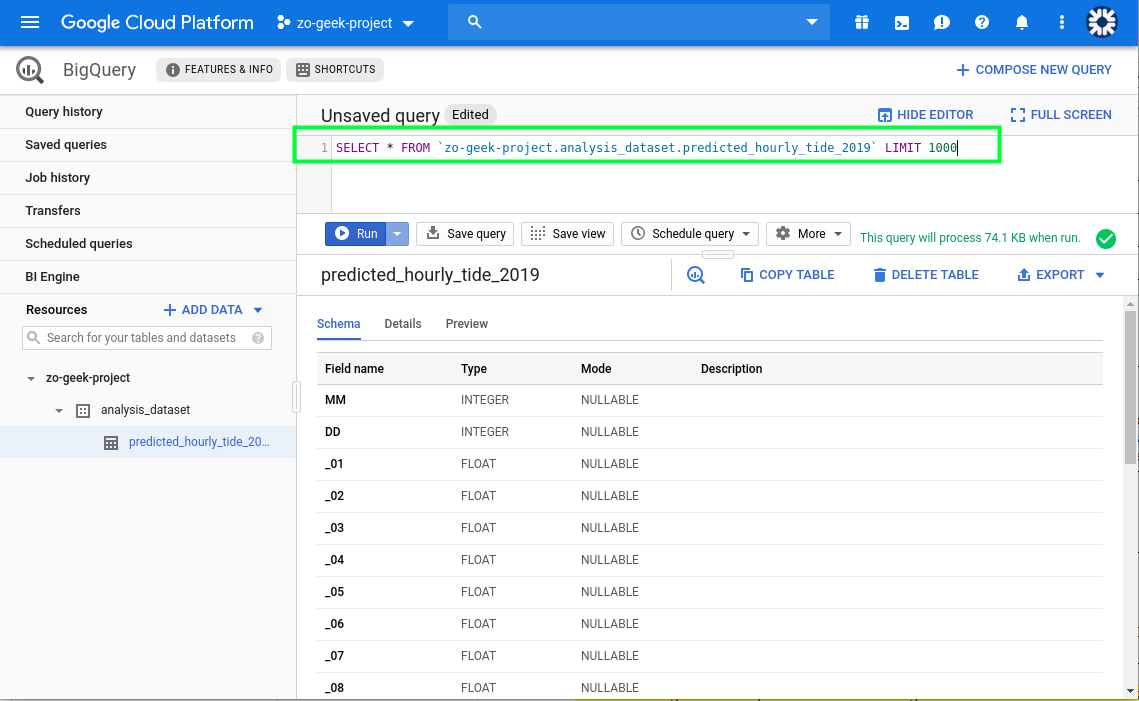
Execute the query and it will show the result.
Querying Data
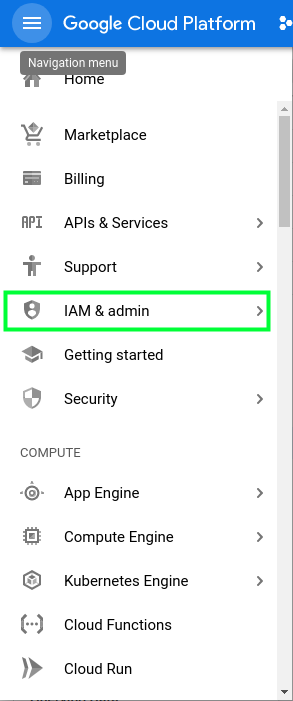
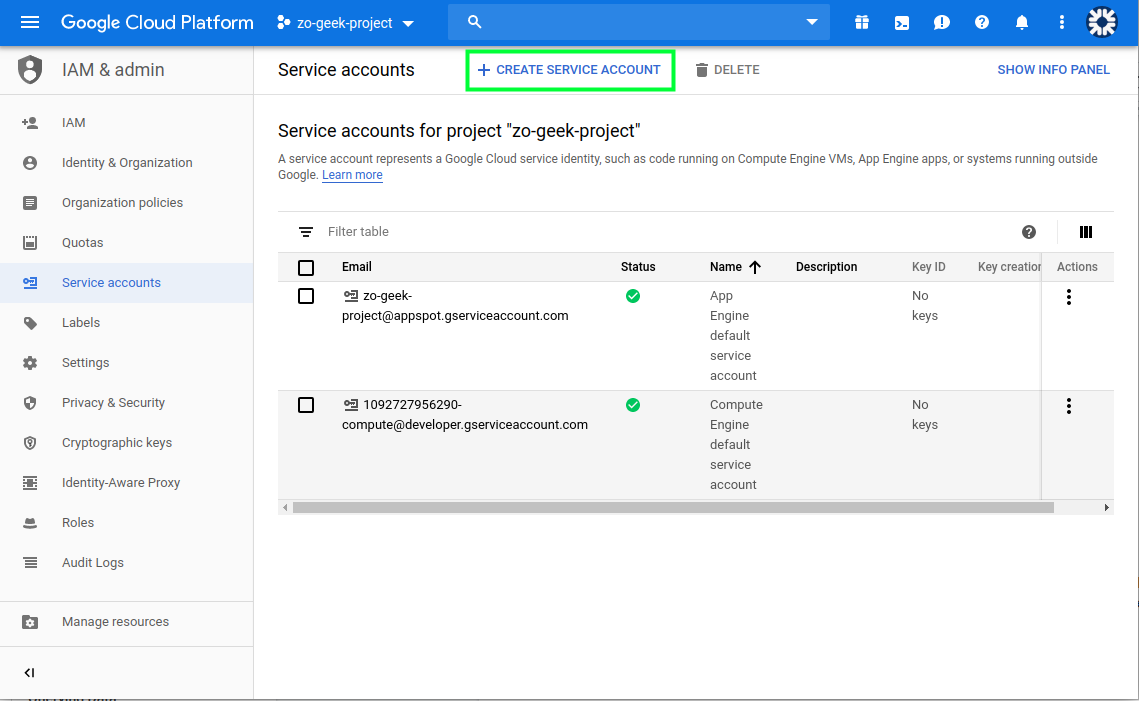
01. You will need a service account in order to access BigQuery using the Python SDK. Use or create a service account first before proceeding. Navigate to the menu and select “IAM & admin”.
02. Select Service Accounts from the menu. If you already have a Service Account that has access to BigQuery you can use that. Else, create a new one by selecting the “Create Service Account” button.
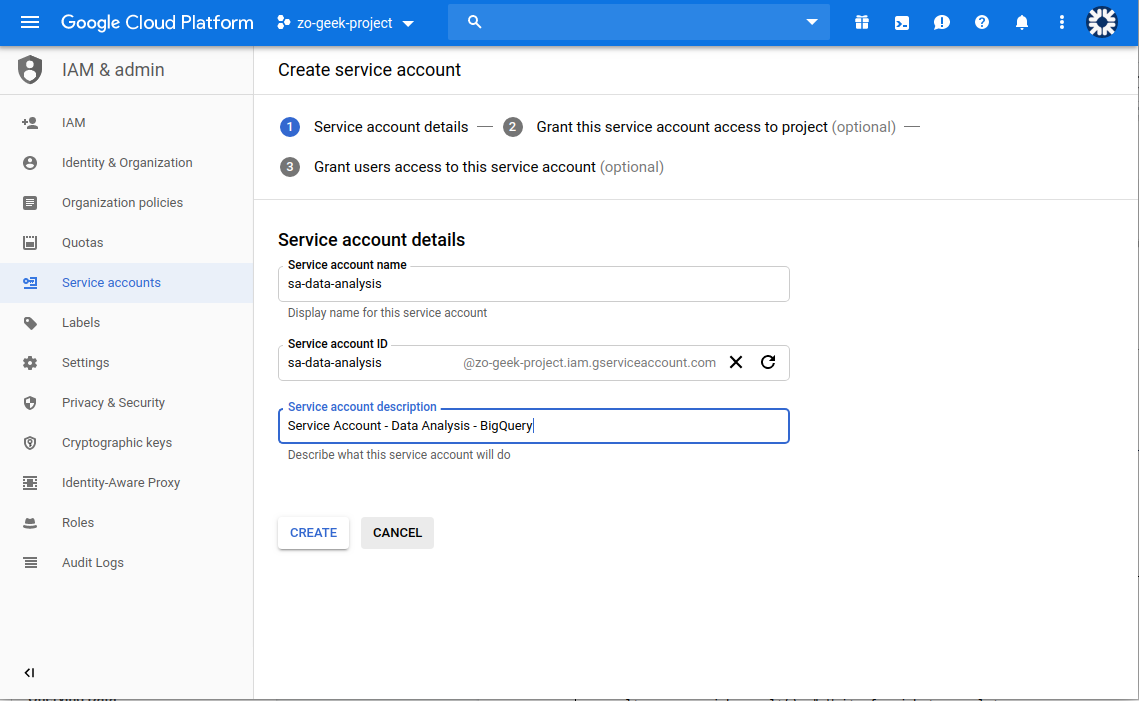
03. A new form will be shown. Enter the Service Account Name and an optional description. The Service Account ID is automatically generated based on the name, but you can still override it if you want. Then select the “Create” button.
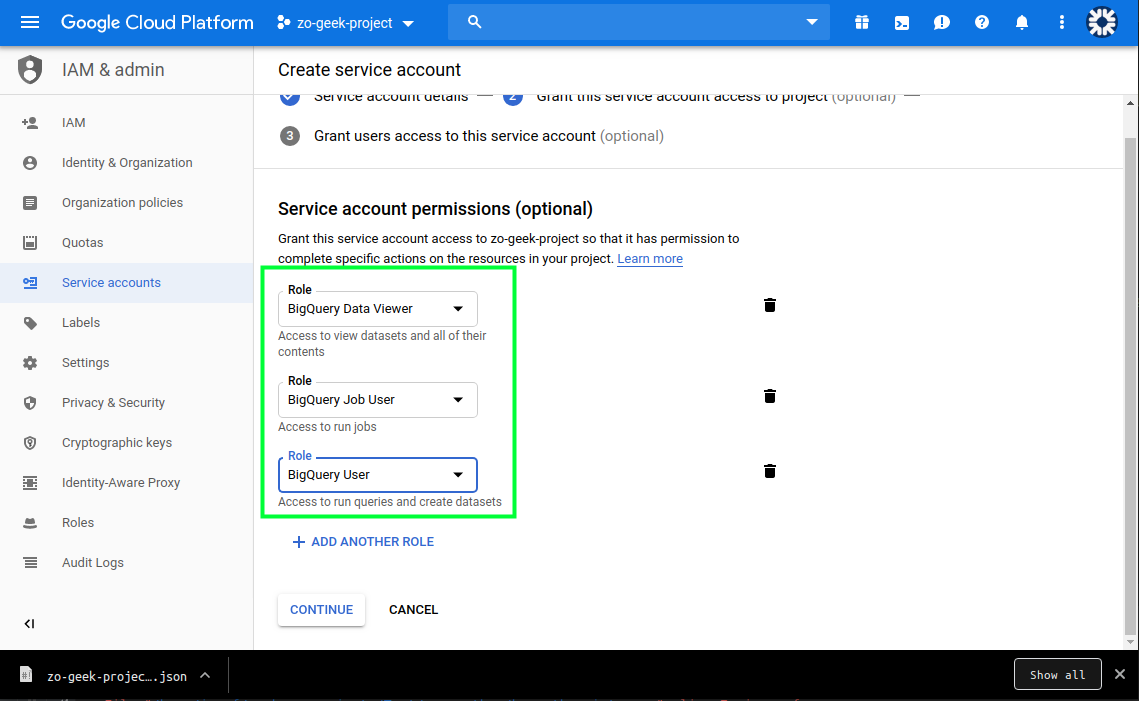
04. Next is to specify the permissions. It is recommended to give only the necessary amount of permission to a Service Account. In this case we will be selecting a Predefined role of “BigQuery Data Viewer”, “BigQuery User” and BigQuery Data Viewer, which can read the content of a BigQuery table and create query jobs Then select the “Continue” button.
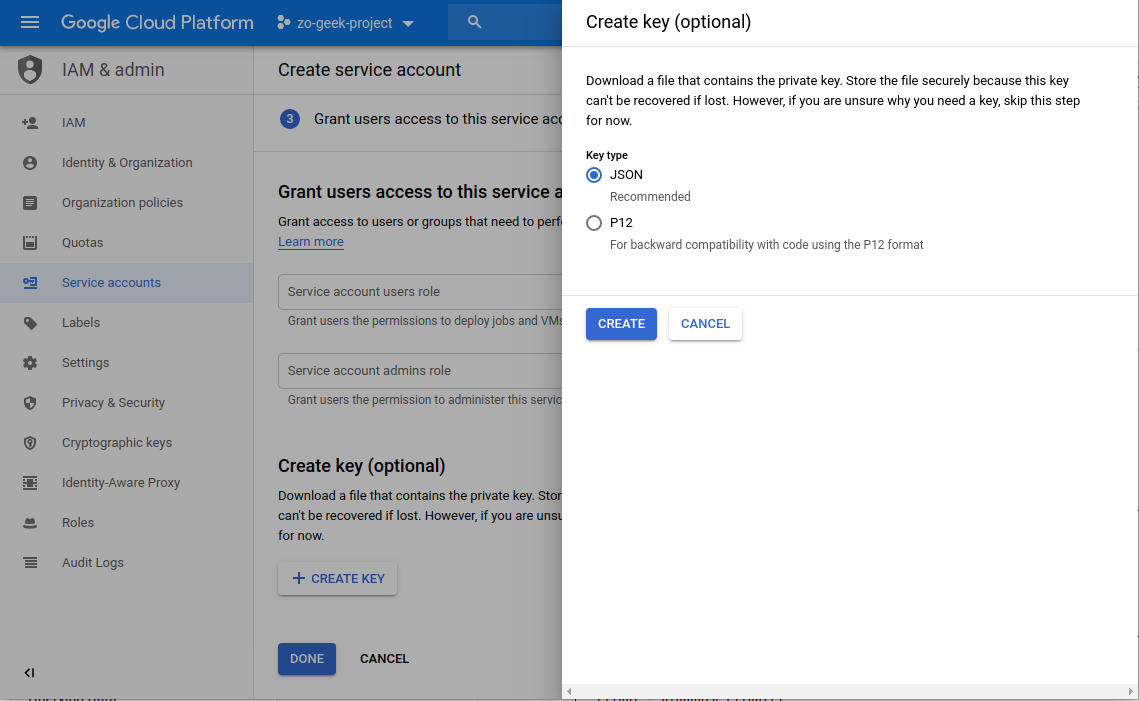
05. On the next section, we will create the Key. Do not lose this key as it cannot be recovered. Select the “Create key” button and a new form will appear.
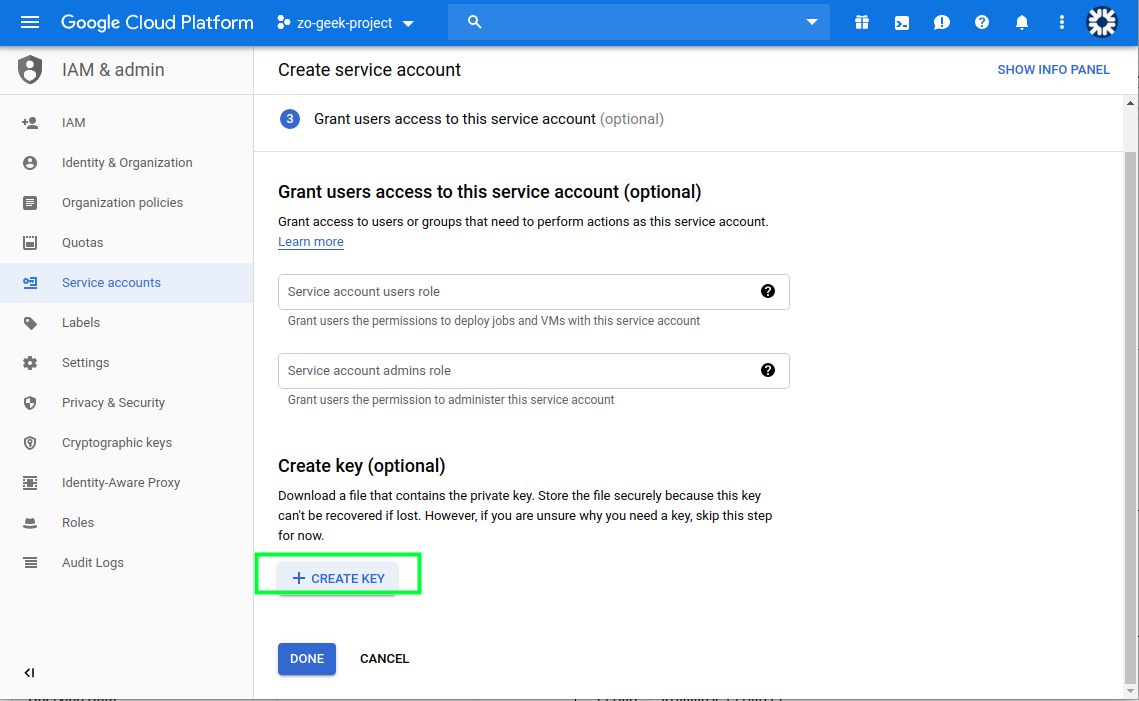
Select “JSON”.
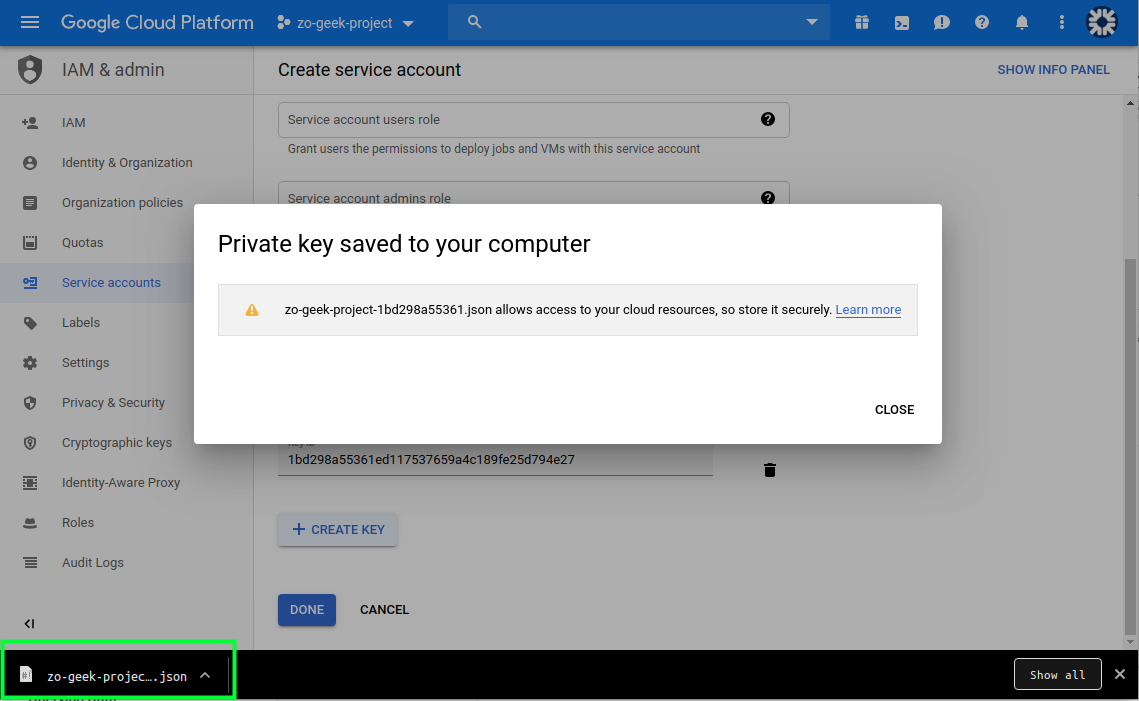
06. A JSON file will be downloaded to your local machine. This will be used in the Python script. Close the popup/modal, then select “Done” button.
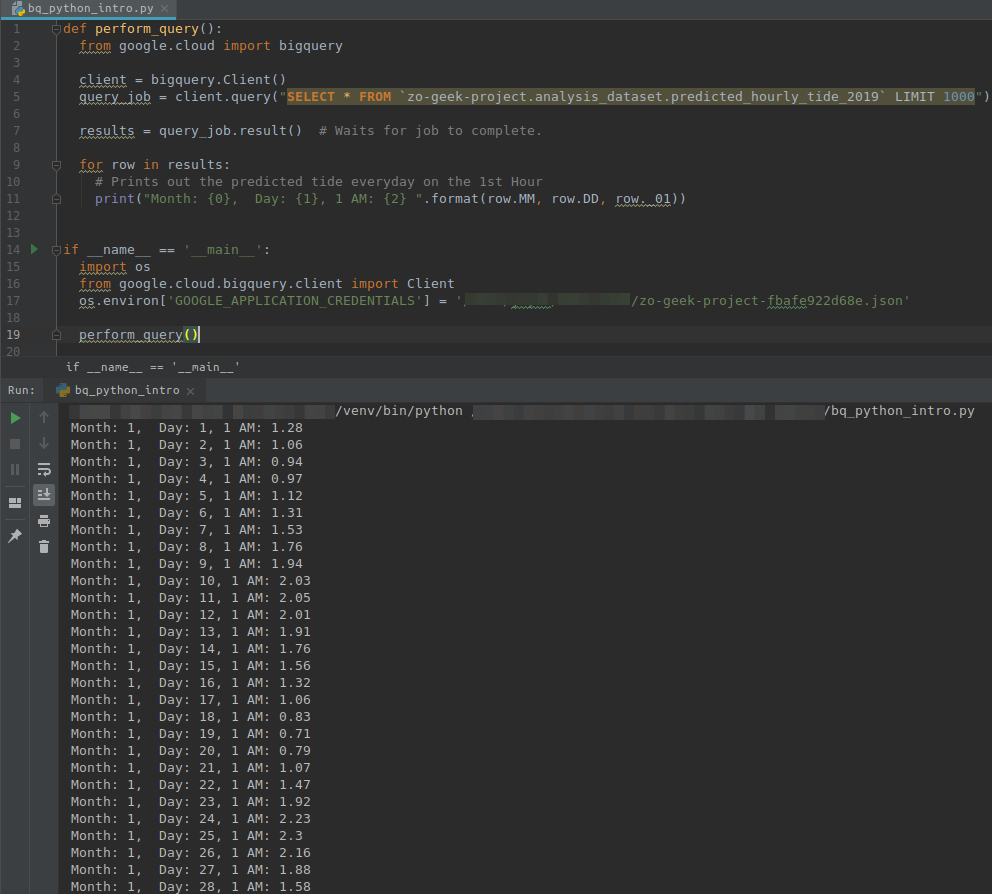
07. You must have installed and configured Python, if not you can follow the guides for Windows and Ubuntu and have created a Virtual Environment to separate your configurations. Create the following Python script.
Change the values of the project name, data set, table and the location on where the Service Account file is located.
def perform_query():
from google.cloud import bigquery

client = bigquery.Client()
query_job = client.query("SELECT * FROM `{{gcp-project-name}}.{{bigquery-dataset-name}}.{{bigquery-table-name}}` LIMIT 1000")

for row in results:
# Prints out the predicted tide everyday on the 1st Hour
print("Month: {0}, Day: {1}, 1 AM: {2} ".format(row.MM, row.DD, row._01))

for row in results:
print("Cert No. {0}, Scope {1} ".format(row.CertNo, row.Scope))

if __name__ == '__main__':
import os
from google.cloud.bigquery.client import Client
os.environ['GOOGLE_APPLICATION_CREDENTIALS'] = '{{sa-account-path}}/{{service-account}}.json'

perform_query()
08. Before running the Python script, make sure you have installed the necessary library in your global environment of Virtual Environment.
$ pip install --upgrade google-cloud-bigquery
09. When the Python script is executed. It will output something like.
For enquiries, product placements, sponsorships, and collaborations, connect with us at [email protected]. We'd love to hear from you!
Our humans need coffee too! Your support is highly appreciated, thank you!