In this guide you will be able to provision a Spanner instance.
1. Login in to the Google Cloud Platform console. If you don’t have any account yet, follow the steps here on how to create a Google Cloud Platform account.
From our partners:
Create the Spanner Instance
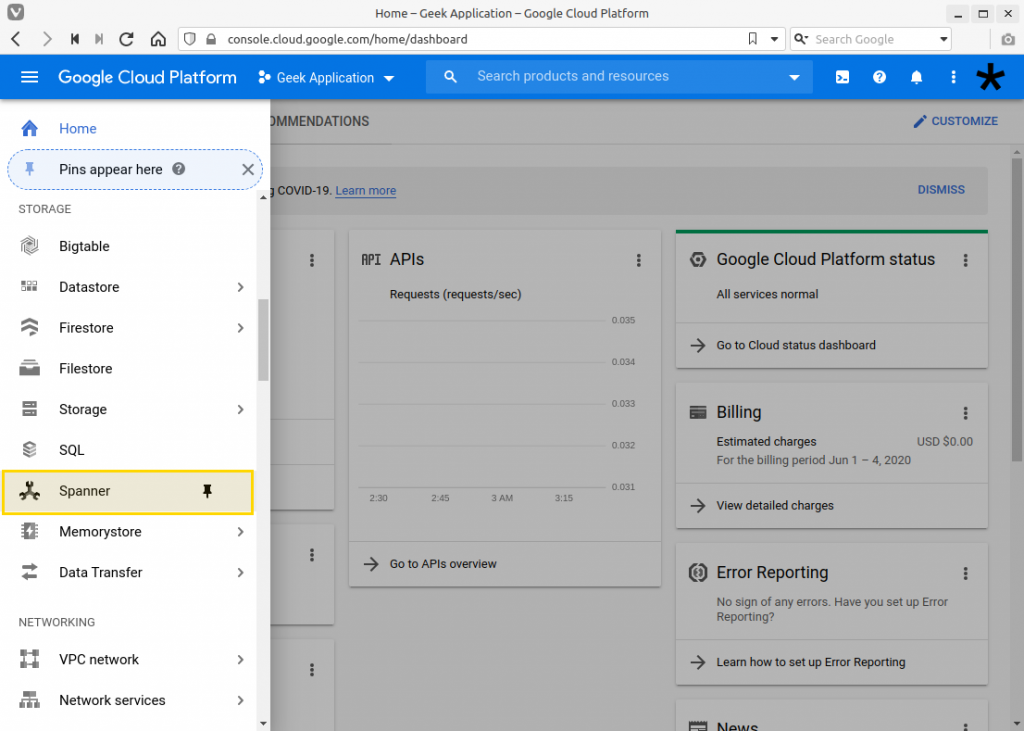
2. Once authenticated, you will be shown the Dashboard. Click on the hamburger icon on the top-left to open the navigation menu. Select Spanner under the Storage section.
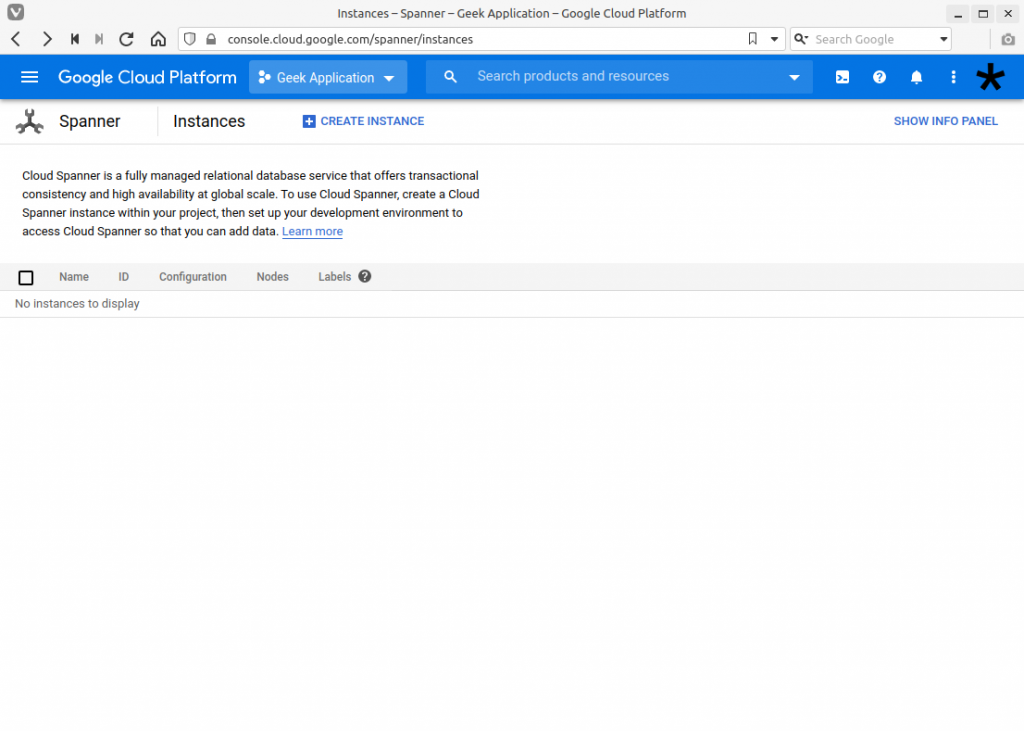
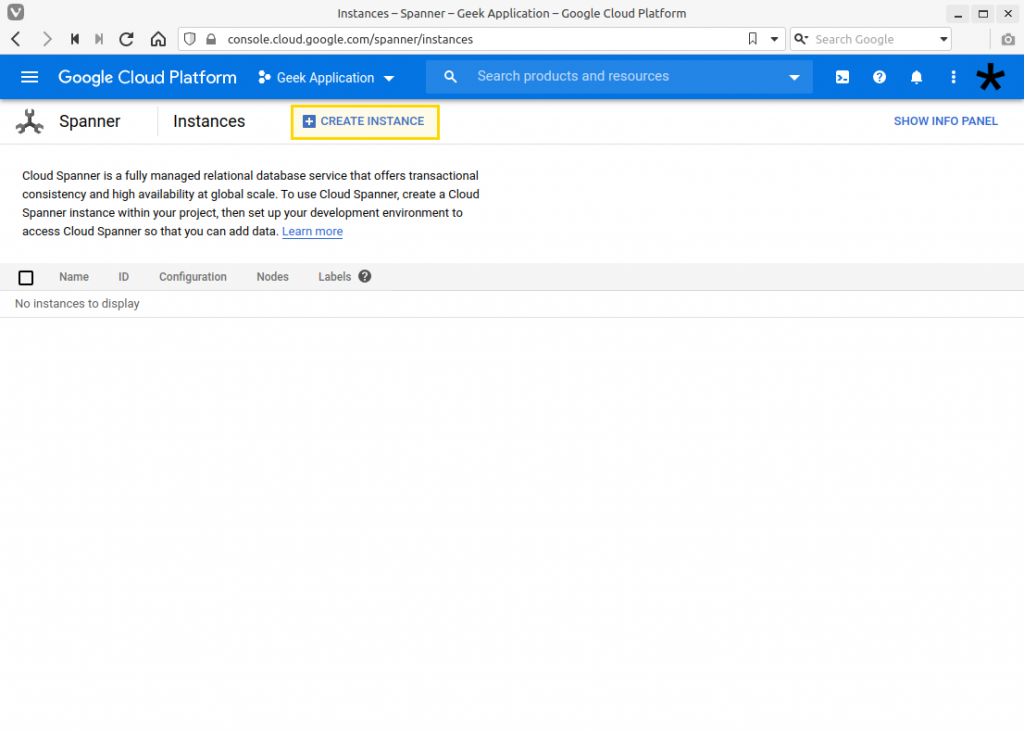
3. You will be taken to the Spanner instances page. In the following image there are no instances created yet.
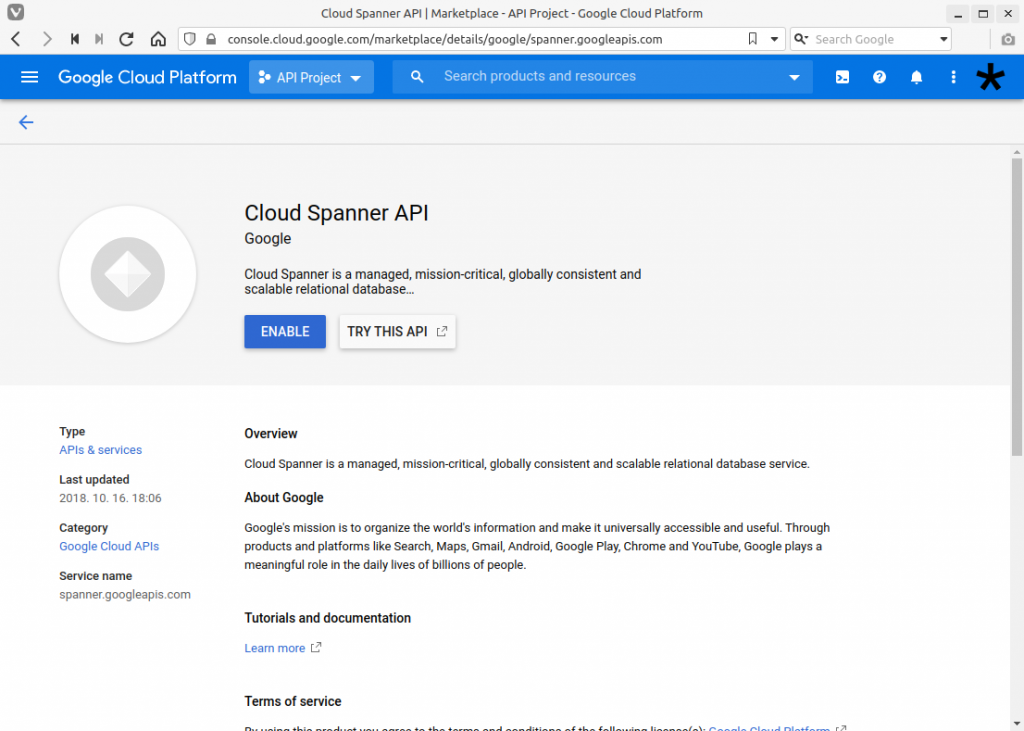
If this is your first time accessing Spanner, you will need to enable the API and the following will be shown. Click on the “Enable” button to enable it and be able to manage Spanner instances.
4. Select on the “Create Instance”
5. A form where you enter the details of the instance will be shown.
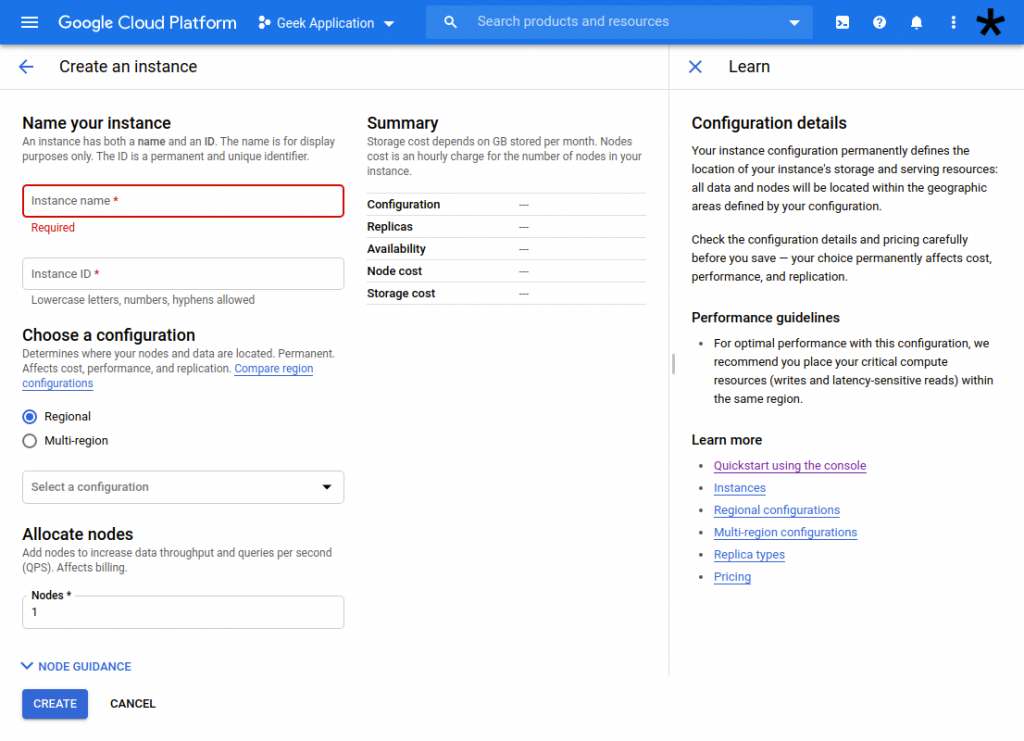
| Name your instance | |
| Instance name | The name of your spanner instance. This is for display purpose and can still be updated later. |
| Instance ID | By default, after selecting an instance name, the Instance ID will be created based on the name. But can still be changed. This must be unique across the project.
Cannot be changed after creation. |
| Choose a configuration | |
| Configuration type |
Cannot be changed after creation. |
| Location | Depending on the type, the values will change. Multi-regional has 2 or more locations. |
| Allocate node | |
| Nodes | The number of nodes to assign to this instance. Note that this can still be updated later. |
A summary will also be shown on the right side. This contains Replicas that will be created automatically by GCP, percent of availability or SLA, node cost and storage cost.
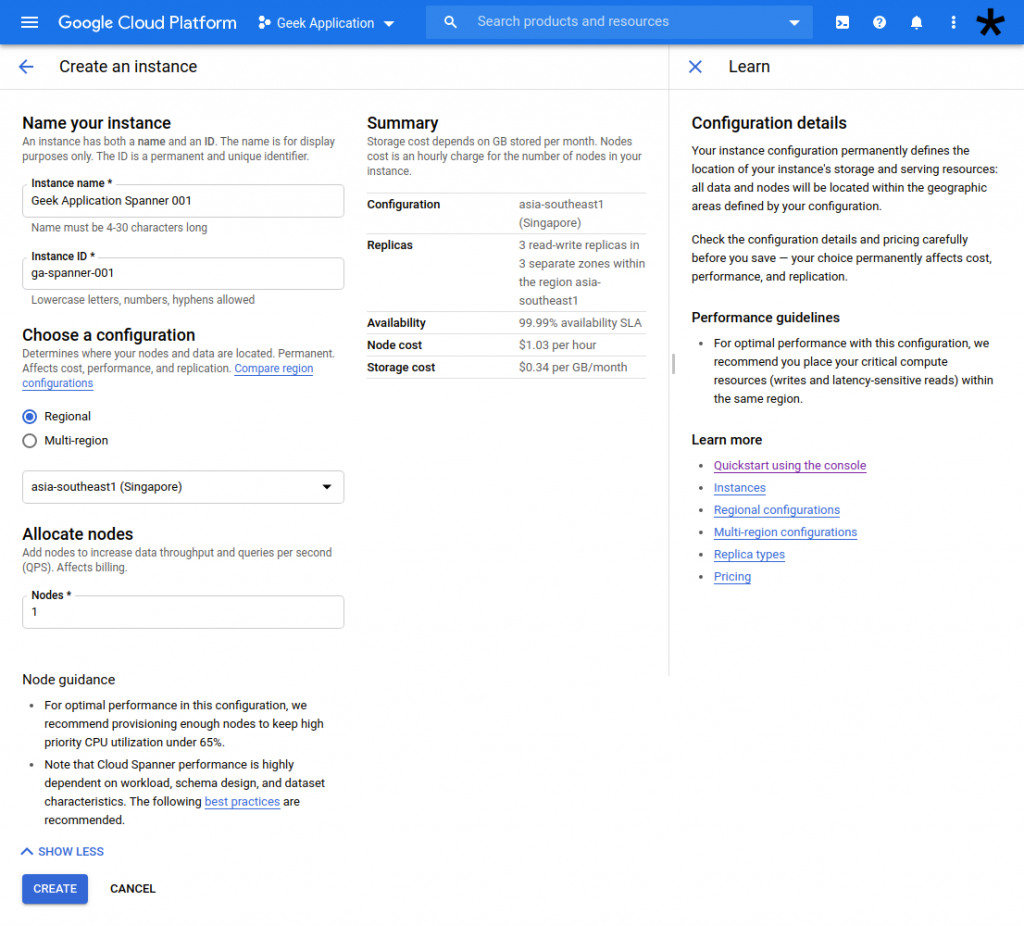
6. Select the “Create” button once you have reviewed the setting. The following image shows the setting we are using in this guide.
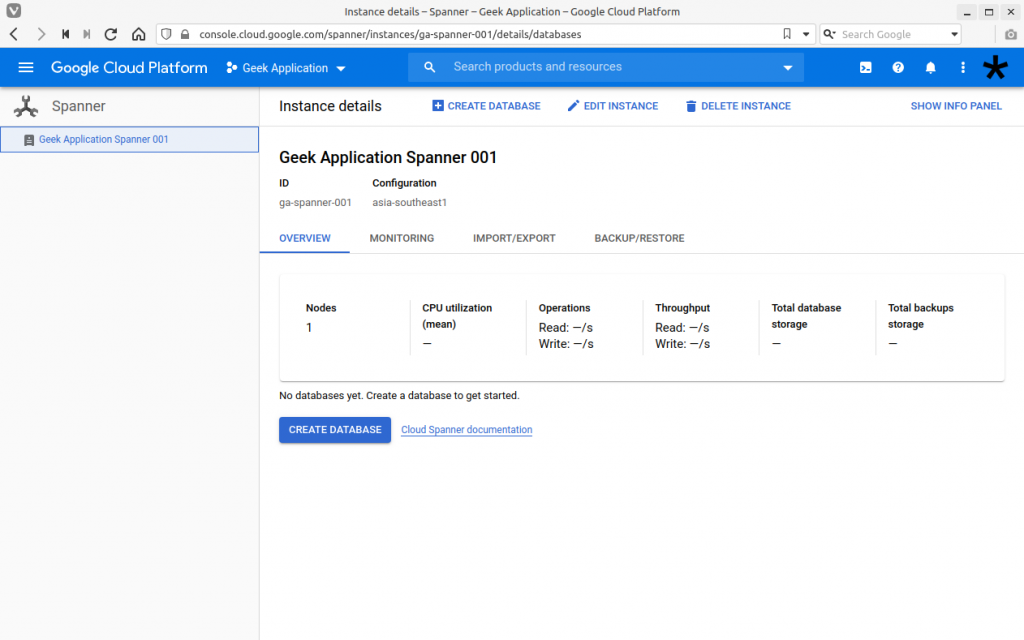
7. Instance creation is fast and the details will be shown.
Create a Database
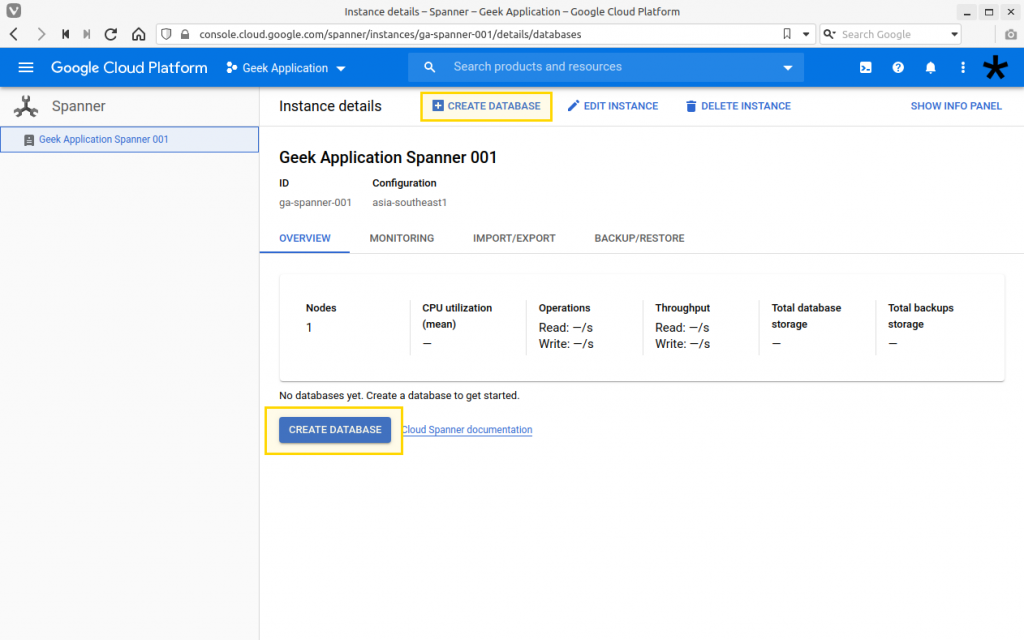
8. Next, we create the database. Click on the “Create Database” on the top section or on the bottom.
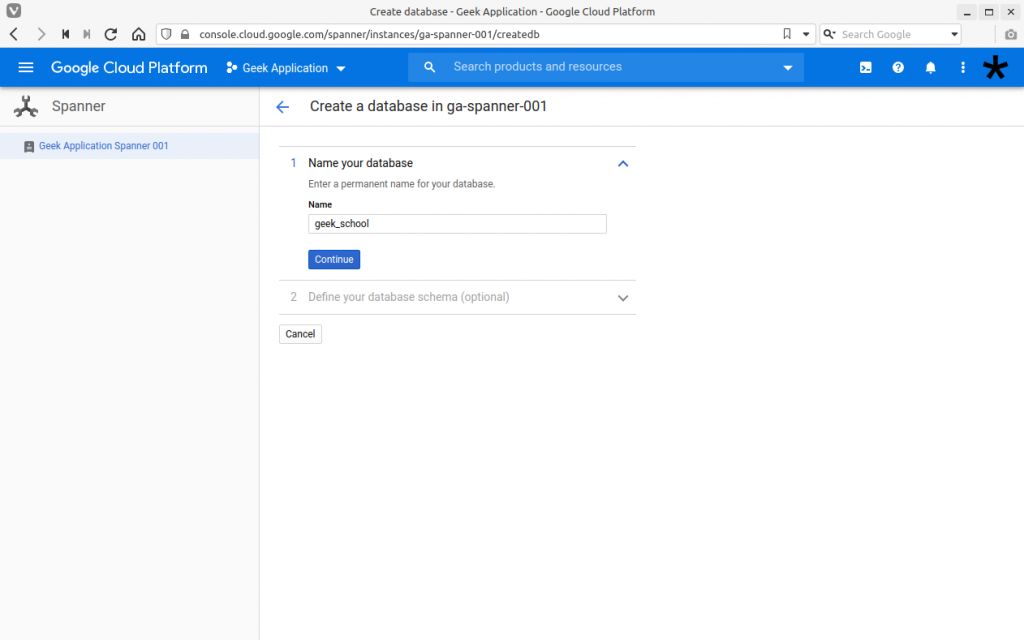
9. We will be creating a school-themed database. Starting with the school name as the database. Naming the database and school as “geek_school”. Then select the “Continue” button.
Allowed characters for the database name are
- Only lower case letters
- Numbers
- Hyphens
- Underscores
10. There are 2 options for creating the database tables. Using DDL (SQL Script) or by disabling the “Edit as text” radio button. Select the “Edit as text” and enter the following script.
| CREATE TABLE classes (
id INT64, name INT64, ) PRIMARY KEY (id); CREATE TABLE students ( id INT64, name STRING(MAX), ) PRIMARY KEY (id); CREATE TABLE class_students ( class_id INT64 NOT NULL, student_id INT64 NOT NULL, ) PRIMARY KEY (class_id, student_id); |
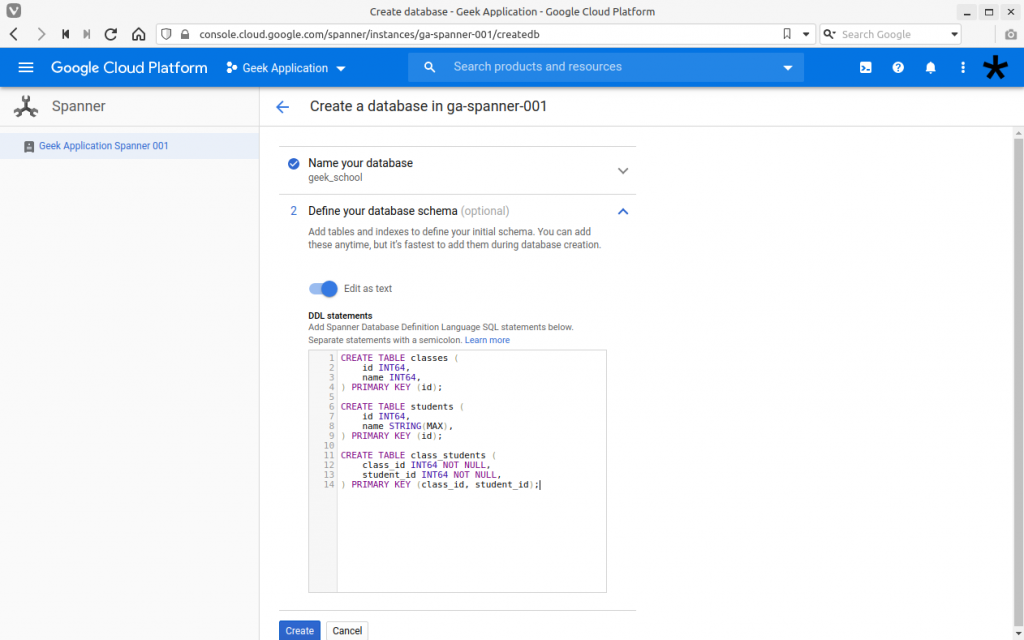
11. Review the DDL or Data Definition Language which describes the structure of the database and its tables. Then select the “Create” button.
12. The Spanner instance now has a database and tables created.
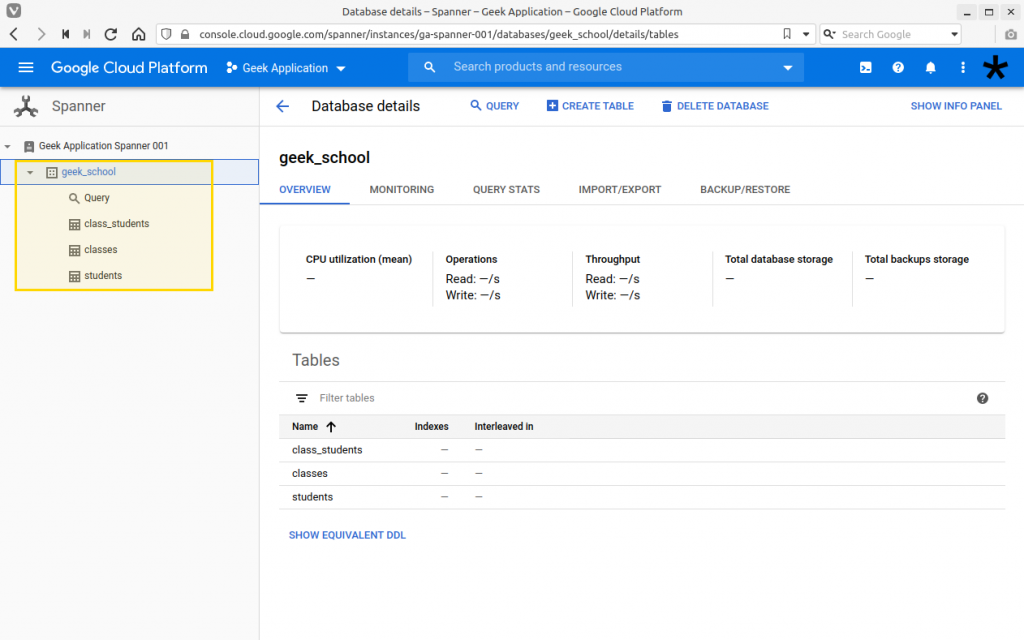
13. You have now created the following resources
- Spanner instance
- Database
- Table
To view the details of a spanner instance go to Cloud Storages – GCP – Spanner – Read/View and Query next.
For enquiries, product placements, sponsorships, and collaborations, connect with us at [email protected]. We'd love to hear from you!
Our humans need coffee too! Your support is highly appreciated, thank you!

